
Grouped Products in Magento 2 is a valuable feature that you should now.
Since the grouped product is a combination of separate simple products the options you have to fill out are the same as in the simple product creation. However there some distinctive fields.
Explore our tips to create grouped products in Magento 2 default NOW!
What Is Grouped Products In Magento 2?
Table of Contents
A grouped product is a collection of simple standalone products that are displayed together. You can provide multiple versions of a single product or categorize them according to season or theme. Customers may be enticed to buy more products if you present them with a bundled product. A grouped product is a simple approach to offer multiple variations of a product on the same page.
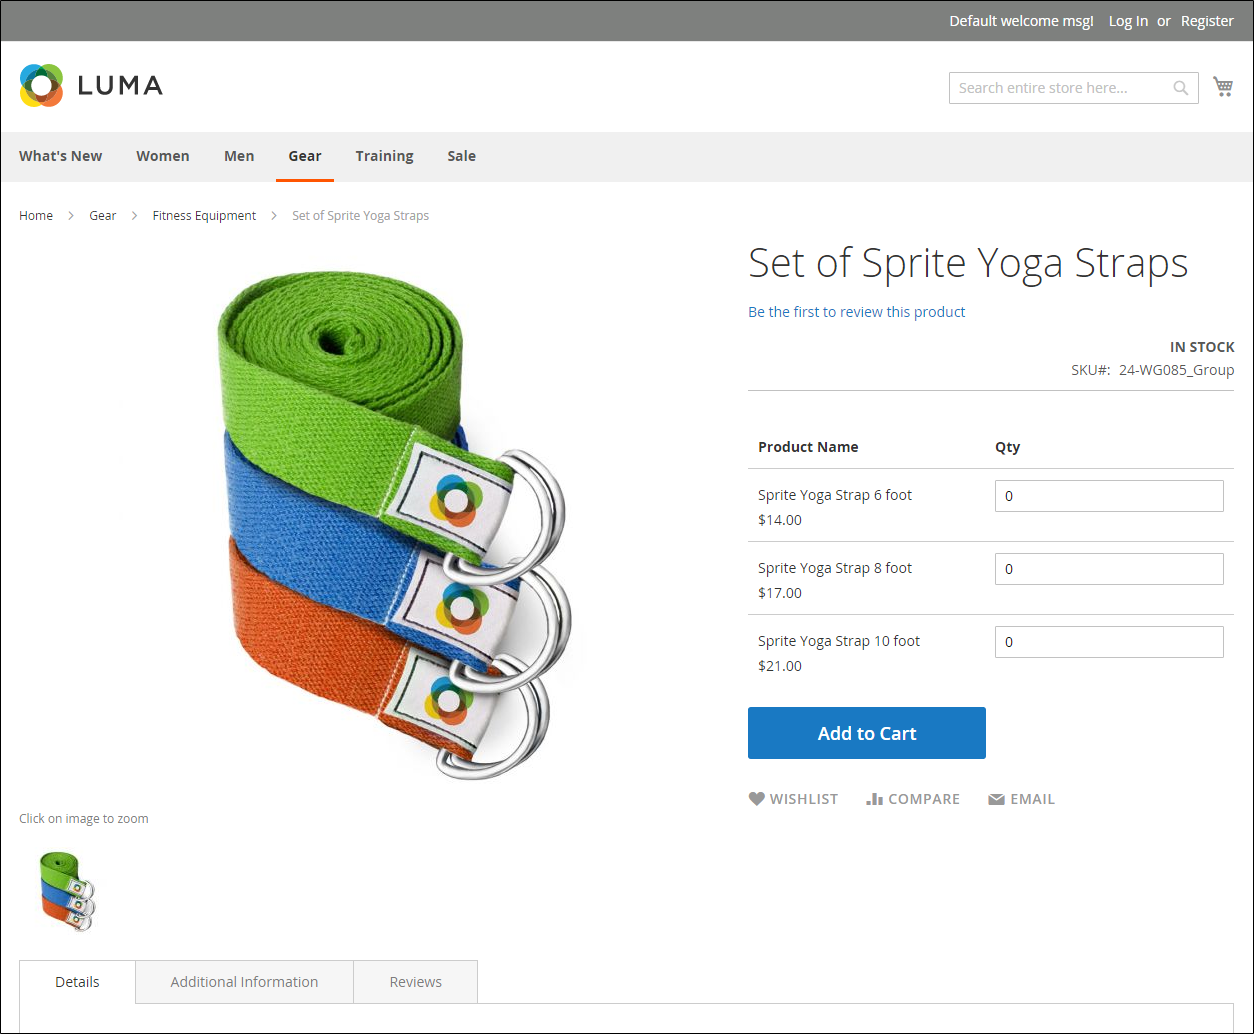
You might, for example, sell open stock flatware and specify each type of utensil used in a formal place setting. Salad forks, fish forks, dinner forks, dinner knives, fish knives, butter knives, soup spoons, and dessert spoons may all be ordered. Other clients may simply want a fork, knife, and spoon. Customers have the option of ordering as many of each item as they choose.
READ NOW >>> Custom Product Labels For Magento 2 Tips To Steal NOW! to know more.
How To Create Grouped Products In Magento 2 Default
Despite the fact that they are presented as a group, each product in the group must be purchased separately. Each item, as well as the quantity purchased, displayed as a single line item in the shopping cart.
The steps below show how to create a grouped product with the use of a product template, needed fields, and basic settings. A red asterisk appears next to each necessary field. When you’ve finished with the basics, you can go on to the advanced settings and other options.
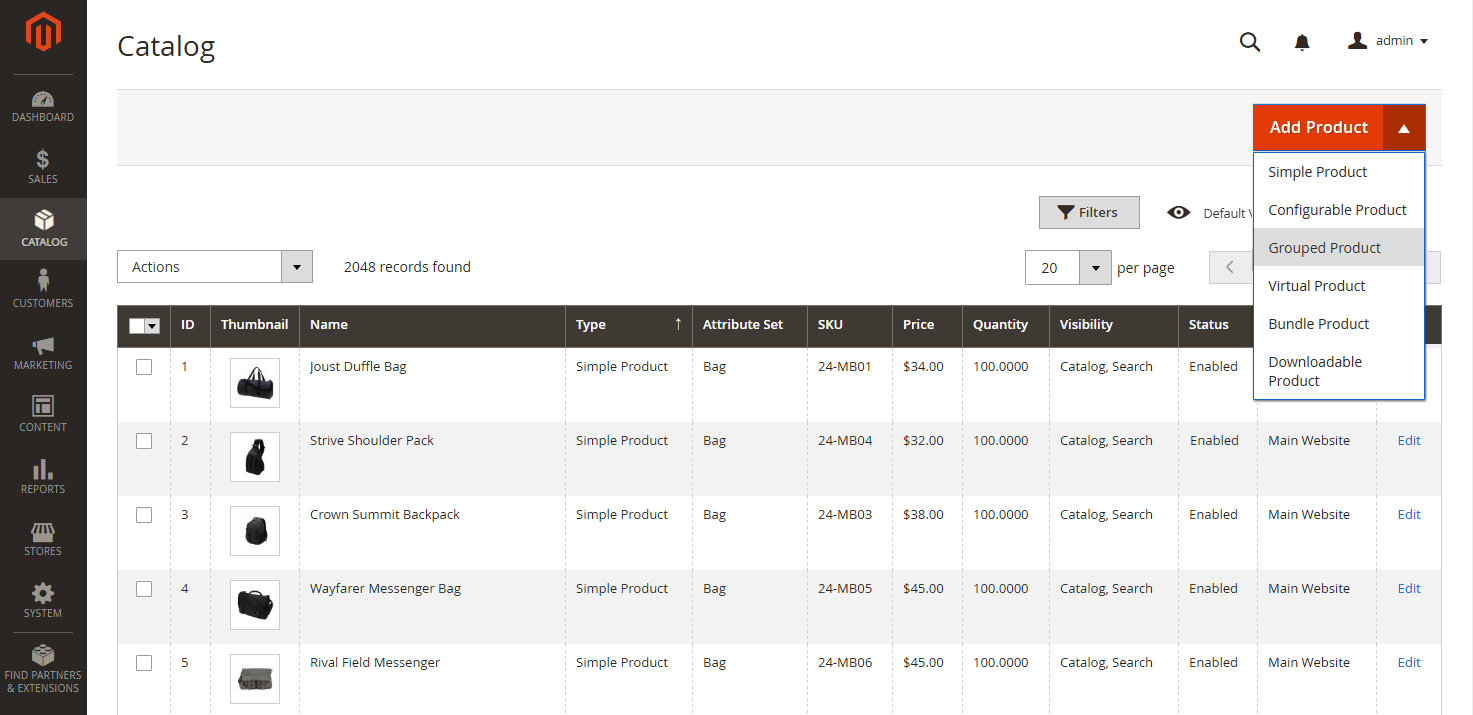
Step 1: Choose the product type
- On the Admin sidebar, go to Catalog > Products.
- On the Add Product menu at the upper-right corner, choose Grouped Product
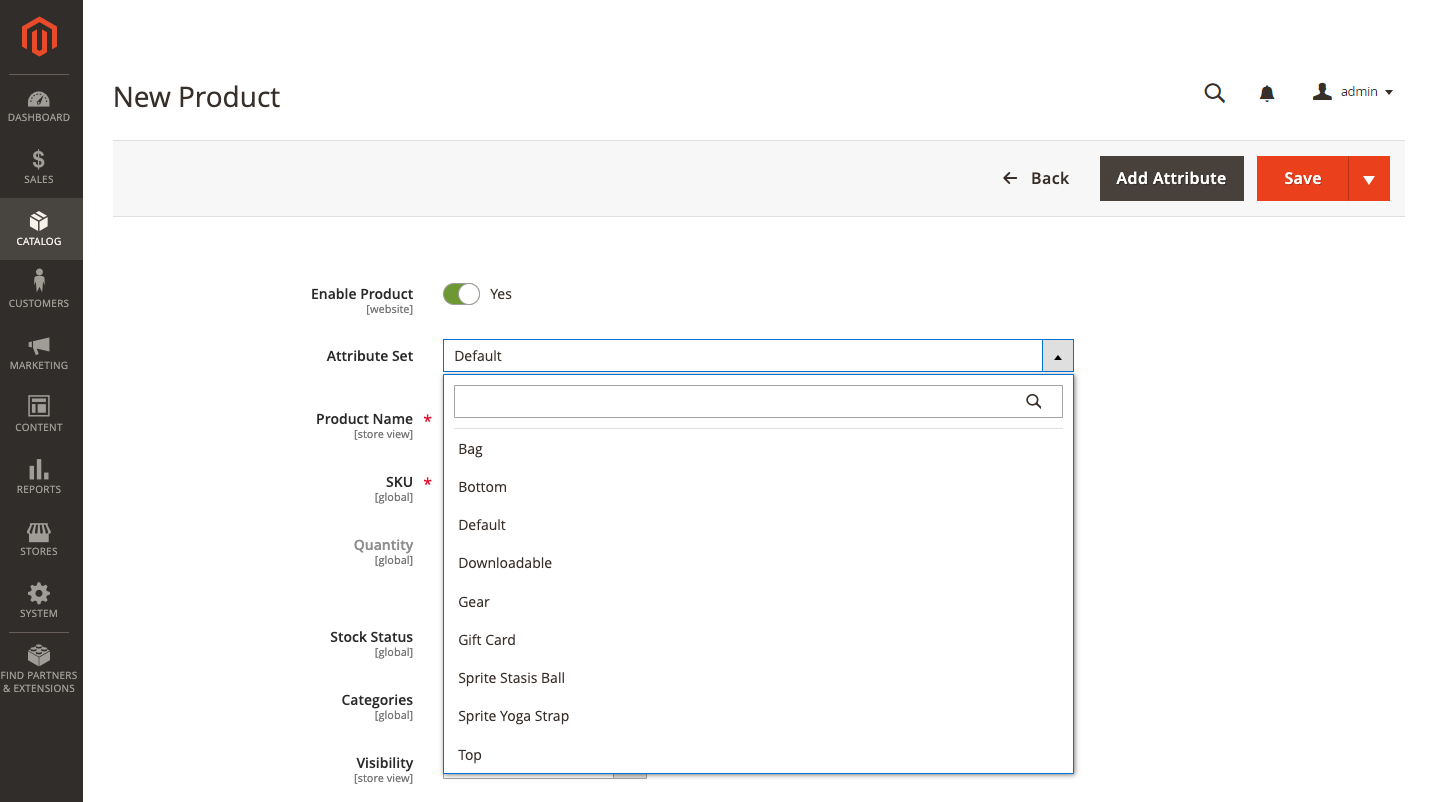
Step 2: Choose the attribute set
To choose the attribute set that is used as a template for the product, do one of the following:
- To search, enter the name of the Attribute Set.
- In the list, choose the Attribute Set that you want to use.
The form is updated to reflect the change.
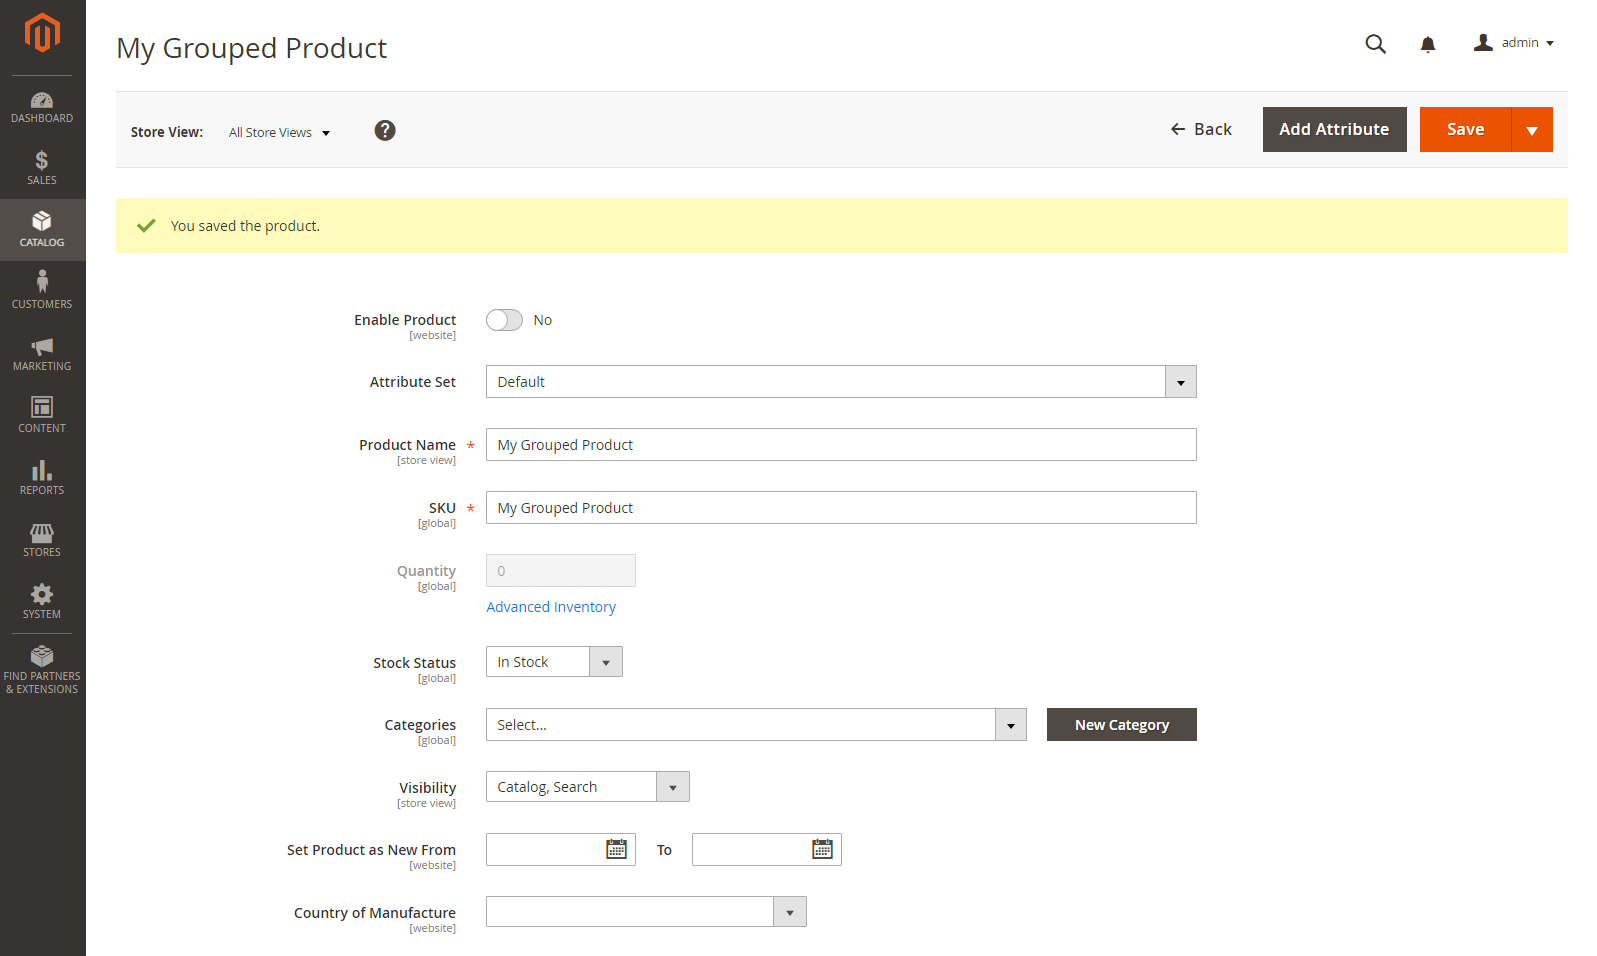
Step 3: Complete the required settings
- Enter the Product Name.
- Accept the default SKU that is based on the product name or enter another.
Take note that the Quantity field is not available because the value is derived from the individual products that make up the group.
- Because the product is not yet ready to publish, set Enable Product to No.
- Click Save and continue.
When the product is saved, the product name appears at the top of the page, and the Store View chooser appears in the upper-left corner.
- Choose the Store View where the product is to be available.
Step 4: Complete the basic settings
- Accept the Stock Status setting of In Stock.
- To assign Categories to the product, click the Select… box and do either of the following:
Choose an existing category:
- Start typing in the box to find a match.
- Select the checkbox of the category that is to be assigned.
Create a new category:
- Click New Category.
- Enter the Category Name and choose the Parent Category to determine its position in the menu structure.
- Click Create Category.
- Accept the Visibility settings of Catalog, Search.
- To feature the product in the list of new products, choose the Set Product as New From and To dates on the calendar.
- Choose the Country of Manufacture.
There might be additional individual attributes that describe the product. The selection varies attribute set, and you can complete them later.
Step 5: Add products to the group
- Scroll down to the Grouped Products section and click Add Products to Group.
- If necessary, use the filters to find the products that you want to include in the group.
- In the list, select the checkbox of each item that you want to include in the group.
- Click Add Selected Products to add them to the group.
- Enter a Default Quantity for any of the items.
- To change the order of the products, grab the Change Order icon in the first column and drag the product to the new position in the list.
- To remove a product from the group, click Remove.
Step 6: Publish the product
- If you are ready to publish the product in the catalog, set Enable Product to Yes.
- Do one of the following:
Method 1:: Save and Preview
In the upper-right corner, click Save.
To view the product in your store, choose Customer View on the Admin menu.
The store opens in a new browser tab.

Method 2: Save and Close
On the Save menu, choose Save & Close.
Step 7: Configure the cart thumbnails (optional)
If you have a different image for each product in the group, you can set the configuration to use the correct image for the shopping cart thumbnail.
On the Admin sidebar, go to Stores > Settings > Configuration.
In the left panel, expand Sales and choose Checkout.
Expand the Shopping Cart.
Set Grouped Product Image to Product Thumbnail Itself.
If necessary, deselect the Use system value checkbox to set this option.
Click Save Config.
READ NOW >>> Magento 2 Layered Navigation Extension Is Not Work Effectively? Cause And Solution To Fix Them Now for more information.
Conclusion
It is all about how to create Grouped Products in Magento 2 default. Remember that:
- A grouped product is essentially a bunch of simple related products.
- Simple, downloadable, or virtual products with no unique settings can be used to group children.
- Rather than appearing as part of a group, each item purchased appears separately in the shopping cart.
- The image from the grouped parent product or connected product can be displayed as the thumbnail image in the shopping cart.
You can also CHECK >>> Compare Magento 2 Layered Navigation Extensions Free & Paid.
BSS Commerce is one of the leading Magento extension providers and web development services in the world. With experienced and certified Magento developers, we commit to bringing high-quality products and services to optimize your business effectively. Furthermore, we offer FREE Installation – FREE 1-year Support and FREE Lifetime Update for every Magento extension.
CONTACT NOW to let us know your problems. We are willing to support you every time.