
You have just started your new business with Magento 2 recently, but you are absolutely a new beginner in this platform. Perhaps you hire a developer team to help you set up and customize your website as you want, but actually, it is extremely costly for a small and medium business.
Even you own a big enterprise and afford a separated information technology team, it’s totally necessary to learn more about Magento.
Hence, we create such a tutorial series to aim at providing you with a lot of Magento knowledge under a logic flow so that you can operate and manage your website most effectively. Let’s start with us now!
Discover how to navigate inside Magento 2 admin using the left sidebar
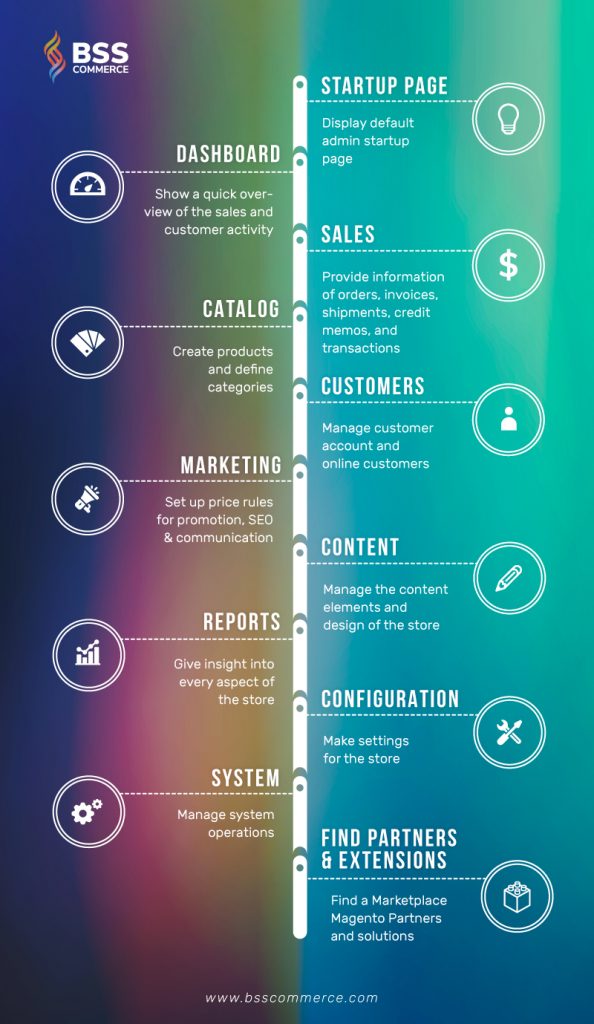
Different from Magento 1, Magento 2 uses a flyout menu to help administrators to easily access to all tools for managing stores effectively. Let’s explore this following infographic to see what you can do in each menu section:
Set up Admin Dashboard
Get started with Magento 2 Admin Dashboard – one of the most significant pages on your backend where you can find out lifetime sales, average order amount, the last five orders, and search terms along with charts for more visuality.
Through these figures and charts, you can have the most general overview of how your store is performing, what customers are interacting with your products and services, and so on. It is also possible to configure these starting dates and data sources used in this dashboard report.
Enable Charts: go to Store ⇒ Configuration ⇒ Advanced ⇒ Admin ⇒ Dashboard and find the Enable chart field to set Yes/No.
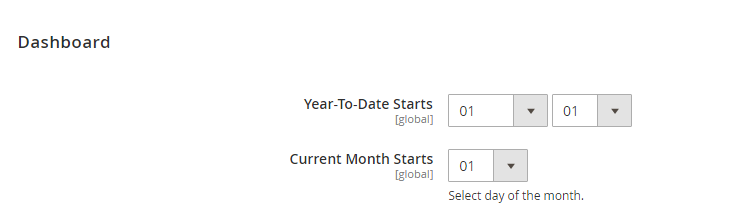
Set the Beginning Date: go to Store ⇒ Configuration ⇒ General ⇒ Reports ⇒ Dashboard, then select a suitable time for Year-To-Date Starts and Current Month Starts.
Choose Data Source: go to Store ⇒ Configuration ⇒ Sales ⇒ Sales ⇒ Dashboard, then set Yes/No for Use Aggregated Data.
- Set Yes to choose real-time data (data is delivered right after it happens on your website.
- Set No to choose historical data (data of past events or circumstances is collected within your store).
What should be mentioned here is you could change your default admin dashboard page easily by navigating to Store ⇒ Configuration ⇒ Advanced ⇒ Admin Startup Page and select whichever page to display after login.
It can be Sales page, Customer page, or any page depending on your want.
Create an admin user
You are a store owner and an administrator as well, but there are still other staffs taking responsibility for your website. Hence, it is important for you to create admin users and user roles to allow them to manage stores at a limited level.
You navigate to System ⇒ Permission ⇒ All Users ⇒ Add New User.
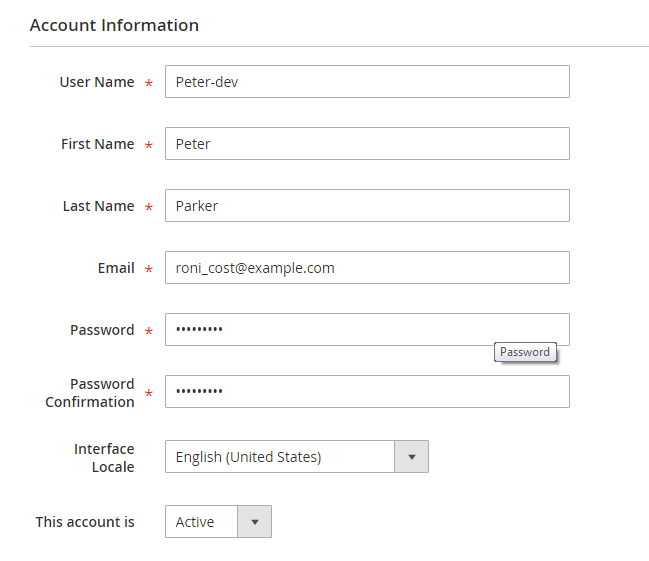
In User Info: you need to complete all of the information for the new user.
In User Role: This section gives you a list of roles that you need to assign for the user. These roles are created by the main administrator, each role has different access rights, depending on the work or responsibility of the admin user.
After selecting appropriate roles for the new user, click Save User.
In addition, you can create new users using command lines. Follow this guide for more details!
*Note: Before selecting roles for the admin user, you need to add new roles and assign suitable resources for this role. Go to System ⇒ Permission ⇒ User Roles and click Add a new role.
- Define the Role
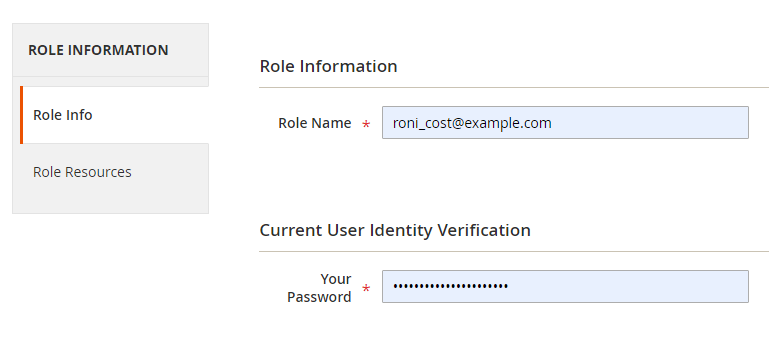
- Assign Resources
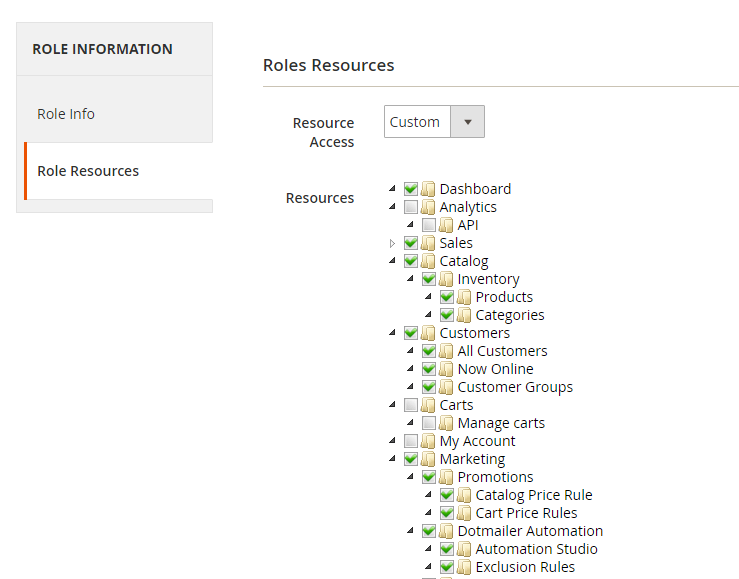
You mark the checkbox of each Admin Resource that the role can access. Not every admin user can access to all sections in the admin backend, they just need to come to some specific menu for tracking or making configuration. Others are restricted.
Then you click Save Role to complete a new role.
Set up Admin Security
You navigate to Store ⇒ Configuration ⇒ Advanced ⇒ Admin to start settings for store security.
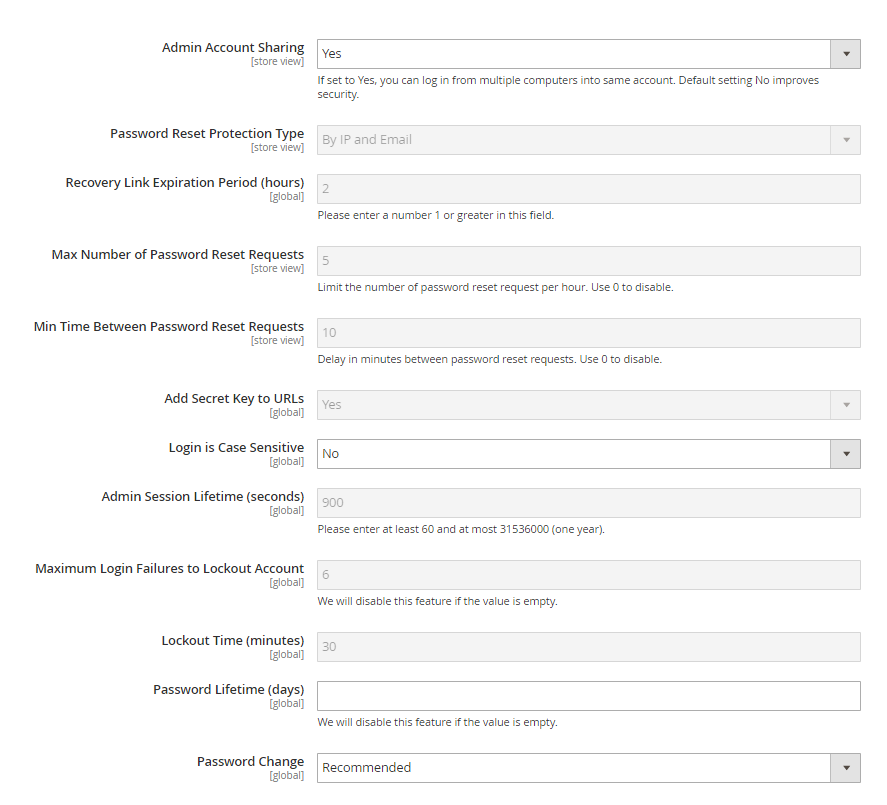
As can be seen from the image, most configs are easy to understand, right? However, we want to explain a few details in some specific fields for more obvious understandings:
Password Reset Protection Type: allows choosing the method to manage password requests:
- By IP and Email: The password can be reset online after you reply to the email sent to the email address associated with Admin account.
- By IP: The password can be reset online without confirmation.
- By Email: The password can be reset online after you reply to the email sent to the email address associated with Admin account.
- None: The password can be reset online by you or the store administrator.
Add Secret Key to URL:
- When you select Yes, a new secret key is generated every time you login to the admin. For example: http://demom2.bsscommerce.com/magento2-gift-cart/admin/admin/system_config/edit/section/admin/key/1600793a6354c09bd16b5b2650193b5765fcacce413abc991cde641f86720cf4/
Secret Key: 1600793a6354c09bd16b5b2650193b5765fcacce413abc991cde641f86720cf4.
Adding these keys to URLs is to make your admin more secure and can be prevented from exploits or Cross-site request forgery (CSRF) Attack.
- In case you want to exclude secret keys from URL, you just need to select No.
Here is a very general introduction of admin that we want to provide to help you make some of the most basic settings for your admin. In the next blog, we will make a tutorial of changing your Magento 2 admin base URL. Let’s keep updated with us for more info!