
This blog is a complete guide on how to set up Magento 2 layered navigation quickly and easily!
Magento 2 Layered Navigation is a feature that allows showing product filters so your customers can search their wanted products based on the price and any relevant product attributes.
Layered navigation is an important feature to build seamless in-store navigation. It helps your customers find products quickly and easily, thus improving the shopping experience in your store and boosting your sales.
In this article, we will walk you through a step-by-step guide on how to set up Magento 2 layered navigation and introduce you to a tool to optimize this feature on your website!
CHECK OUT everything you need to know about Magento 2 Layered Navigation HERE!
Table of Contents
Magento 2 Layered Navigation is a collection of one or more attributes (price range, color, brand, etc.) that acts as a filter that customers can use to narrow the search.
Usually, on Magento-based eCommerce websites, the layered navigation appears in the left column of the category pages and search results pages.
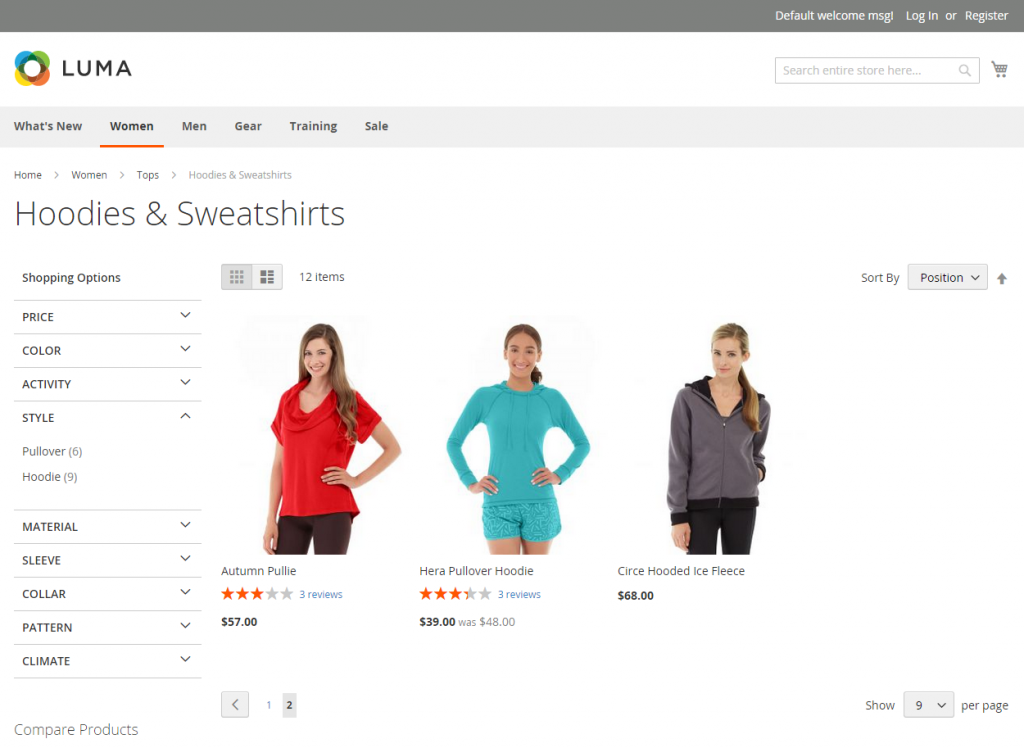
Layered Navigation in default Magento 2
Even though Magento provides a basic layered navigation feature, it’s still not ideal to use in your store.
The downsides of the default Magento layered navigation feature:
- Only support a single filter at a time
- Doesn’t allow admin to add custom attributes to the filter
- Doesn’t support rating filter – a standard product filter in any eCommerce store
- Doesn’t support the custom price range filter for price-minut-oriented business
- Can take a long time to load filter results
As you are aware, your main goal is to provide customers with the best shopping conditions. It should be simple and user-friendly, and fast, or they will leave your website in a heartbeat.
Clearly, the more advanced Magento 2 product filter is, the better it results in customer satisfaction. And the quicker customers find their preferred items, the more likely they drive into the purchase decision.
That’s why we advise you to use Magento 2 AJAX Layered Navigation extensions to enhance customer experience and boost sales.
READ MORE about Magento 2 Layered Navigation Extension to see all the benefits this module can bring to your store!
Here are two simple steps to set up Magento 2 layered navigation to use price navigation in layered navigation.
Step 1: Log in as admin to the backend of your Magento 2 store.
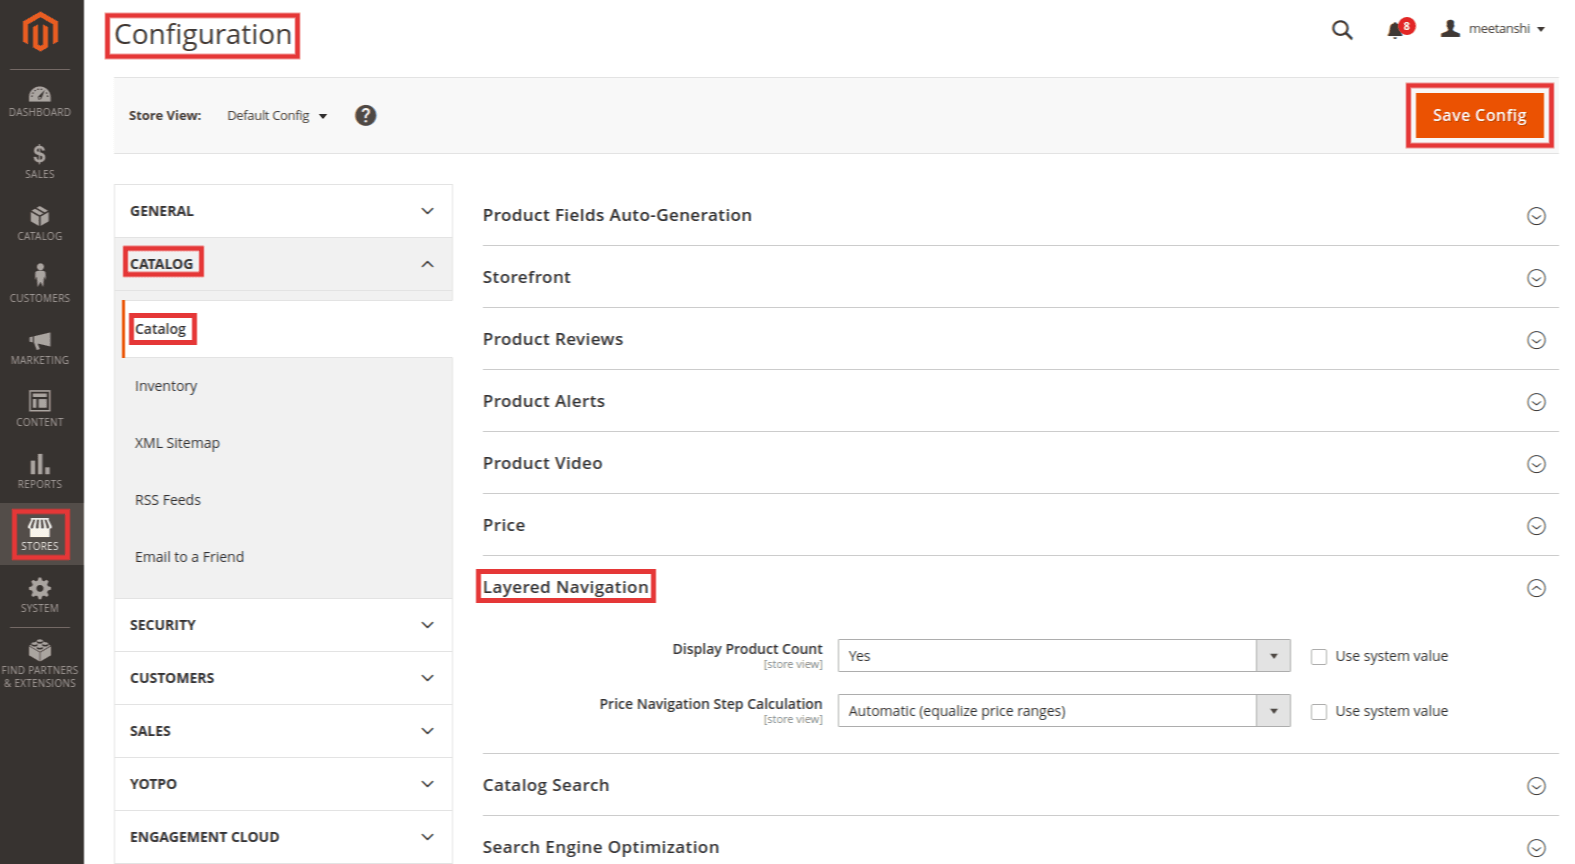
From the Admin sidebar, navigate to Stores > Configuration > Catalog > Catalog.
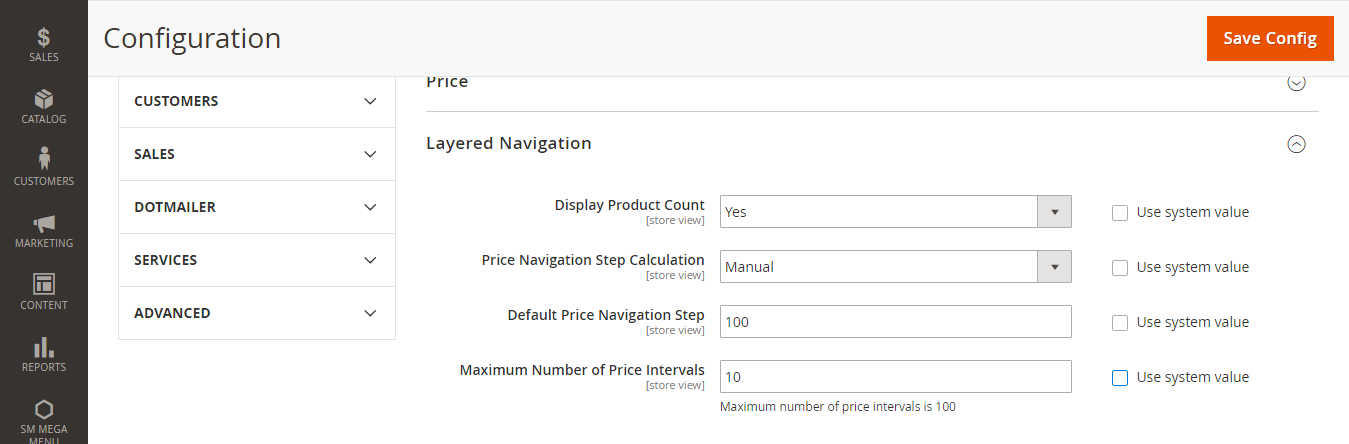
Scroll down to the Layered Navigation section and expand it.
- First, set Display Product Count to Yes.
- Then set up the Price Navigation Step Calculation.
If you haven’t known this yet, then the Price navigation is used to distribute products by price range in layered navigation. You can also split each range into intervals.
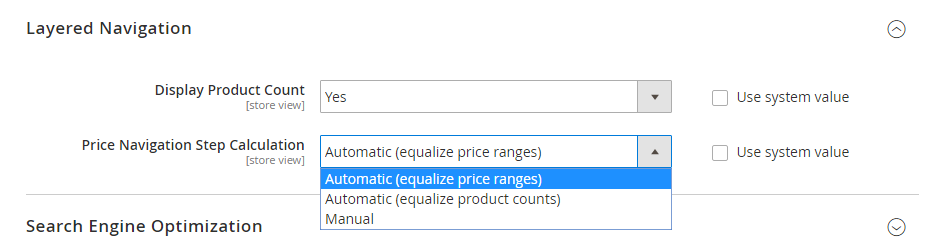
There are three methods available in default Magento to calculate price navigation.
Method 1: Automatic (equalize price ranges)
This setting uses the standard algorithm for price navigation.
Method 2: Automatic (equalize product counts)
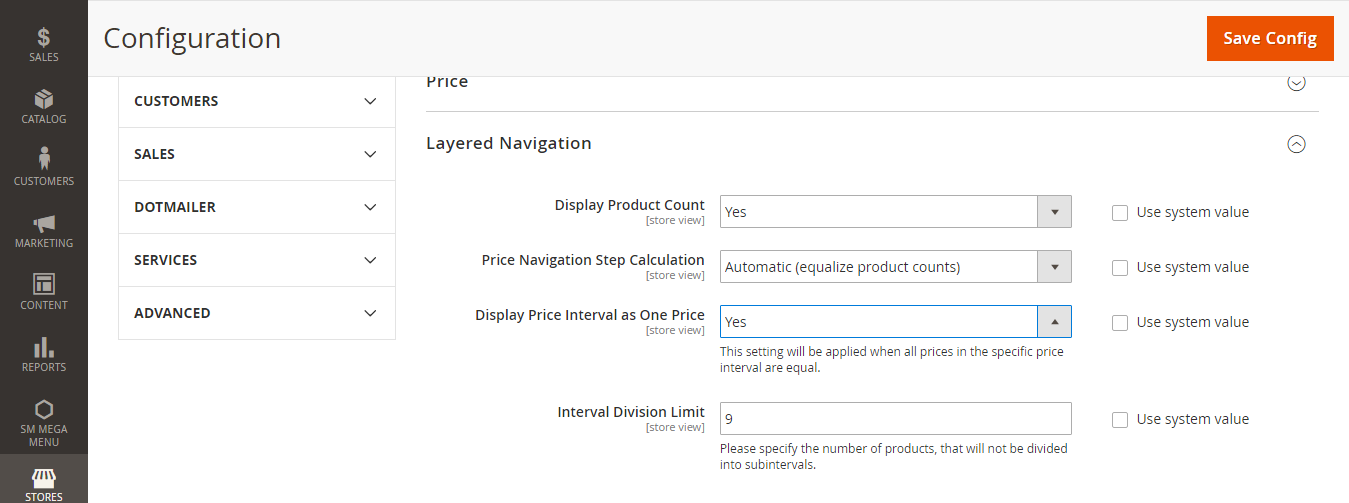
After choosing this method, follow the next 2 steps to complete the setting:
- Set the Display Price Interval as One Price to Yes to display a single price when multiple products with the same price.
- Enter the thresholds for a number of products within a price range into the Division Limit.
Note that the default value is 9, and you cannot set the range beyond this limit.
Method 3: Manual setting
Unlike the two previous methods, which set the navigation steps to be calculated automatically, the manual method allows you to specify a division limit for price intervals.
Follow the following 2 steps to complete the setting:
- Enter the value to Default Price Navigation Step.
- Enter the limit for the Maximum Number of Price Intervals allowed, up to 100.
Iterative splitting provides the best distribution of products among price ranges.
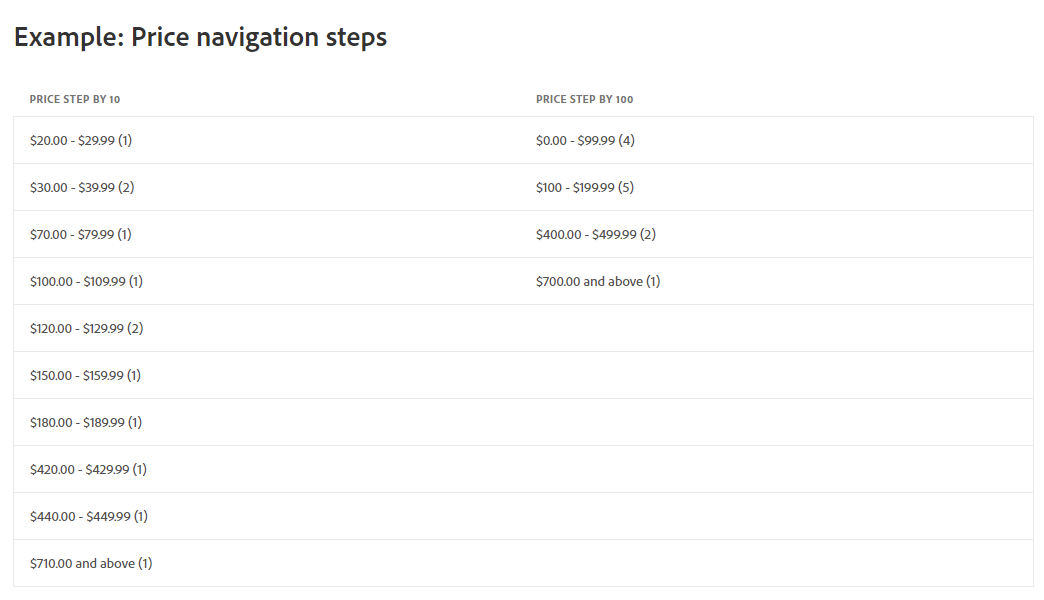
To help you understand more about this Price Navigation Step setting, check out the below example to see the difference between price navigation steps of 10 and 100.
Click Save Config. to finish the process to set up Magento 2 layered navigation with Price Navigation.
Besides price navigation, you can also enable the possibility to search by category or attribute.
To set up Magento 2 layered navigation With Filterable Attributes, follow these 3 steps.
Step 1: Log in as admin to the backend of your Magento 2 store.
Step 2: Set up the attribute properties.

In the Admin Panel, you navigate to Store > Attributes > Product.
Then open the attribute in Edit mode.
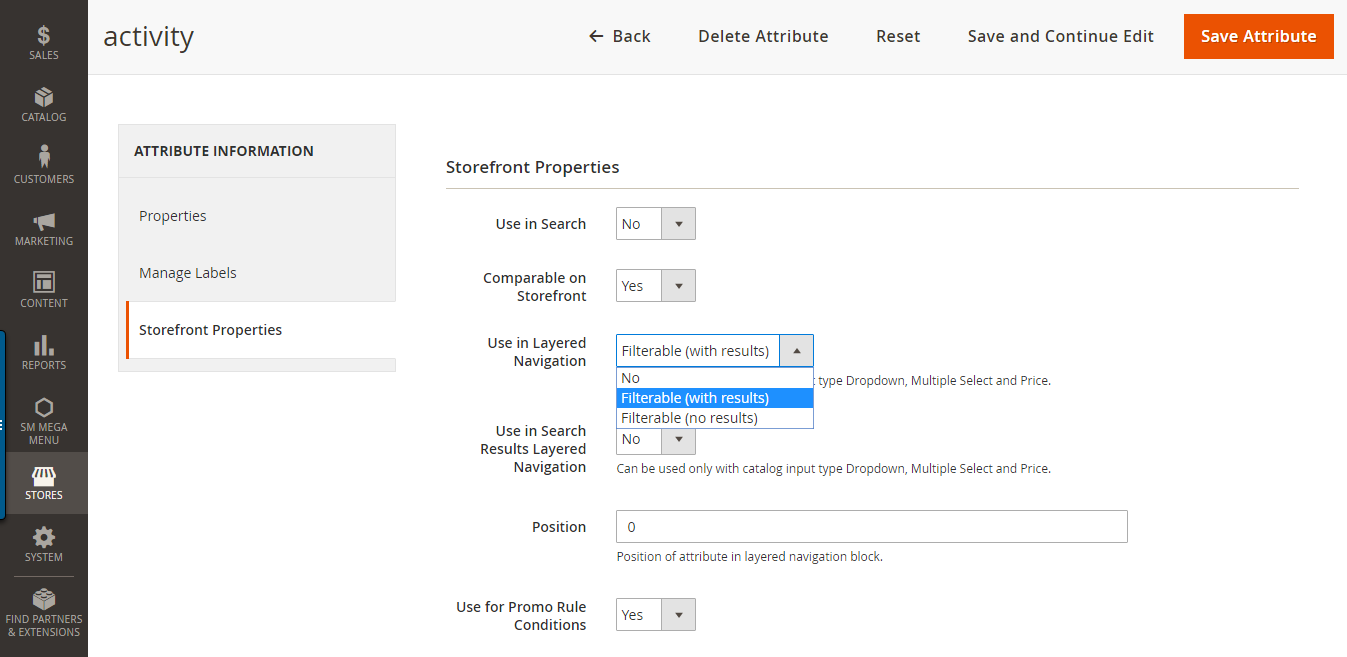
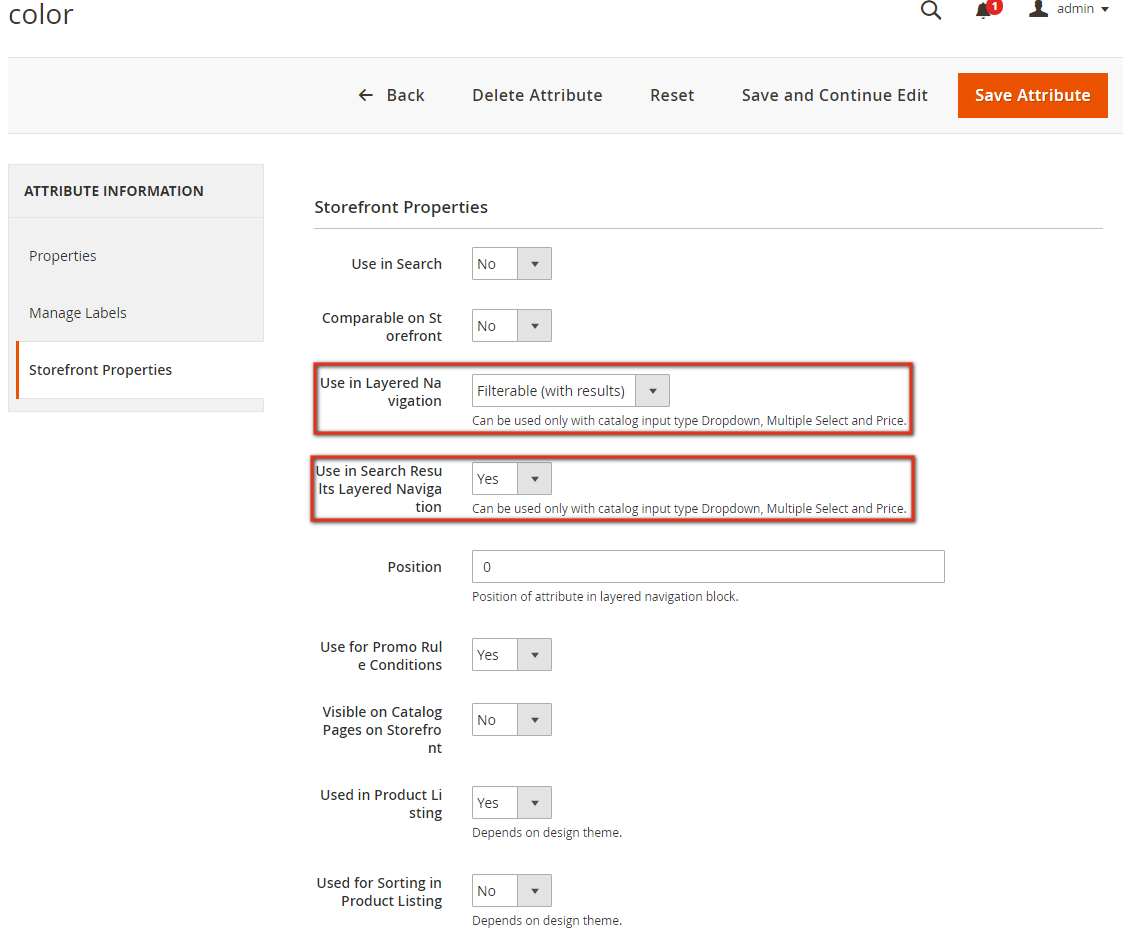
Select Frontend Properties and explore.
For each attribute to include in layered navigation, enable the following settings:
- Change Use In Layered Navigation to Filterable (with results) or Filterable (no results).
Filterable (with results): The layered navigation only shows the attribute values that apply to the products. If no products match a filter value, that filter will be hidden.
Filterable (no results): Lists all attribute values, even those with no products associated with it. Layered navigation only appears on a category page if there are filterable attributes available.
- Select Yes for Use In Search Results Layered Navigation.
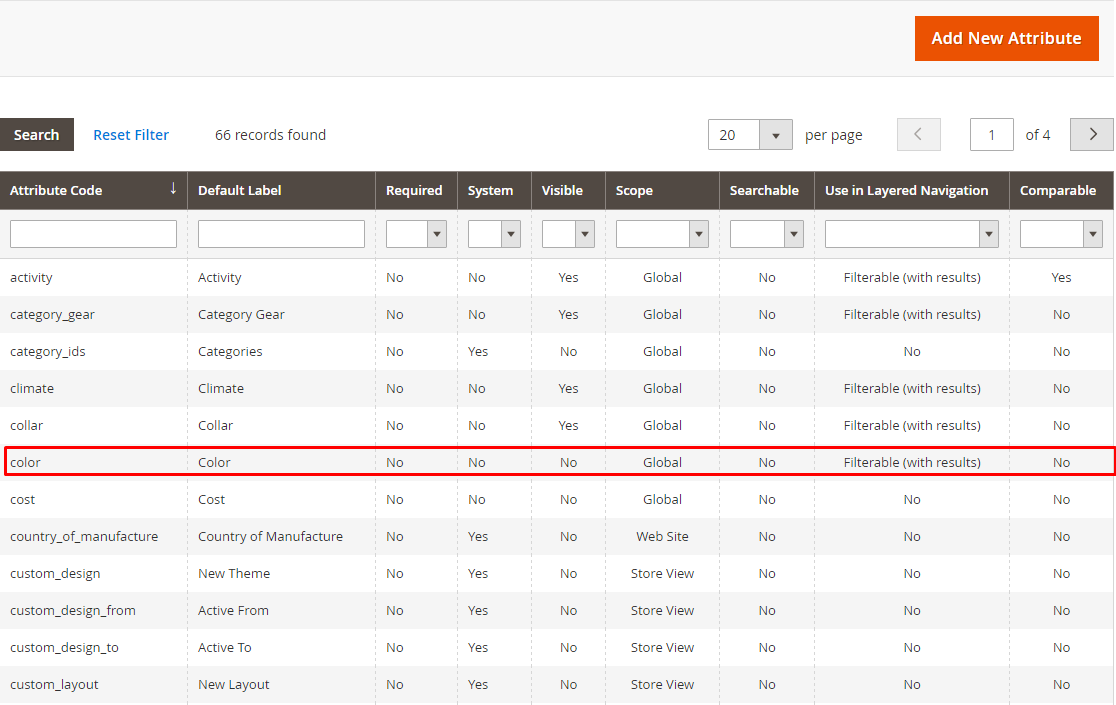
For example, to set up the Color attribute included in the layered navigation.
Repeat those 2 steps above for each attribute you want to include in layered navigation.
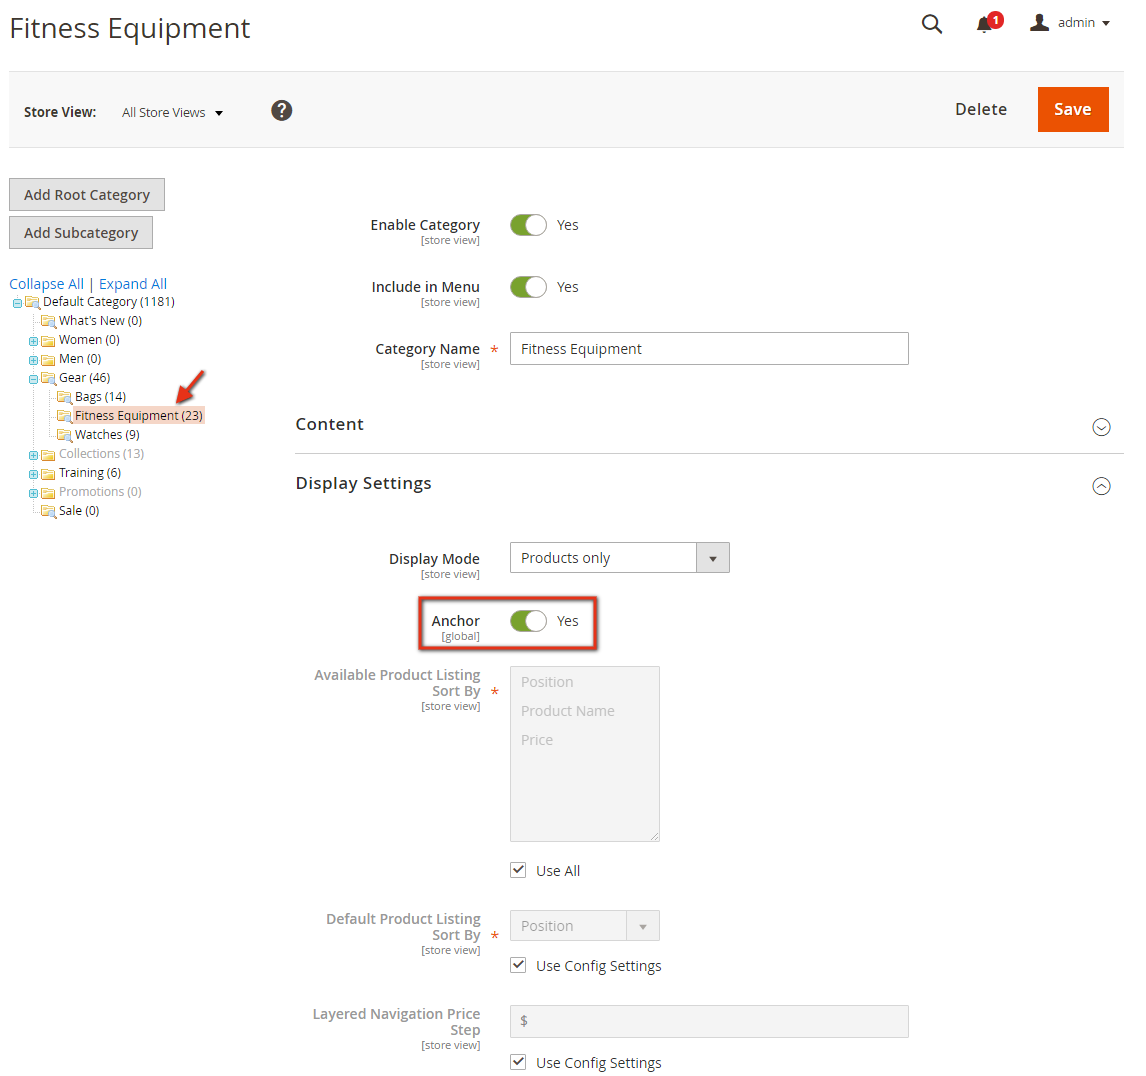
Step 3: Make the category an anchor.
For every category to use layered navigation, you have to edit the display settings of the category to enable Anchor setting as follows:
From the Admin sidebar, navigate to Catalog > Products > Categories.
- Select the Categories you want to use Layered Navigation in.
- Change to the Display Settings tab.
- Select Yes for Is Anchor section.
- Click Save Category to continue.
When you are done, refresh the cache (Admin Panel > System > (Tools) Cache Management). Then go to the store page and choose the category in the top navigation to check whether the filterable attributes appear.
And that’s the complete guide to set up Magento 2 layered navigation with filterable attributes.
Conclusion
We have shown you the complete guide to set up Magento 2 Layered Navigation.
We hope this article is helpful and good luck to you!
BSS Commerce is one of the leading Magento extension providers and web development services globally. With experienced and certified Magento developers, we commit to bringing high-quality products and services to optimize your business effectively. Furthermore, we offer FREE Installation – FREE 1-year Support and FREE Lifetime Update for every Magento extension.
CONTACT NOW to let us know your problems. We are willing to support you every time.