Theme is a dispensable element of a website. A theme that is appropriate with products and services will drive more customer attention and encourage them to explore your website. Today, I will give you a general overview of Magento 2 Themes and how to install Magento 2 themes so that developers and merchants can understand and install quickly.
Overview of Magento 2 Themes
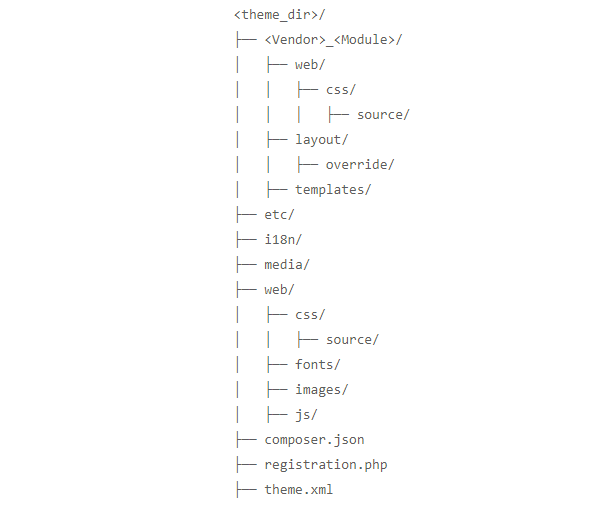
As you know, Magento 2 theme provides interfaces for both backend and frontend by combining templates, layouts, styles or images. Themes are put in the app/design/frontend/<Vendor>/ folder of Magento 2.
A theme includes the following elements:
It’s quite easy to configure Magento 2 themes step-by-step in the backend:
Step 1: Navigate to Admin ⇒ Content ⇒ Design ⇒ Configuration.
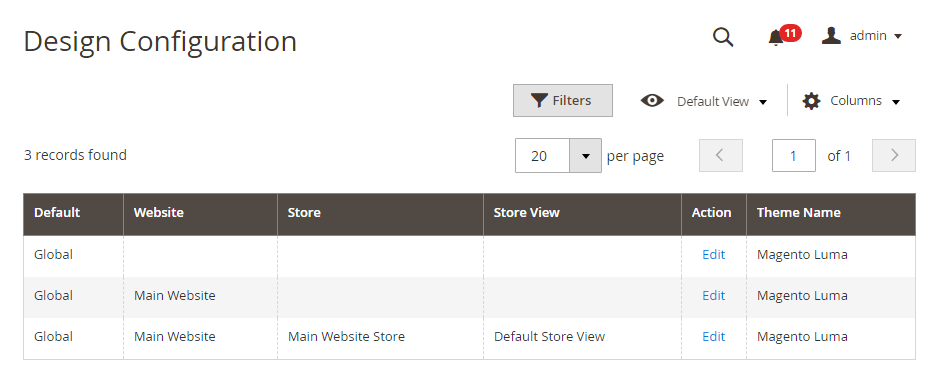
Step 2: Choose a store view you want to configure and click Edit
Step 3: If you want to change the Default Theme, select a theme from the drop-down list to apply.
Step 4: In case you would like to use the theme for only one device, click Add New User Agent Rule in the Design Rule section.
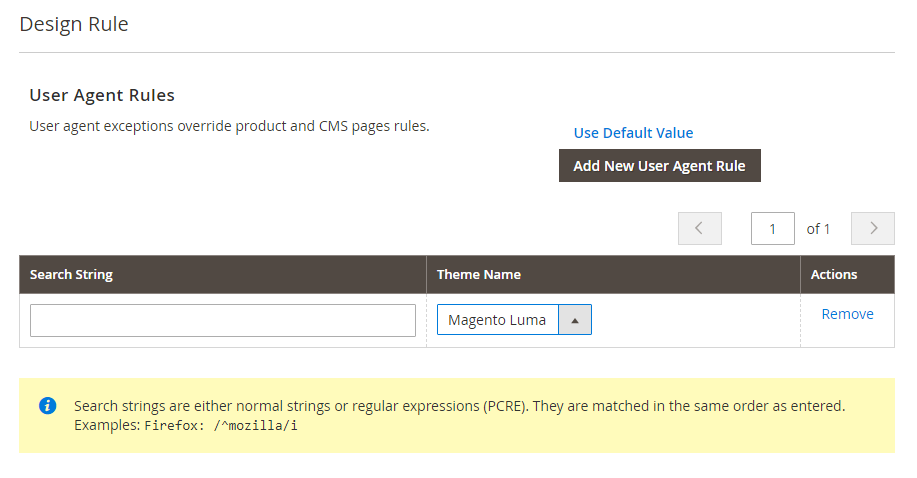
In Search String: enter the browser ID of the device, for example: /^mozilla/i
In Theme Name: select a theme to be used for the device.
Step 5: Expand the Other Settings section and complete the following fields:
- Pagination: set up paginations to display at the top and bottom of the list, specifying product listings.
- HTML Head: includes settings corresponding to the <head> tag of an HTML page and to configures meta title, meta description, keywords, favicon,…
- Header: contains settings to change the logo, customize width and height, alt text and welcome message.
- Footer: helps to update the copyright notice shown on the bottom of the page, and enter script placed before the <body> tag.
- Search Engine Robots: include settings to manage instructions of web crawlers and bots indexing the website.
- Product Image Watermark: helps to upload a small image to be displayed along with product images which can prevent other competitors from stealing.
- Transaction Emails: configure the logo displayed in the header email.
Step 6: Click Save configurations.
How to Install Magento 2 Themes
1. How to Install Magento 2 Theme manually
- Unzip the theme package
- Run Upgrade and Deploy
php bin/magento setup:upgrade
php bin/magento setup:static-content:deploy
- Flush cache
Use this command line to flush cache:
php bin/magento cache:clean
- Active the theme
Go to Admin ⇒ Content ⇒ Design ⇒ Configuration ⇒ Select your current theme:
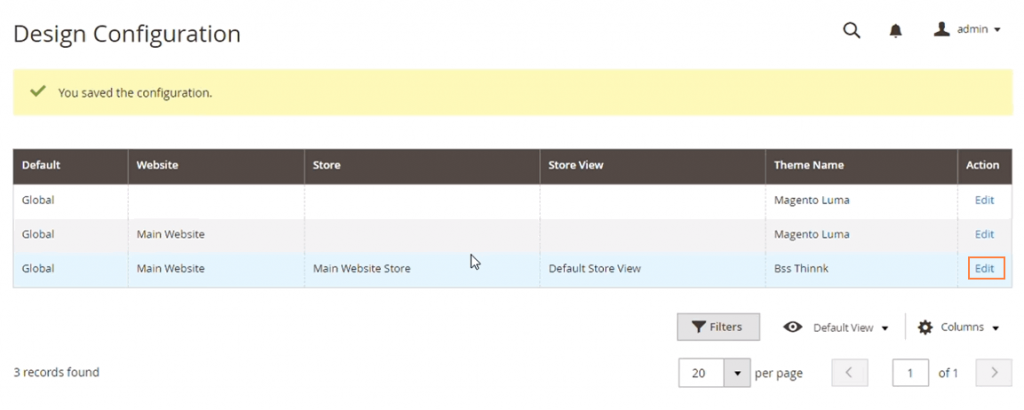
Select a theme to install from the drop-down list. Then click Save Configurations to complete the installation.
2. How to Install Magento 2 as a composer package
If your theme is used as a composer package, it is necessary to install it via the composer. The installation process is quite similar to the process of installing an extension.
- Purchase a theme from Magento Marketplace or other theme providers supporting composer.
- Get the composer name of the theme on Marketplace
- Go to Magento root category and run this command:
composer require <vendor>/<name>:<version>
- Add the name of the theme into this command line.
- Activate the theme
Navigate to Admin ⇒ Content ⇒ Design ⇒ Configuration ⇒ Select your installed current theme and click Save Configurations.
3. How to Install Magento 2 on Marketplace
Installing a Magento 2 theme is quite similar to installing a Magento 2 extension on Marketplace.
- Login to your backend and navigate to Admin ⇒ System ⇒ Tools ⇒ Web Setup Wizard.
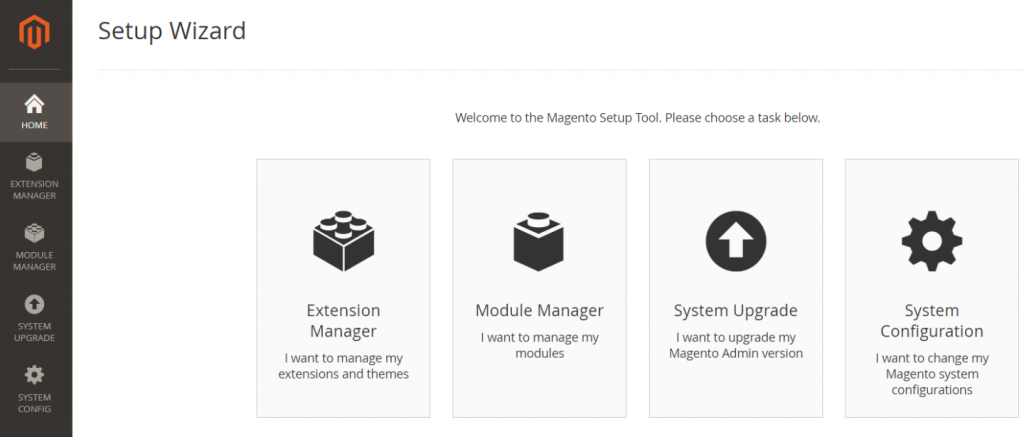
- Click Extension Manager section.
- Enter the public key and private key that you get from Marketplace.

Wait for some minutes to generate the lists of new updates.
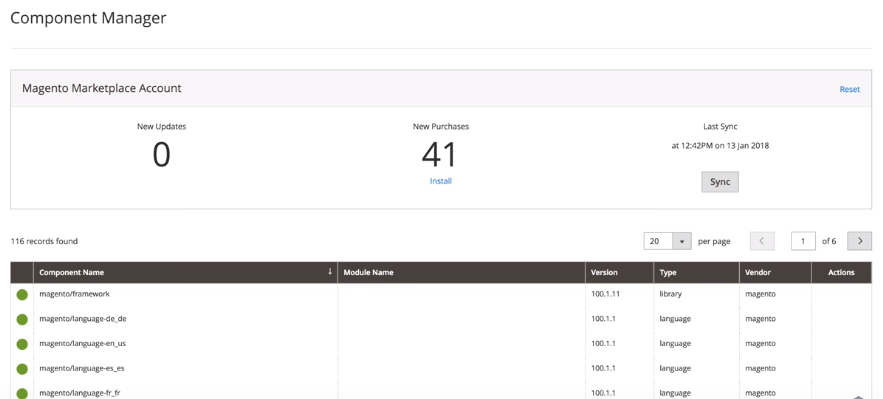
- Click Install under the new purchases and you are redirected to an extension grid. Then, select your theme and tap Install.
- Run Readiness Checkup, Create Backup and finish installing the theme.
- Finally, flush cache and go to Content ⇒Design ⇒ Themes to check the installed theme.