
Ever troubled by endless marketing emails you have to send to your subscribers, and each on different occasions, and try to customize them to your customer preferences? Then connecting your Magento 2 Mailchimp store is the answer.
Mailchimp is a marketing solution that helps you personalized your marketing emails to your audience. And connecting Mailchimp with your ecommerce store will help you manage your campaigns, audience behavior changes over time, and tracking if your subscribers are still interested in your channel or not.
If you want to know what makes Mailchimp stands out to other marketing platforms, then:
READ NOW at Magento Mailchimp – Best Marketing Platform For Magento 2
Having a Mailchimp Account can integrate your ecommerce platform with Mailchimp and start using the extension to benefit your business. We will give you some beginner steps in getting and managing your Mailchimp Account.

Create an Account
Table of Contents
The first thing you will need to have to connect your store to Mailchimp is a Mailchimp Account (Free/Paid). To create a Mailchimp account, you should comply with Mailchimp Terms of use and Anti-spam regulations. Then, navigate to Mailchimp’s Signup Page, then click Sign Up Free. Fill in your username, email address, and password and then click Get Started!
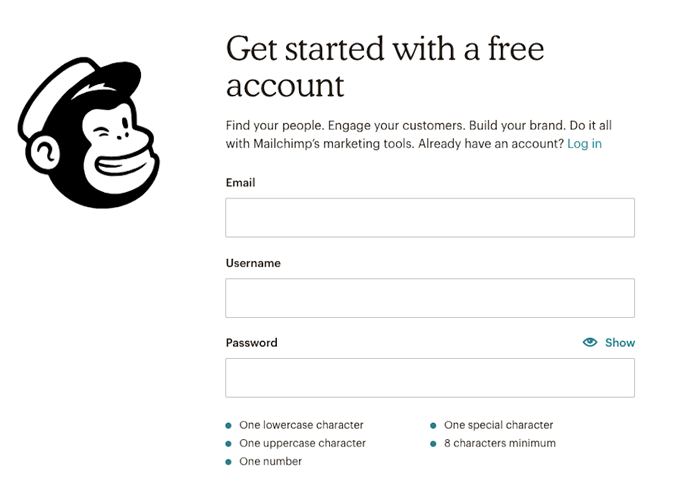
Mailchimp accounts default to start off with the Free Plan, and then if you want to upgrade to a paid plan, then Mailchimp will require you to provide your credit card information. See more information on the Mailchimp pricing plan here.
Sign up for an account
In the first time you log in to the Mailchimp account, you will be required to provide the following information in order for Mailchimp to provide the right content for you and your company, as well as to make sure that you comply with their terms of use.
- You should list the email address that you want Mailchimp contact to. You can reply to the mail that Mailchimp sent by a different address.
- Details of your company. These help Mailchimp give useful content and guidance. Also, you will be required to put your company name which will show in the emails along with your mailing address.
- The website URL of your business.
- The mailing address where you can receive mail.
Activate your account
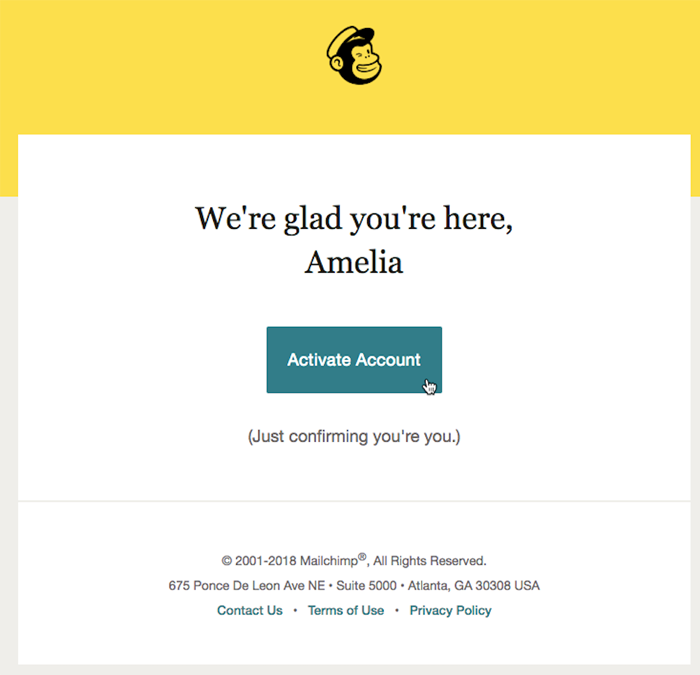
Mailchimp Account Verification is also an important step, and to verify your account, you can go to the account verification email that Mailchimp sent after you signed up to the platform, then click on Activate Account.
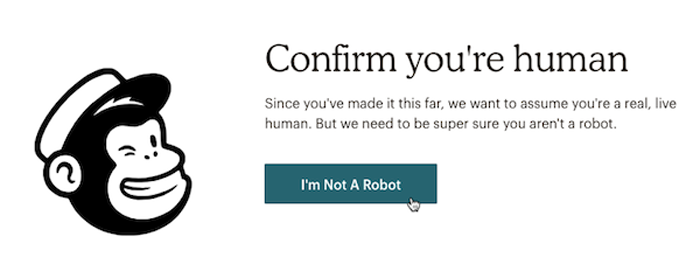
You also have to verify your humanity by confirming that you are not a robot, and then complete your Mailchimp account verification along with your setup.
Get connected with your Magento Store
Magento is a highly customizable and popular ecommerce platform, therefore it also supports Magento 2 Mailchimp extension, but due to the ecommerce platform complexity, it is often suitable for developers or Magento Expert to connect Magento 2 Mailchimp with their Magento store.
If you couldn’t afford an expert and want to connect the module yourself, then we did have a complete guide to connect your Magento store with Mailchimp:
TAKE A LOOK at Magento 2 Mailchimp set up.
Manage your store connection
Either your store is an e-commerce store in an ecommerce platform, or is a custom website, it is still possible for you to connect to Mailchimp.
With Magento 2 Mailchimp integration, you can enjoy the suite ecommerce features such as abandoned cart emails, product retargeting emails, promo code, etc.
In order to access the Integration section, where you can manage all your Magento 2 Mailchimp integration data that you shared with your account, follow the steps below:
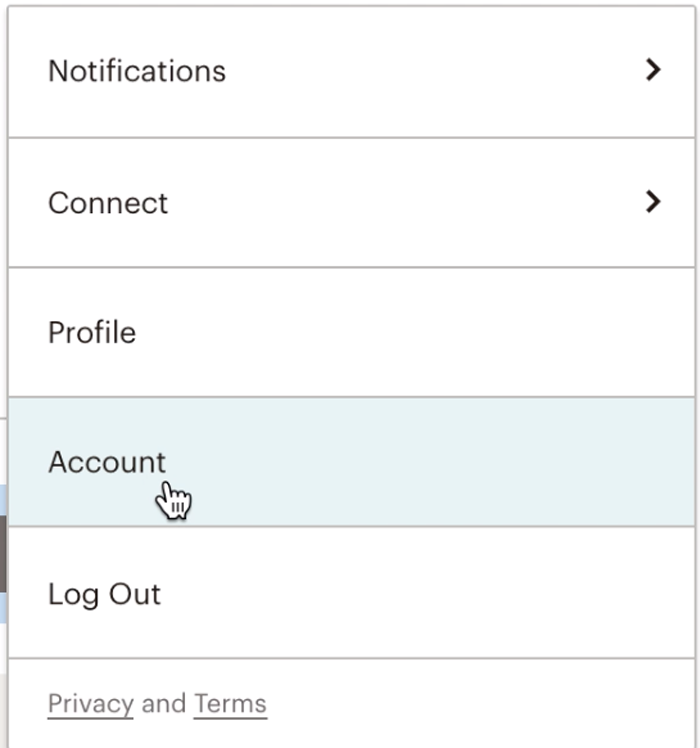
- Click your profile name, then choose Connect.
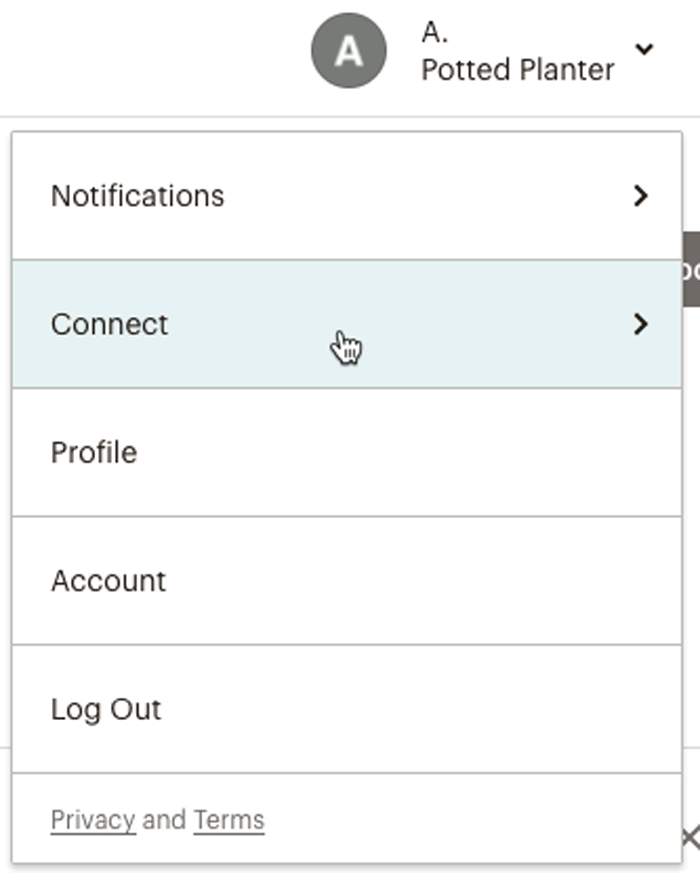
- Click Integrations.
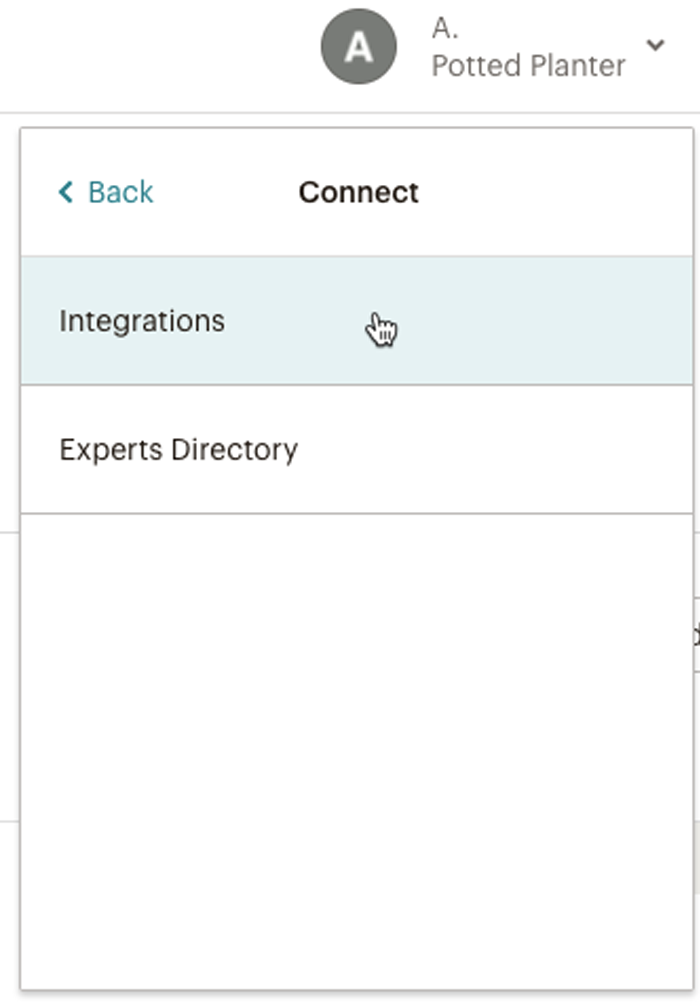
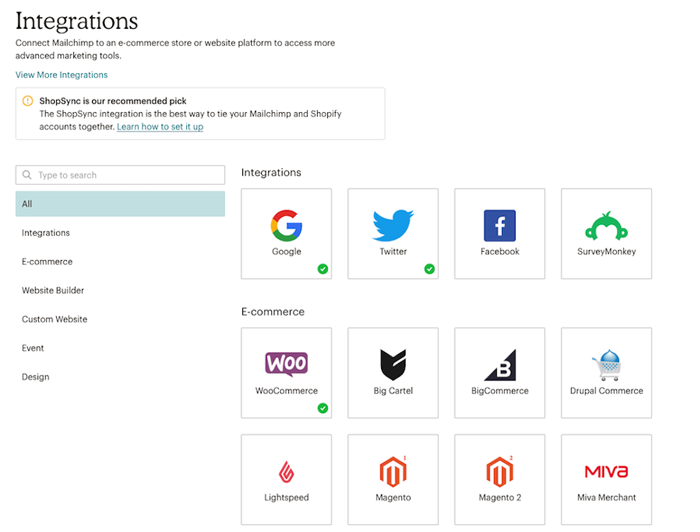
- The Integration section will lead you to all supported ecommerce stores, then you can generate codes to add your custom website builder, or manually add your website to Mailchimp.
View site details
When you have successfully integrated your ecommerce store (in this case would be Magento 2) to your Mailchimp account, you can now customize the details for each website in your Integration details page.
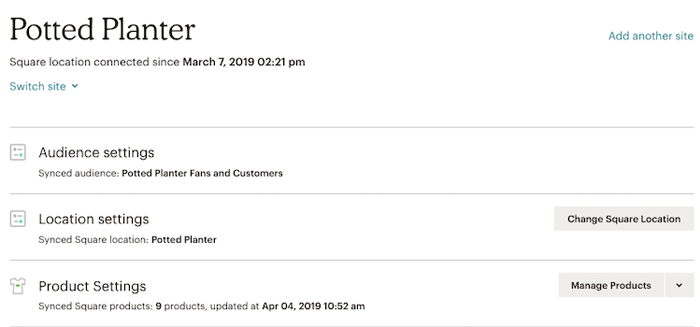
For each integration, you can track the connection status, check your audience data, and include a custom pop-up form to your website. You as users can also set the automation types from this page, for example, product retargeting emails, abandoned cart emails, etc.
Recover usernames and passwords for your Mailchimp Account
Now, as you have already settled in with your account and how you can integrate it with your Magento 2 business, that doesn’t mean that there can’t be any problem occurring to your Magento 2 Mailchimp account. And Mailchimp account recovery is a safety-belt that Mailchimp offers to revive or reset your account login information.
One of the situations could be that you forgot your username or password and couldn’t access your account. If you don’t have your email account and you want to reset the password, you can use your verified mobile phone number to update the email address that receives the password reset email.
With Mailchimp account recovery for username, there are two ways you can get your username back: By email address or phone number.
First, click Forgot username? at the bottom of the login screen.
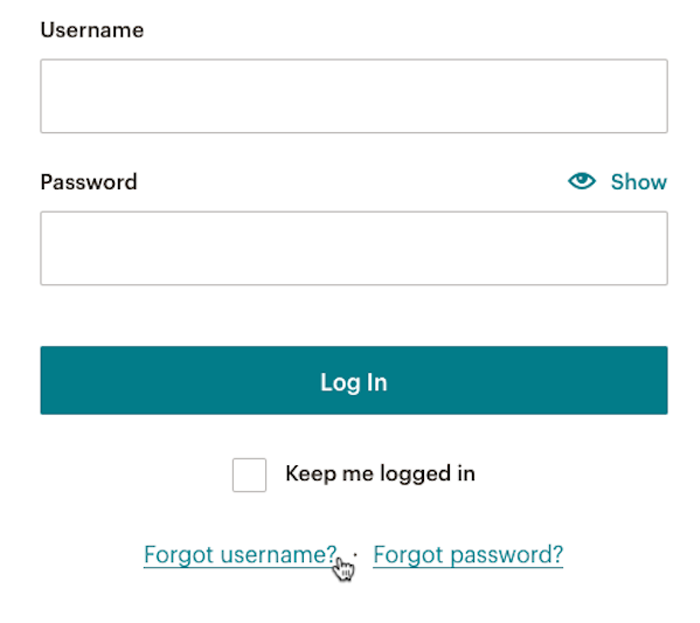
Then, Mailchimp will give you the option to recover your username using email or mobile phone number. You can then choose to recover your username in which way you prefer.
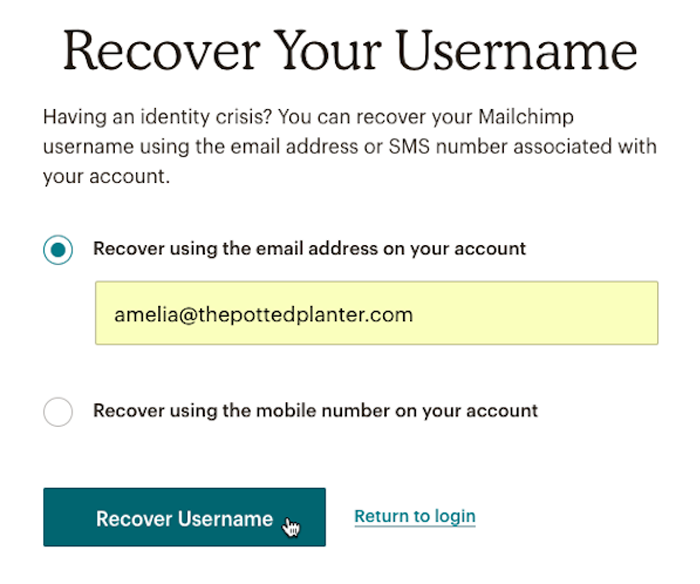
The same applies when you want to reset your password. Click on the Forgot Password? then send the reset password to your email address.
Close an Account
When you don’t have a need to use Mailchimp anymore, it could be that your business no longer operates, or simply that you have found a better alternative for your Magento 2 Mailchimp account, you can choose to close and delete your account. After an account is deleted, it can’t be restored. This means all account data, including audiences and reports, is removed from the Mailchimp system would not be recovered. Follow these steps to delete your account:
- Choose Account under your profile name.
- Click Setting and on the drop-down menu, choose Pause or Delete Account. Remember that only paid accounts can be paused. Free Plan accounts can only be deleted.
- Choose Permanently delete this account, then click Continue.

- You can then confirm your password, then choose Permanently Delete. Mailchimp will show you a confirmation pop-up, type DELETE then confirm your account deleted.
Wrap Up
We have provided you with all beginner’s tips and guides to Magento 2 Mailchimp Account. If you want to learn more about Magento 2 Mailchimp, then read other articles we wrote on our website, or send us any questions that you might have when working with Mailchimp.
BSS Commerce is one of the leading Magento extension providers and web development services in the world. With experienced and certified Magento developers, we commit to bring high-quality products and services to optimize your business effectively. CONTACT NOW to let us know your problems. We are willing to support you every time.