
After the post “What is Magento widget?“, we understand that Magento widget is one of the strongest features of Magento store. Customer can use widget to display some information or content from the database easily in the CMS page or CMS block.
The below article will show how to create and use widget in Magento 1. This widget lets customer enter title and content displayed anywhere in the CMS page or CMS block when you add widget.
How to create custom widget module.
Step 1: Firstly, create the necessary directory system. Create the “template” directory in
app/design/frontend: your_theme/default/template/customwidget.In app/code/local, create directories:
Bss/CustomWidget/Block/
Bss/CustomWidget/etc
Bss/CustomWidget/Helper
Step 2: Declare module in app/etc/modules and create file Bss_CustomWidget.xml.
<?xml version="1.0"?>
<config>
    <modules>
        <Bss_CustomWidget>
            <active>true</active>
            <codePool>local</codePool>
            <depends>
                <Mage_Cms />
            </depends>
        </Bss_CustomWidget>
    </modules>
</config>
Step 3: Create a module configuration file config.xml in directory Bss/CustomWidget/etc.
<?xml version="1.0"?>
<config>
    <modules>
        <Bss_CustomWidget>
            <version>0.1.0</version>
        </Bss_CustomWidget>
    </modules>
    <global>
        <helpers>
            <customwidget>
                <class>Bss_CustomWidget_Helper</class>
            </customwidget>
        </helpers>
        <blocks>
            <customwidget>
                <class>Bss_CustomWidget_Block</class>
            </customwidget>
        </blocks>
    </global>
</config>
Step 4: Create file widget.xml in directory Bss/CustomWidget/etc used to declare information and parameters of widget.
<?xml version="1.0"?>
<widgets>
 <add_post type="customwidget/widget" translate="name description" module="customwidget">
         <name>widget add post</name>
        <description type="desc">add post</description>
        <parameters>
<title>
                <label>Title</label>
                <visible>1</visible>
                <required>1</required>
                <type>text</type>
            </title>
            <content>
                <label>Content</label>
                <visible>1</visible>
                <required>1</required>
                <type>text</type>
            </content>
        </parameters>
    </add_post>
</widgets>
In which:
The <add_post> tag is used to declare widget with type used to call the corresponding block file.
The <parameters> tag is widget configuration. In which, the <title> and <content> tags are used to declare option names inwidget, the <label> tag declares the title of the option, the <visible> tag sets to hide and display options, the <required> tag is used to set the forced input or not, the <type> tag declares the input data.
Step 5: Create block file Widget.php to display output of content in Bss/CustomWidget/Block.
class Bss_CustomWidget_Block_Widget extends Mage_Core_Block_Template implements Mage_Widget_Block_Interface
{
    public function _construct()
    {
        $this->setTemplate('customwidget/widget.phtml');
    }
    public function getTitle(){
        return $this->getData('title');
    }
     public function getContent(){
        return $this->getData('content');
    }
}
Step 6: Create template file widget.phtml in app/design/frontend/your_theme/default/template/customwidget.
<div class="widget">
    <p class="name-page"><?php  echo $this->getTitle() ?>
        <p class="name-page"><?php echo $this->getContent() ?>
</div>
Step 7: Create the empty file helper Data.php in Bss/CustomWidget/Block using for translation.
<?php
class Bss_CustomWidget_Helper_Data extends Mage_Core_Helper_Abstract
{
}
How to use widget.
For example: add widget to Homepage
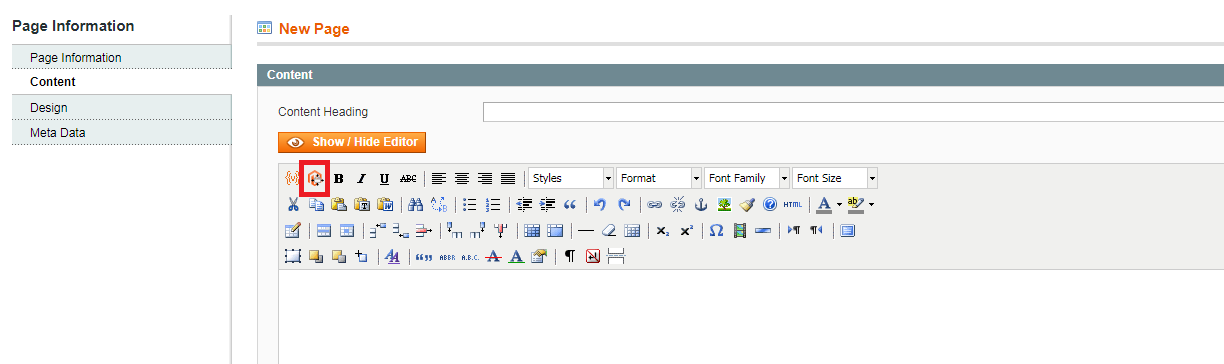
Navigate to Admin -> CMS -> Page, choose CMS page with title: “Home page”. In Tab “Content”, click on WYSIWYG icon as following:
Then popup “Widget Insertion” is shown as below
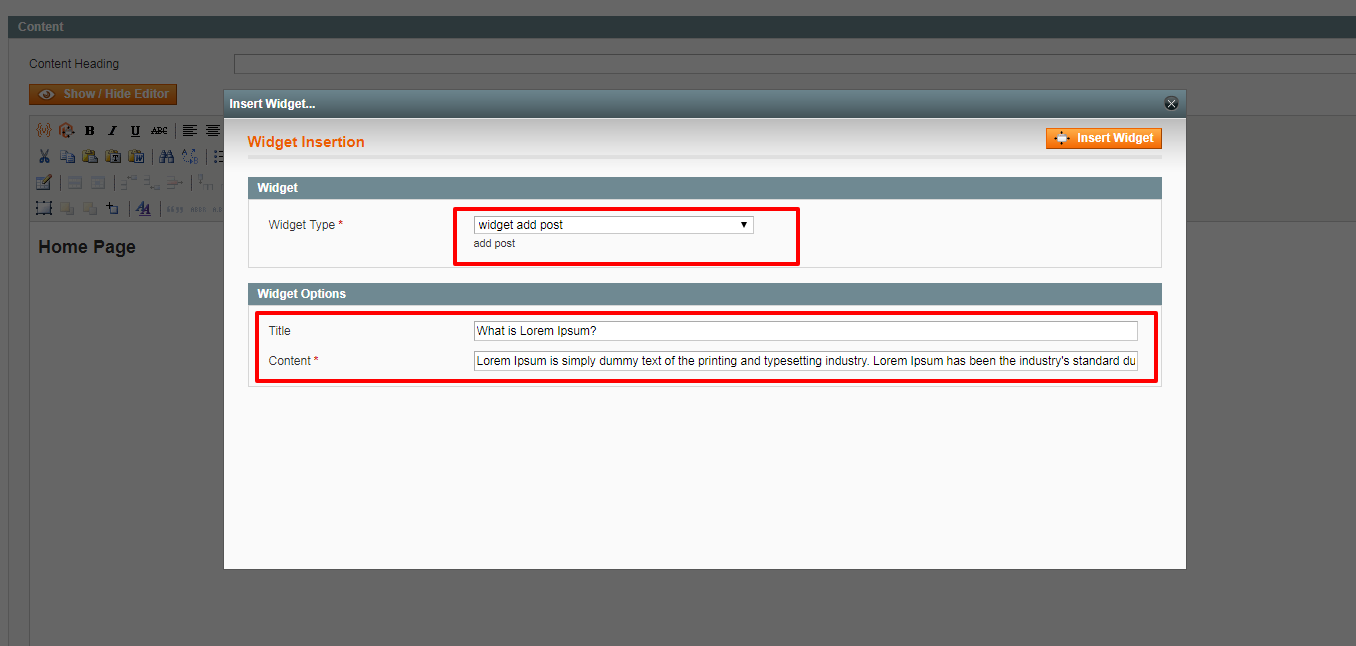
In “Widget Type”, choose the widget you have just created, then fill information on “Widget Options” and put on the button “Insert Widget”.
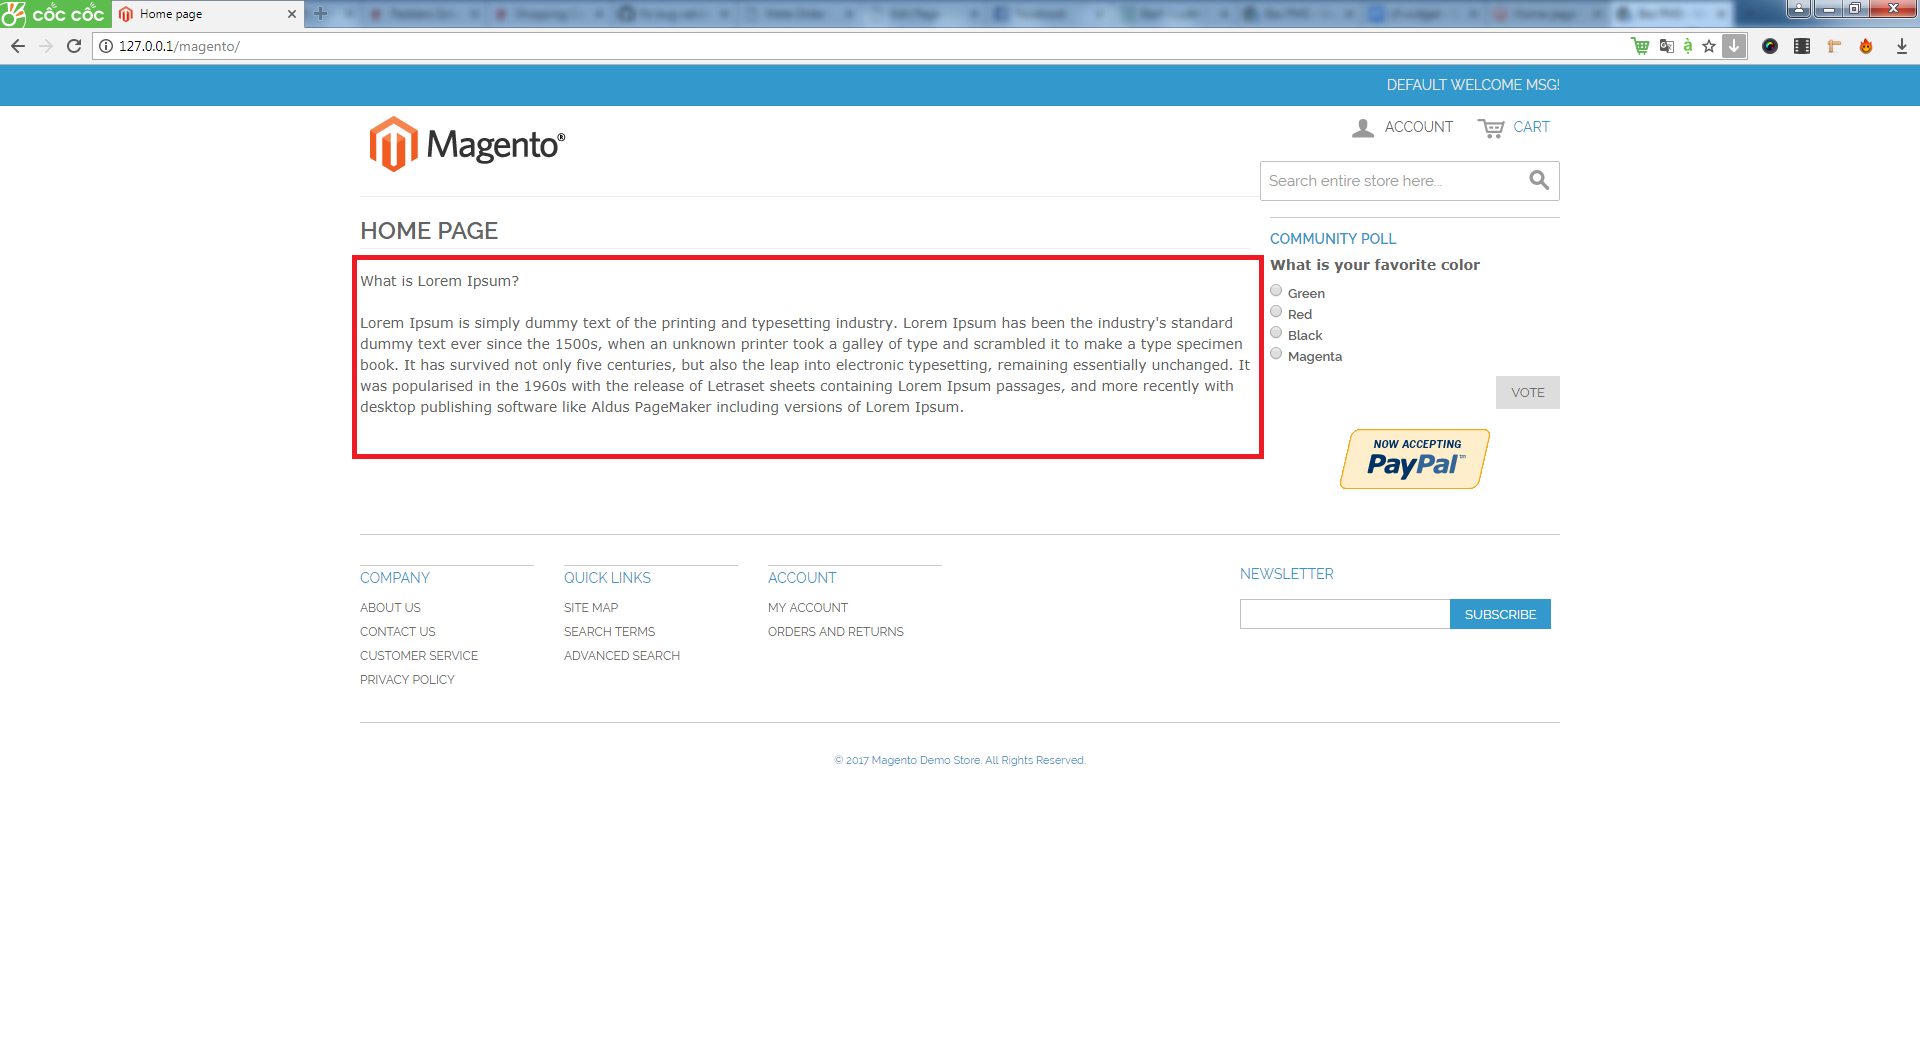
Finally, we can check on frontend, the result will be displayed as below:
If you have any problems when create and use the widget in Magento 1 or need our professional service, please email us support@bsscommerce.com
You can also find the right solution in our best-in-class Magento 2 Extensions