
As you know, Magento 1 Grid is a kind of table which listing the items in your database table and provide to you some features like: sort, filter, delete, update item, etc.
This article will show how to create a simple admin grid in Magento 1.
Step 1: Create Simple Module for Admin Grid.
Before creating admin grid, you have to create a module first.
For example: create a module named as AdminGrid. Create file app\etc\modules\Bss_AdminGrid.xml
<?xml version="1.0"?>
<config>
  <modules>
    <Bss_AdminGrid>
      <active>true</active>
      <codePool>local</codePool>
      </Bss_AdminGrid>
    </modules>
  </config>
Create file app\code\local\Bss\AdminGrid\etc\config.xml
<?xml version="1.0"?>
<config>
  <modules>
    <Bss_AdminGrid>
      <version>1.0.0</version>
    </Bss_AdminGrid>
  </modules>
  <global>
    <helpers>
      <admingrid>
        <class>Bss_AdminGrid_Helper</class>
      </admingrid>
    </helpers>
  </global>
</config>
If you use a translate attribute, you should declare a default helper of module. So creating file app\code\local\Bss\AdminGrid\Helper\Data.ph
<?php
class Bss_AdminGrid_Helper_Data extends Mage_Core_Helper_Abstract
{
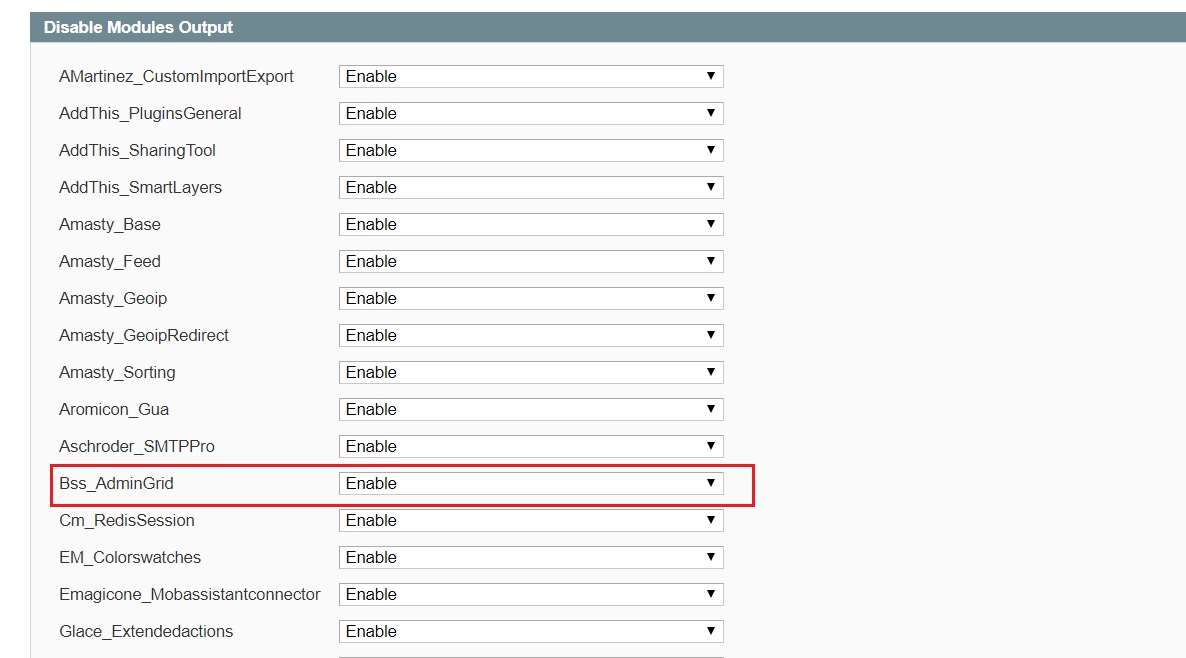
}So you had a simple module, you can check by accessing to Backend: System/Configuration/Advanced/Advanced
Step 2: Create Admin Menu in Backend.
Creating menu in Magento and ACL helps to set permission for Magento menu in file app\code\local\Bss\AdminGrid\etc\adminhtml.xml
Create menu items:
<menu>
	  <admingrid module="admingrid">
		<title>AdminGrid</title>
		<sort_order>100</sort_order>
		<children>
		  <adgrid module="admingrid">
			<title>Manage Items</title>
			<sort_order>0</sort_order>
			<action>*/adgrid</action>
		  </adgrid>
		</children>
	  </admingrid>
	</menu>
In which:
<title> tag: Display horizontal menu name in the menu bar in the Backend tag: Create child menu for Admin Grid.
<action> tag: URL for controller action to handle this menu.
Create ACL:
<acl>
	  <resources>
		<all>
		  <title>Allow Everything</title>
		</all>
		<admin>
		  <children>
			<admingrid translate="title" module="admingrid">
			  <title>AdminGrid</title>
			  <sort_order>1000</sort_order>
			  <children>
		  <admingridbackend translate="title">
			<title>Manage Items</title>
		  </admingridbackend>
			  </children>
			</admingrid>
		  </children>
		</admin>
	  </resources>
	</acl>
Declare a router to load Adminhtml Controller in file config.xml.
<admin>
        <routers>
            <adminhtml>
                <args>
                    <modules>
                        <bss_admingrid before="Mage_Adminhtml">Bss_AdminGrid_Adminhtml</bss_admingrid>
                    </modules>
                </args>
            </adminhtml>
        </routers>
  </admin>
In which:
<frontName> tag: Put the admin html router in <frontName> like URL path frontname/controller when accessing to menu.
Example: http://domain/index.php/admin_admingrid/adminhtml_adgrid/index/key/…
You can put all code of menu item and acl to file app\code\local\Bss\AdminGrid\etc\config.xml in <config> tag.
The result:

Step 3: Create Grid in child Menu.
Grid page need to receive data, so you have to create a simple database table in Mysql with 2 fields: id and item.
Before creating a table, you need to setup Model, Resource for Data Collection.
Create base Model: app\code\local\Bss\AdminGrid\Model\Adgrid.php.
<?php
class Bss_AdminGrid_Model_Adgrid extends Mage_Core_Model_Abstract
{
    protected function _construct()
    {
        $this->_init('admingrid/adgrid');
    }
}
Create Resource: app\code\local\Bss\AdminGrid\Model\Resource\Adgrid.php.
<?php
class Bss_AdminGrid_Model_Resource_Adgrid extends Mage_Core_Model_Resource_Db_Abstract
{
    protected function _construct()
    {
        $this->_init('admingrid/adgrid', 'id');
    }
}
Create Collection: app\code\local\Bss\AdminGrid\Model\Mysql4\Adgrid\Collection.php.
<?php
class Bss_AdminGrid_Model_Mysql4_Adgrid_Collection extends Mage_Core_Model_Mysql4_Collection_Abstract
{
    protected function _construct()
    {
        $this->_init('admingrid/adgrid');
    }
}
Declare Model and Resource in file config.xml.
Put all these code into <global> tag.
Model:
<models>
            <admingrid>
                <class>Bss_AdminGrid_Model</class>
                <resourceModel>admingrid_resource</resourceModel>
            </admingrid>

            <!-- Resource model to create a database table -->
            <admingrid_resource>
                <class>Bss_AdminGrid_Model_Resource</class>
                <entities>
                    <adgrid>
                        <table>admingrid_adgrid</table>
                    </adgrid>
                </entities>
            </admingrid_resource>
        </models>
Resource setup script:
<resources>
			 <admingrid_setup>
				 <setup>
				 <module>Bss_AdminGrid</module>
				 </setup>
			 </admingrid_setup>

        <admingrid_write>
            <connection>
                <use>core_write</use>
            </connection>
        </admingrid_write>

        <admingrid_read>
            <connection>
                <use>core_read</use>
            </connection>
        </admingrid_read>
		 </resources>
Create table by creating file.
app\code\local\Bss\AdminGrid\sql\admingrid_setup\mysql4-install-1.0.0.php.
(1.0.0 is module version in config.xml)
<?php

$installer = $this;

$installer->startSetup();

$table = $installer->getConnection()
    ->newTable($installer->getTable('admingrid/adgrid'))
    ->addColumn('id', Varien_Db_Ddl_Table::TYPE_INTEGER, null, array(
        'identity'  => true,
        'unsigned'  => true,
        'nullable'  => false,
        'primary'   => true,
        ), 'Id')
    ->addColumn('item', Varien_Db_Ddl_Table::TYPE_TEXT, null, array(
        'nullable'  => true,
        ), 'Items');
$installer->getConnection()->createTable($table);

$installer->endSetup();
In which:
Table name: admingrid_adgrid.
Columns: id, item.
There is another way to create a table in Magento database.
$installer = $this;
$installer->startSetup();
$installer->run("
    DROP TABLE IF EXISTS {$this->getTable('admingrid/adgrid')};
    CREATE TABLE {$this->getTable('admingrid/adgrid')} (
      `id` int(11) unsigned NOT NULL auto_increment,
      `item` text NULL ,
      PRIMARY KEY (`Id`)
    ) ENGINE=InnoDB DEFAULT CHARSET=utf8;
        ");
$installer->endSetup();
But I recommend to use default Magento function to create a database table.
Setup Grid.
Grid page in Backend will display database like a table. You can use it to manage data of module. So here are the steps to create a simple Grid page in Backend.
Create Controller for Grid page backend app\code\local\Bss\AdminGrid\controllers\Adminhtml\AdgridController.php.
<?php
class Bss_AdminGrid_Adminhtml_AdgridController extends Mage_Adminhtml_Controller_Action
{

	protected function _isAllowed()
    {
        return Mage::getSingleton('admin/session')->isAllowed('admingrid/adgrid');
    }


	public function indexAction()
    {
       	   $this->loadLayout();
	   $this->_title($this->__("Admin Grid"));
	   $this->renderLayout();
    }
}
In which:
$this->loadLayout(): Get information from file layout configured in adminhtml (app\design\adminhtml\default\default\layout\adgrid.xml).
$this->_title($this->__(“Admin Grid”)): Grid page’s name.
$this->renderLayout(): Render all of module block out to Grid page.
Remember: Controller of Backend must be placed into Adminhtml folder because class of Controller inheritsclass of Magento Mage_Adminhtml_Controller_Action.
Declare layout of adminhtml in file config.xml, code must be put into tag:
<layout>
	  <updates>
		<admingrid>
		  <file>admingrid.xml</file>
		</admingrid>
	  </updates>
	</layout>
Create layout file for Grid page: app\design\adminhtml\default\default\layout\admingrid.xml.
<?xml version="1.0"?>
<layout version="0.1.0">
  <adminhtml_adgrid_index>
	<reference name="content">
	  <block type="admingrid/adminhtml_adgrid" name="adgrid"/>
	</reference>
  </adminhtml_adgrid_index>
</layout>
Create Block for Grid page. Now you start to setup Grid block container to display the grid rendered in Grid page. Firtsly, we need to define the link of blockin file config.xml.
<blocks>
	  <admingrid>
		<class>Bss_AdminGrid_Block</class>
	  </admingrid>
	</blocks>
This Block is also put in folder Block/Adminhtml because class of admin block inherits Mage_Adminhtml_Block_Widget_Grid.
app\code\local\Bss\AdminGrid\Block\Adminhtml\Adgrid.php
class Bss_AdminGrid_Block_Adminhtml_Adgrid extends Mage_Adminhtml_Block_Widget_Grid_Container {
    public function __construct()
    {
        $this->_blockGroup = 'admingrid';
        $this->_controller = 'adminhtml_adgrid';
        $this->_headerText = $this->__('Grid');

        parent::__construct();
    }
}
In which:
$this->_controller: declare grid of controller.
$this->_headerText: name of grid set in the top left corner.
After the grid block container is setup, you need to setup grid content: app\code\local\Bss\AdminGrid\Block\Adminhtml\Adgrid\Grid.php
In this file, class Bss_AdminGrid_Block_Adminhtml_Adgrid_Grid will extends Mage_Adminhtml_Block_Widget_Grid.
In __construct(), we define some default value for grid:
    public function __construct()
    {
        parent::__construct();

        $this->setDefaultSort('id');
        $this->setId('admingrid_adgrid_grid');
        $this->setDefaultDir('asc');
        $this->setSaveParametersInSession(true);
    }
Get collection data for the grid:
    protected function _getCollectionClass()
    {
        return 'admingrid/adgrid_collection';
    }

    protected function _prepareCollection()
    {
        $collection = Mage::getResourceModel($this->_getCollectionClass());
        $this->setCollection($collection);

        return parent::_prepareCollection();
    }
Create columns which is displayed in grid table:
 protected function _prepareColumns()
    {

        $this->addColumn('id',
            array(
                'header'=> $this->__('ID'),
                'align' =>'right',
                'width' => '50px',
                'index' => 'id'
            )
        );

        $this->addColumn('items',
            array(
                'header'=> $this->__('Items'),
                'index' => 'items'
            )
        );
        return parent::_prepareColumns();
    }
In which:
$this->addColumn: Create columns function.
There are some simple parameters for us to create columnsalign , width: Css attributes.
index(required): one of the fields in database will be called in this column.
When you click to menu AdminGrid/Manage Items at Backend, you’ll see a simple Grid page created.

But that Grid will display a text “No records found”.. Because the admingrid_adgrid table in Mysql doesn’t have any value. So we need to create sample value in this table to display in Grid page.

The result:

Download demo module here
If you have any problems when create Admin Grid in Magento 1 or need our professional service, please email us support@bsscommerce.com. You can also find the right solution in our best-in-class Magento 2 Extensions.
I think you’ve missed a tag in your code:
We have reviewed the code carefully and all work fine. Please try again and let us know if there is still something wrong. Thanks in advance.
Its working perfectly
We’re glad to hear that. Feel free to take a tour around for more useful pieces.
The following might also be your interest:
– UI Components: How to use DynamicRows components in Magento 2
– How to Display Latest Products in Magento 1
– Magento Tip: Reduce Magento Database Size
Good day!
May i ask if the Add new button is working? i tried inserting data via phpmyadmin manually and it fetched the data correctly. but the Add New button does not work and gives me 404 error 🙁
In this article, we focus on how to create a basic grid rather than an input form and data saving. So, the “Add new button” has no code yet. You can create one and inform us if you need more help.
There are some confusions in where to put blocks and layout sections in config file please update