
As you know, Magento default has 2 themes “Blank” and “Luma”. When installing Magento successfully, in frontend there will be the default theme “Luma”. For easy upgrading and maintaining, we should not directly edit these 2 default theme.
If you want to customize and design your website, create a new theme in the following steps.
1: Create a theme directory.
2: Declare your theme.
3: Apply and config theme in admin.
Step 1: Create a theme directory
Similar to Magento 1, theme directories are stored in app/design/frontend.
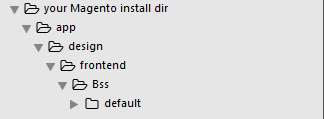
In which:
- Bss: Vendor directory name (same as a package in M1).
- default: Theme directory name (you can create whatever name you like, as long as it is relevant and meaningful).
Step 2: Declare your theme.
theme.xml
After you create a directory for your theme, you must create “theme.xml”.
<your Magento install dir>app/design/frontend/<your_vendor>/<your_theme/theme.xml
In this file, you’d better make sure it has two properties.
- In tags <title>[title display in admin]</title>. Here I create title name “Bss default”.
- In tags <parent>[parent theme]</parent>. Here I choose parent theme “Magento/blank”. In case the required files are not found in the “Bss / default” theme, it will automatically find the parent theme, “Blank”.
You can declare image screenshot theme displaying in admin as the tag:
<preview_image>media/name_image.png</preview_image>Or replace with image formats such as png, jpg … (but this part is not required).
You put your screenshot image in media directory:
/app/design/frontend/<your_vendor_name>/<your_theme_name>/media/screenshot_theme.pngExample:
<theme xmlns:xsi="http://www.w3.org/2001/XMLSchema-instance" xsi:noNamespaceSchemaLocation="urn:magento:framework:Config/etc/theme.xsd">
     <title>Bss default</title>
     <parent>Magento/blank</parent>
     <media>
              <preview_image>media/preview.jpg</preview_image>
     </media>
 </theme>
Composer.json
In Magento 2, each theme is used as a composite package. You can copy from the Blank or Luma theme by default Magento path.
vendor/magento/theme-frontend-blank/composer.jsonregistration.php
To register a theme in the Magento system you need to create the registration.php file. You also copy and edit it.
<?php
/**
 * Copyright © 2015 Magento. All rights reserved.
 * See COPYING.txt for license details.
 */
\Magento\Framework\Component\ComponentRegistrar::register(
    \Magento\Framework\Component\ComponentRegistrar::THEME,
    'frontend/<YourVendor>/<yourtheme>',
    __DIR__
);
Create directories for static files (fonts, jquery, css, image…).
You can add fonts, css, image … in your theme by creating folder “web” in the following path.
app/design/fronend/<your_vendor_name>/<your_theme_name>/webNote: In folder “web” you should create different folders (inside folder css writes css, fonts only contain font…).
The basic folder/ files structure as creating a theme.

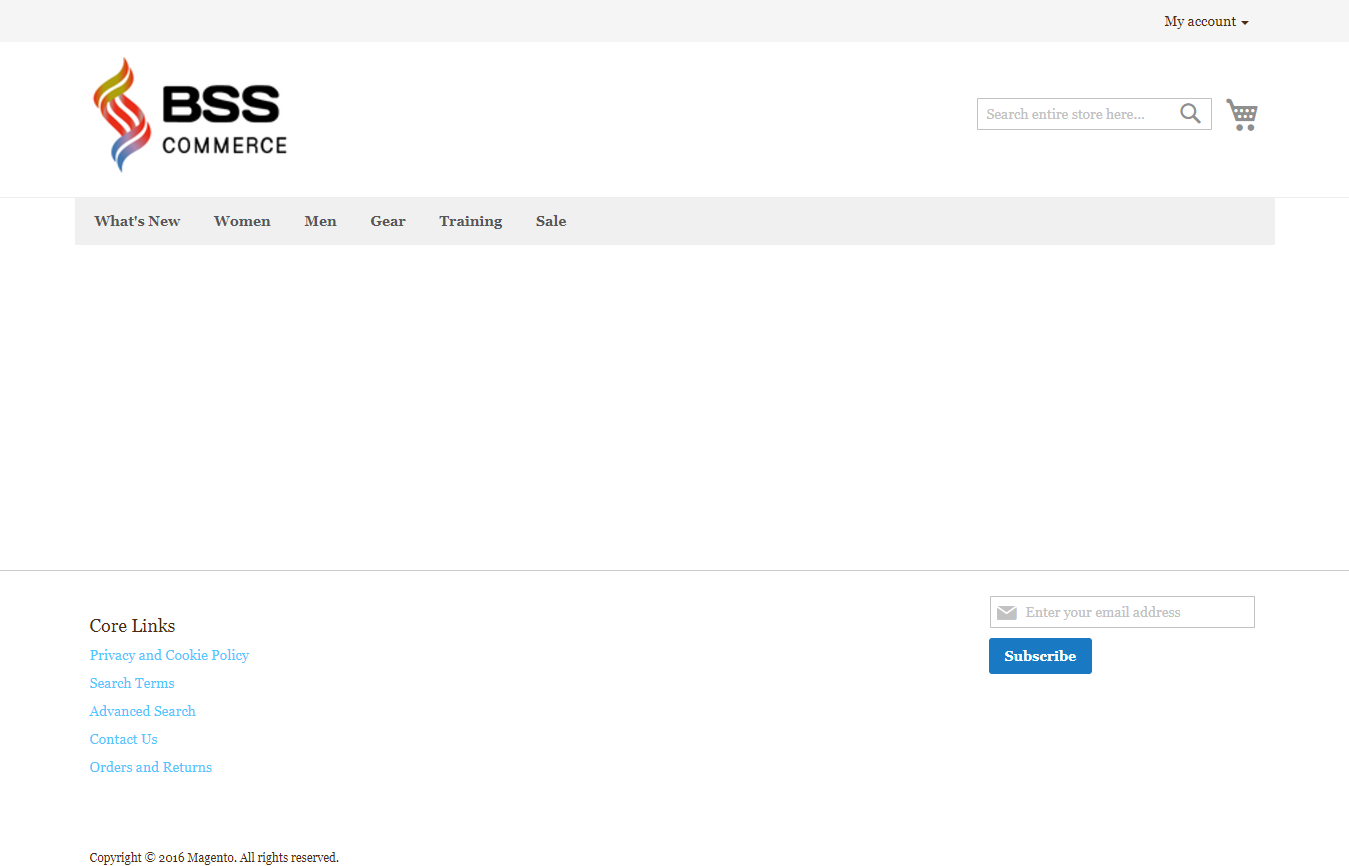
Add logo in theme.
You can add a logo to your theme by creating a folder/file declare. Create a folder as name Magento_Theme/layout in the folder your theme.
The path looks like this
<your Magento install dir>app/design/fronend/<your_vendor_name>/<your_theme_name>/Magento_Theme/layoutNext, you create a file named “default.xml” (you can copy the below code to edit).
<page xmlns:xsi="http://www.w3.org/2001/XMLSchema-instance" xsi:noNamespaceSchemaLocation="urn:magento:framework:View/Layout/etc/page_configuration.xsd">
    <body>
        <referenceBlock name="logo">
            <arguments>
                <argument name="logo_file" xsi:type="string">images/logo.png</argument>
                <argument name="logo_img_width" xsi:type="number">300</argument>
                <argument name="logo_img_height" xsi:type="number">300</argument>
            </arguments>
        </referenceBlock>
    </body>
</page>
In which you need to care:
logo_file //the path to your theme logoExample:
/app/design/frontend/Bss/default/web/images/logo.png
logo_img_width //width’s logo
logo_img_height //height’s logo
In here, my logo size is 300x300px.
Tip: Magento will prioritize your theme folder before running other default theme folders.
Step 3: Apply and config theme in admin.
Before going to config theme in admin, you should run command “upgrade” and “flush cache”, to ensure that your theme does not have any problem.
- Upgrade: php bin/magento setup:upgrade
- Flush cache: php bin/magento cache:flush
To apply theme on your website. You follow as below.
Check your theme.
In admin, go to Design > Themes (from Magento 2.1 and up). The old version, 2.0.0, go to Stores > Configuration > Design
You will see your theme created before. My theme is Bss/default.
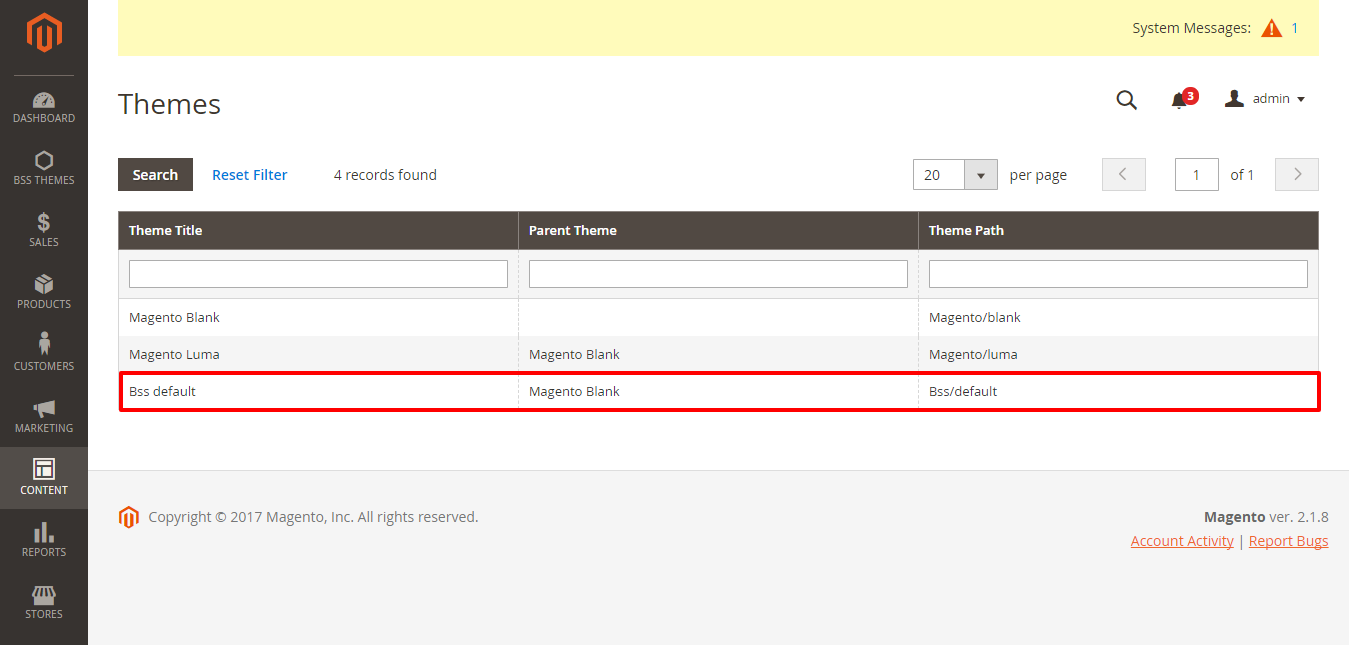
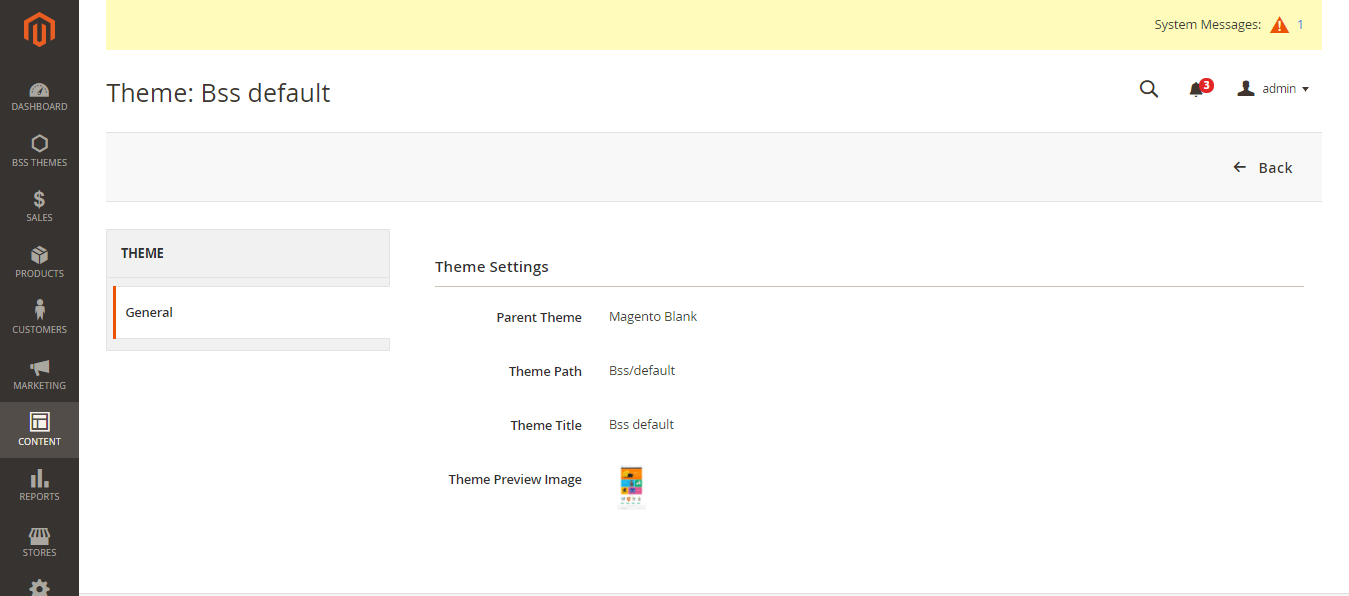
This is information about my theme. You can see by clicking your theme.
Apply theme on the website.
Magento 2.1 and up: CONTENT > Configuration > Edit theme > Default Theme > Select your theme.
Magento 2.0.0: Stores > Configuration > Design Tab > Design Theme.
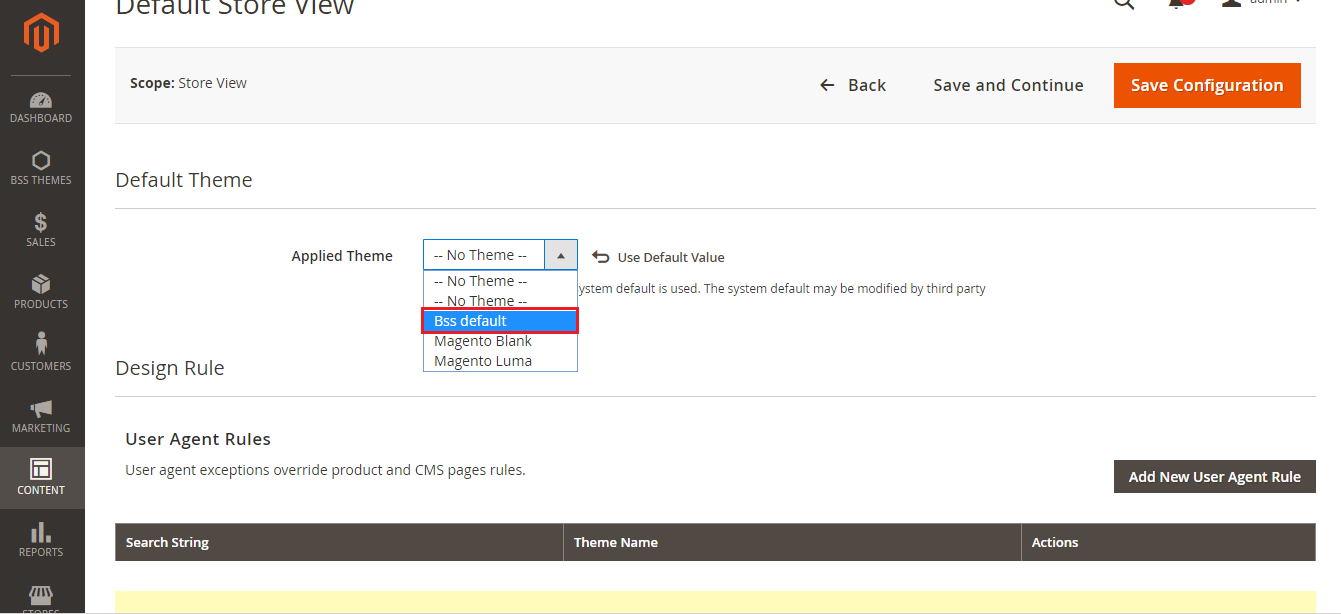
Then click “Save Configuration”
Run deploy by command below.
php bin/magento setup:static-content:deployOtherwise, you can deploy following language which your site is using.
Example: your site is using French, you add fr_FR
php bin/magento setup:static-content:deploy fr_FROr you can deploy many languages at same time.
php bin/magento setup:static-content:deploy en_US fr_FR de_DeCheck the result in Frontend, press “Ctrl + F5” to refresh the page.
If you have any problems or need our professional service, please email us support@bsscommerce.com. You can also find the right solution in our best-in-class https://bsscommerce.com/magento-2-extensions.html