Magento 2 JavaScript Template is known as a standard template to help developers to quickly make HTML code that is repeated many times while only data is different. Therefore, creating a template will help developers to write code snippets quicker, save more time than before.
READ MORE How to defer parsing JavaScript in Magento 2 and speed up your website.
In this post, I will show you a Magento 2 JavaScript tutorial: the best way to create a JavaScript template. Follow the steps below and quickly create a template for your own.
Step 1: In your .phtml file, prepare necessary data to add into Javascript template
The data sample can be as below:
<?php

$productData = [

            ["sku"=>"Tshirt-Red",

            "name"=>"Tshirt Red Armani",

            "price"=>"5000"],

            [sku"=>"Tshirt-Blue",

            "name"=>"Tshirt Blue Armani",

            "price"=>"6000"],

            ["sku"=>"Tshirt-Yellow",

            "name"=>"Tshirt Yellow Armani",

            "price"=>"7000"]

        ];

$jsonProductData = $this->helper('Magento\Framework\Json\Helper\Data')->jsonEncode($productData);

?>
*Note: Input data must be JSON type.
Then you write a JavaScript code to add the prepared data into your Javascript template.
Step 2: Write JavaScript code to get data from jstemplate.js file as below:
<script type = "text / x-magento-init">
    {
        "*":
        {
            "Bss_JsTemplate / js / jstemplate":
            {
                "Data": <?php echo $ jsonProductData; ?>
            }
        }
    }

</ script>
In this code snippet, “Bss_JsTemplate / js / jstemplate” is corresponding to “vendor_module / folder_js / js_file”
Step 3: Insert this script into your .phtml file
<script id="product-template" type="text/x-magento-template">

    <% _.each(data, function(value, key) { %>

    <ul>

        <li> Product <%-value %>  : <%- key %></li>

    </ul>

    <% }); %>

</script>
In this script, I use the .each () loop to retrieve data from the JavaScript file and use <ul>, <li> tags to build a template.
Step 4: Add two HTML elements as buttons and a <div> tag. When you click this button, you can see data in the following <div> tag:
<button id=”getInfo”>Get Info</button>
<div id =”product” style=”display: none;”></div>
Step 5: Create a jstemplate.js file
In the web/js folder, you create the jstemplate.js file and use the code below:
define ([
    "jquery"
    "mage / template"
], function ($, template) {
    "use strict";
    return function (config) {
        var product;
        $ .each (config.Data, function () {
            var productTemplate = template ('# product-template');
            product = productTemplate ({
                date: {
                    sku: this ['sku'],
                    name: this ['name'],
                    price: this ['price']
                }

            };

            $ ('# product'). append (product);
        };
        $ ("# getInfo"). click (function () {
            $ ("# product"). toggle ();
        };
    };

};
Finally, you should remember to flush cache and then check the result.
Result
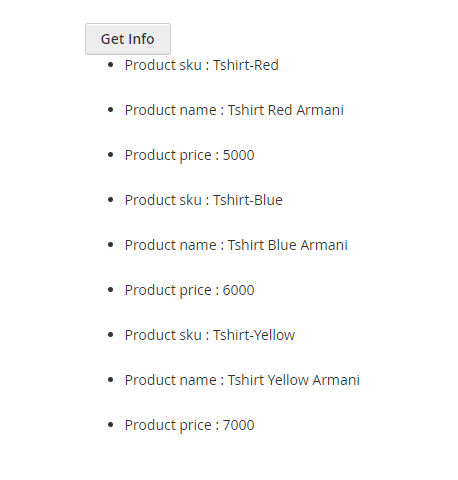
You will see a “button”. When you click this button, data will be shown as below:
When you click this button for the second time, data will be hidden.

By following all 5 above steps in this Magento 2 JavaScript tutorial, you absolutely create a Magento 2 Javascript template on your own. Please Like, Share or Comment your thought if you have any issues. We are willing to discuss with you.

