
To create a cron job in Magento 2, firstly you need to log in to ssh then enter the following command crontab -u -e.
For example: crontab -u magento_user -e.
You can see current Cron Jobs by using crontab -l. To fix a Cron Job or add a new one you can use crontab -e, then an editor pops up allowing you to edit the cron job.
write a Cron Job using command.

* * * * *  <path to php binary> <magento install dir>/bin/magento cron:run | grep -v "Ran jobs by schedule" >> <magento install dir>/var/log/magento.cron.log
* * * * *  <path to php binary> <magento install dir>/update/cron.php >> <magento install dir>/var/log/update.cron.log
* * * * *  <path to php binary> <magento install dir>/bin/magento setup:cron:run >> <magento install dir>/var/log/setup.cron.log
In which:
<path to php binary> is the absolute file system path to your PHP binary.
<magento install dir> is the directory in which you installed the Magento software, for example: /var/www/html/magento2/
The first command (magento cron:run) reindexes indexers, sends automated e-mails, generates the sitemap, and so on. Usually it’s associated with the PHP command line .ini file. The other two commands are used by the Component Manager and System Upgrade.
For example: you install Magento in /var/www/magento2, to set cron job running every 1 minute, you can follow as below.
*/1 * * * * php /var/www/html/magento2/bin/magento cron:run | grep -v "Ran jobs by schedule" >> /var/www/html/magento2/var/log/magento.cron.log
*/1 * * * * php /var/www/html/magento2/update/cron.php >> /var/www/html/magento2/var/log/update.cron.log
*/1 * * * * php /var/www/html/magento2/bin/magento setup:cron:run >> /var/www/html/magento2/var/log/setup.cron.log
To save it after all modification, click Esc then use :wq and enter. In case you don’t want save any changes as above you can use :q enter.
Setup cron jobs in Magento 2 admin
On the Magento Admin, follow the path of selection Store > Configuration > System > Cron.
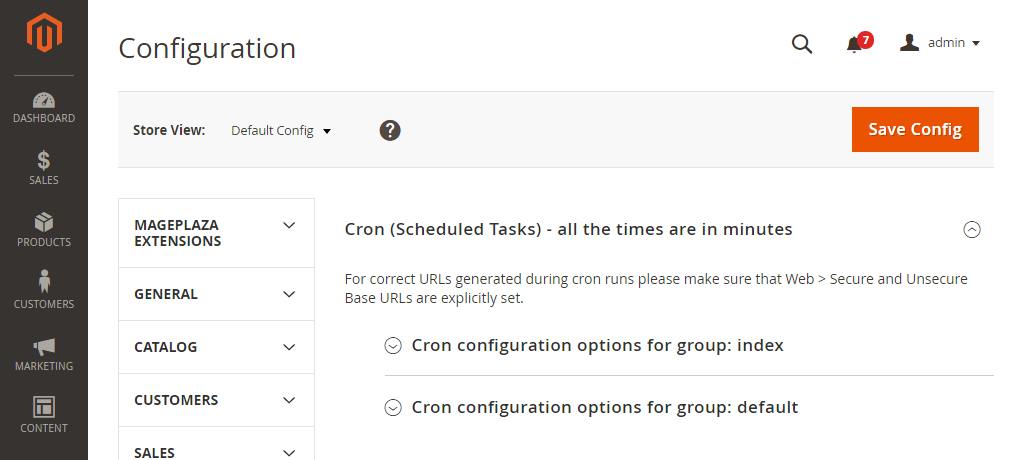
Expand the Cron configuration options for group: Index and Cron configuration options for group: Default sections and complete all information as shown below:
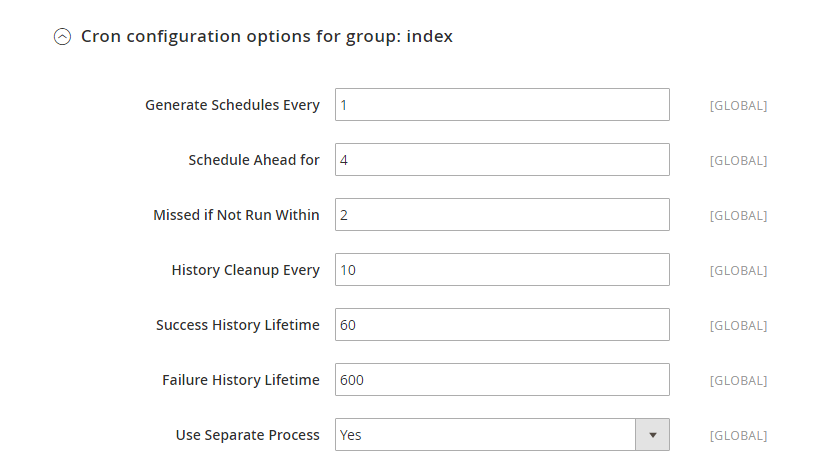
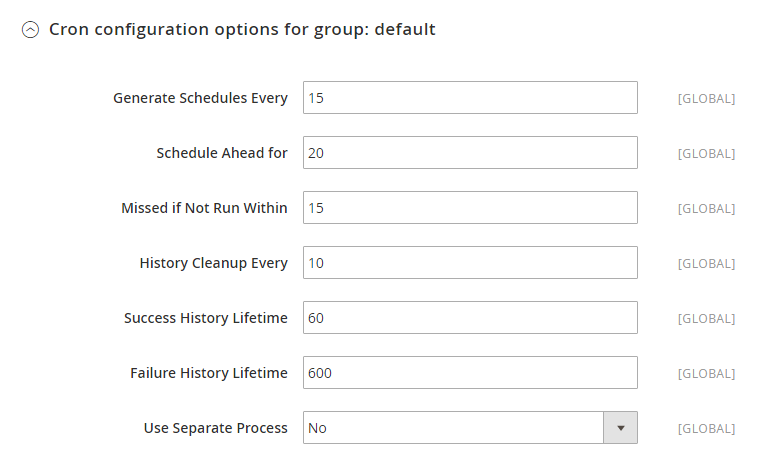
Press Save Config.
Secure cron.php to run in a browser
You have two ways of securing Magento 2 cron: using Apache or Nginx.
Secure cron with Apache
Create a password file
First, you need to create a password file. For security purposes, you shouldn’t locate your file under your web server docroot. Below we stored cron in a new directory as an example:
Enter the following commands as a user with root privileges:
$ mkdir -p /usr/local/apache/password
$ htpasswd -c /usr/local/apache/password/passwords <username>
The <username> can be the web server or another user.
Follow the prompt on your screen to create a password for the user.
In order to add another user to your password file, write the following command with root privileges:
$ htpasswd /usr/local/apache/password/passwords <username>
After creating a password file, you can choose to add user to create an authorized group, but this step is optional. The instruction for the step can be found here.
Secure cron in .htaccess
To secure cron in .htaccess, you should follow these steps:
- Log in to your Magento server as, or switch to, the Magento file system owner.
- Open <magento_root>/pub/.htaccess in a text editor.
(Because cron.php location is in the pub directory, edit .htaccess only.)
- Case 1: Cron access for one or more users. Replace the existing <Files cron.php> directive with the following:
<Files cron.php>

   AuthType Basic

   AuthName "Cron Authentication"

   AuthUserFile /usr/local/apache/password/passwords

   Require valid-user

</Files>
- Case 2: Cron access for a group. Replace the existing <Files cron.php> directive with the following:
<Files cron.php>

   AuthType Basic

   AuthName "Cron Authentication"

   AuthUserFile /usr/local/apache/password/passwords

   AuthGroupFile <path to optional group file>

   Require group <name>

</Files>
- Save the .htaccess edits.
- Verify if cron is secure.
Secure cron with Nginx
Like with Apache, you also need to create a password file and modify the Nginx configuration to reference the password file when accessing the pub/cron.php. Read the following sources to know how to set up a password file.
- How To Set Up Password Authentication with Nginx on Ubuntu 14.04 (DigitalOcean)
- Basic HTTP Authentication with nginx (howtoforge)
Secure cron in nginx.conf.sample
Magento gives an optimized sample Nginx configuration file out of the box. You can modify it to secure cron.
Add the part below to your Magento nginx.sample.conf file:
#Securing cron

location ~ cron\.php$ {

   auth_basic "Cron Authentication";

   auth_basic_user_file /etc/nginx/.htpasswd;

   try_files $uri =404;

   fastcgi_pass   fastcgi_backend;

   fastcgi_buffers 1024 4k;


   fastcgi_read_timeout 600s;

   fastcgi_connect_timeout 600s;


   fastcgi_index  index.php;

   fastcgi_param  SCRIPT_FILENAME  $document_root$fastcgi_script_name;

   include      fastcgi_params;

}
After saving the file changes, you can restart Nginx using this command:
$ systemctl restart nginx
Finally, Verify if cron is secure.
Disable cron jobs
In certain situations, you might want to manually disable cron job before you complete the maintenance task, as well as cache management, in order to prevent performance issues. Use the ece-tools CLI command cron:disable to disable all Magento cron jobs and stop any active cron processes.
The steps to disable cron jobs:
- Use SSH to log in to your environment.
- Disable cron jobs and stop all active cron processes. The command is as stated below:
./vendor/bin/ece-tools cron:disable
- Once you completed the maintenance task, make sure to enable the cron jobs again:
./vendor/bin/ece-tools cron:enable