Lead In
Table of Contents
Magento is one of the most famous e-commerce platforms that attracts tons of sellers and buyers all over the world. Knowing how to develop custom Magento extensions can provide businesses with unique functionality and an enhanced customer experience. If you are looking for a detailed guide to unlock the secrets of Magento extension development, this article is made for you!
In this article, we will give you important insights into the process of Magento extension development, focusing on the necessary steps to make your development process easier. By the end of this guide, you will have a clear roadmap for designing, developing, and deploying a Magento extension that meets your specific business needs. Don’t hesitate any longer, let’s scroll down to view details.
What is Magento Extension Development?
A Magento extension is a set of code designed to achieve a particular functionality in Magento. Technically, it consists of a collection of PHP and XML files organized in blocks, controllers, helpers, and models related to a specific business feature.
In Magento’s Developer Documentation, you may notice the term “module” used interchangeably with “extension”. While these terms are similar, a module typically refers to core code integrated into Magento, whereas an extension specifically denotes a package that can extend and customize Magento functionalities. Extensions can be distributed and installed across various stores to enhance specific functionalities.
Magento extensions can be integrated into the respective eCommerce stores such that the store is completely optimized. Magento Extension development is the best way to optimize your online Magento eCommerce store.
4 Steps To Implement Magento Extension Development
In these steps, you will be instructed how to make a customized extension by using a basic “hello world” module. But first, there are some requirements that you need to meet.
Firstly, you need to have the most up-to-date version of Magento 2 installed on your system.
Secondly, you need to disable the Magento Cache so that you don’t have to clear the cache while making changes to the extension, which will save you a lot of time in development.
Thirdly, you need to make sure that your Magento store is in developer mode so that all changes are reflected in real-time and you can easily spot any errors from Magento while doing the coding.
That’s all you need to keep in mind before you start creating a custom extension in Magento as follows:
Step 1: Establish the directory structure for the module
- In the app/code folder, create a VenderName directory.
- Within the newly-created VenderName directory, create a ModuleName directory.
- For example: VendorName could be named “BSS”, and ModuleName could be named “CustomModule”.
Step 2: Create the necessary files for the module
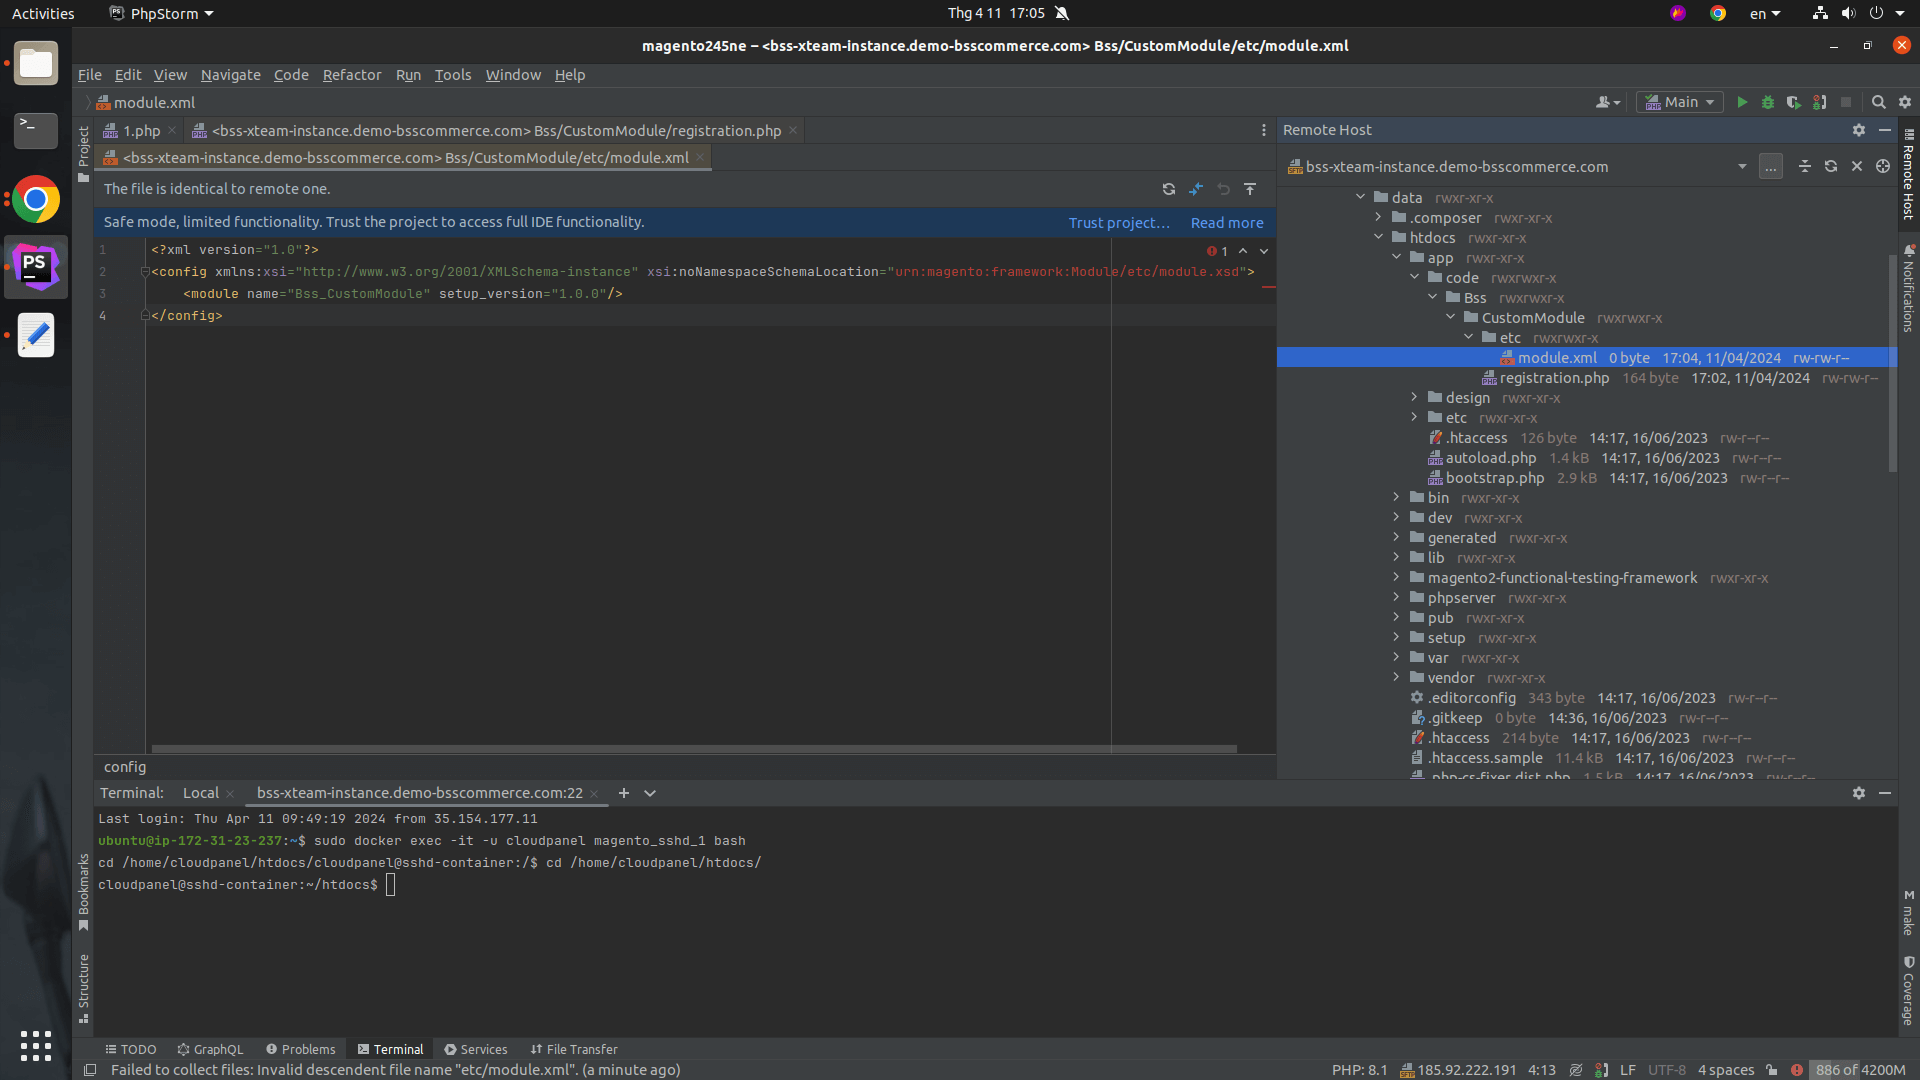
In the ModuleName directory, create a registration.php file in order to get this module/ extension registered.
<?php

\Magento\Framework\Component\ComponentRegistrar::register(

\Magento\Framework\Component\ComponentRegistrar::MODULE,

'VendorName_ModuleName',

__DIR__

);
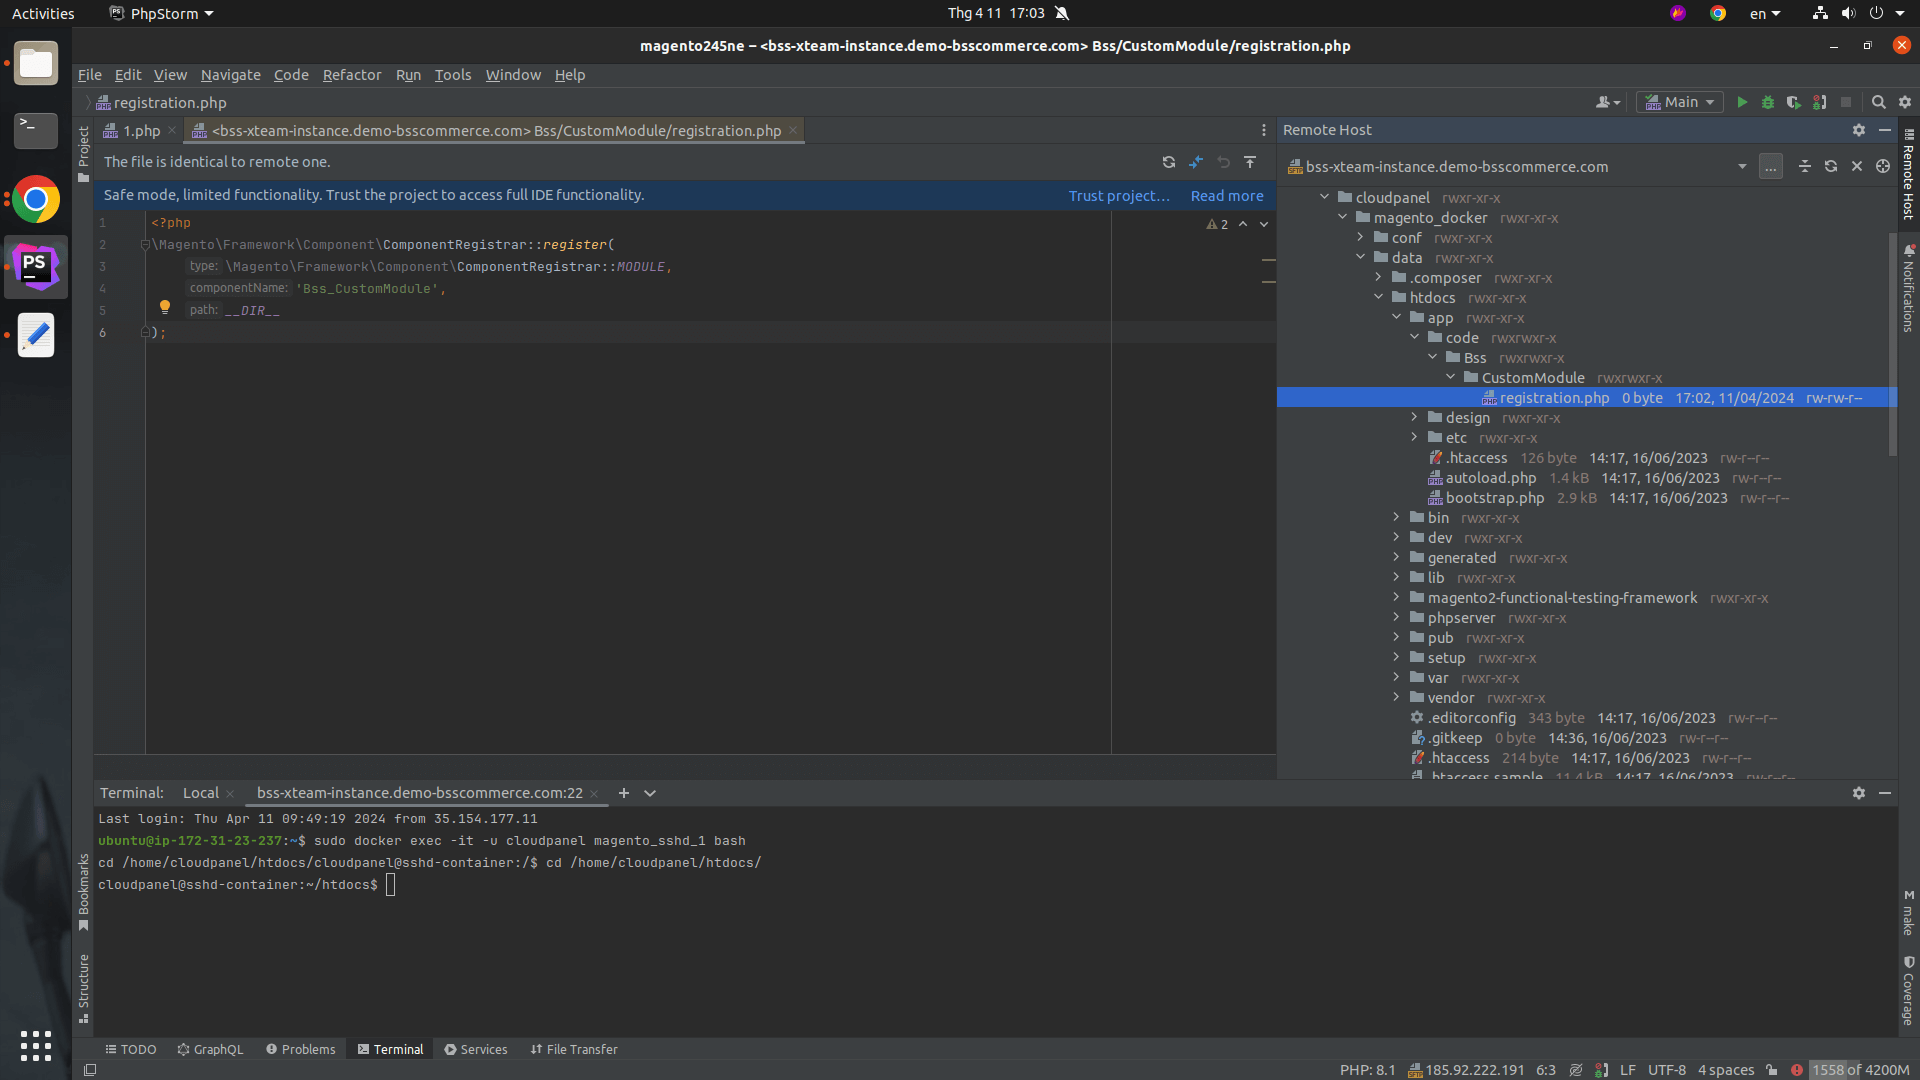
In the same ModuleName directory, create a module.xml file, which encapsulates specific information about the module, including name, version, sequence,…
<?xml version="1.0"?>

<config xmlns:xsi="http://www.w3.org/2001/XMLSchema-instance" xsi:noNamespaceSchemaLocation="urn:magento:framework:Module/etc/module.xsd">

<module name="VendorName_ModuleName" setup_version="1.0.0"/>

</config>
Step 3: Create a controller
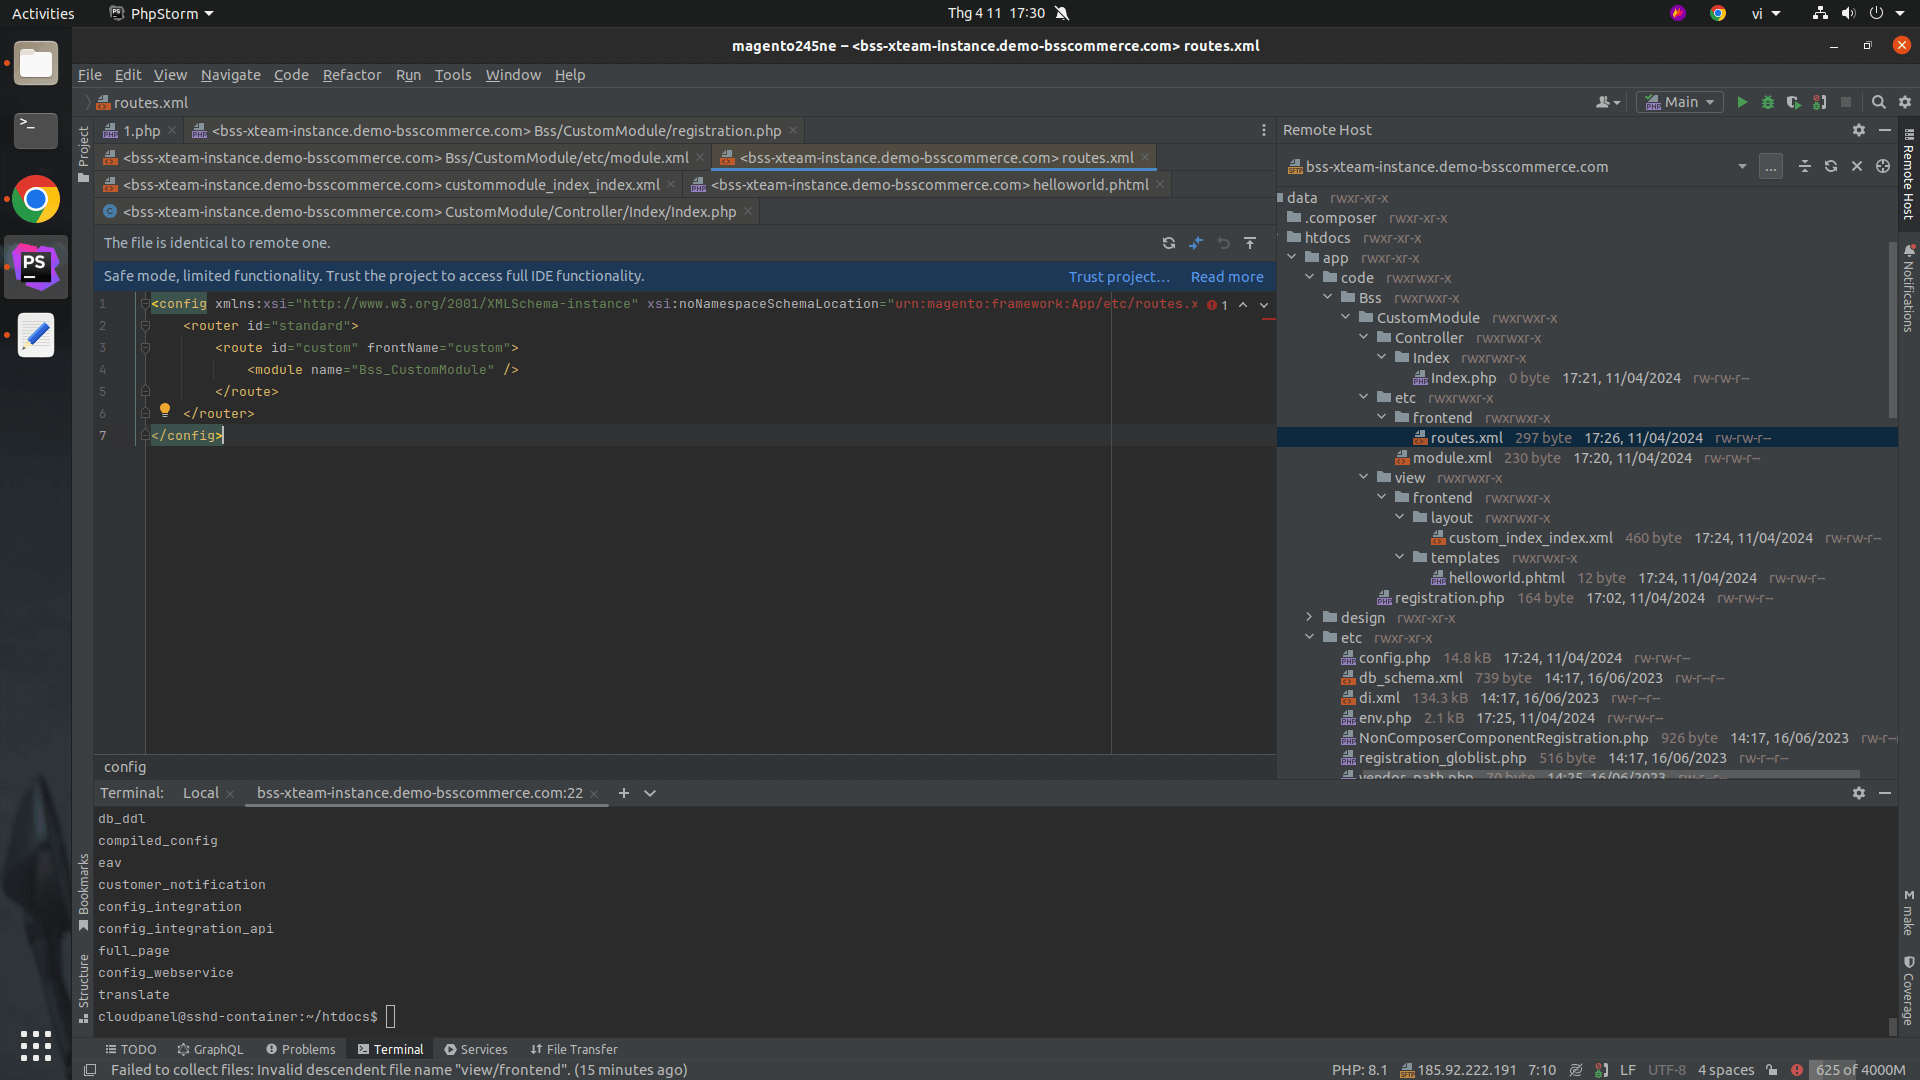
Create a routes.xml file in the Modulename directory’s frontend folder to define custom routes for the module.
Each route defines how Magento will handle specific URL requests and route them to corresponding controllers and actions.
<config xmlns:xsi="http://www.w3.org/2001/XMLSchema-instance" xsi:noNamespaceSchemaLocation="urn:magento:framework:App/etc/routes.xsd">

<router id="standard">

<route id="routeid" frontName="routename">

<module name="VendorName_ModuleName" />

</route>

</router>

</config>
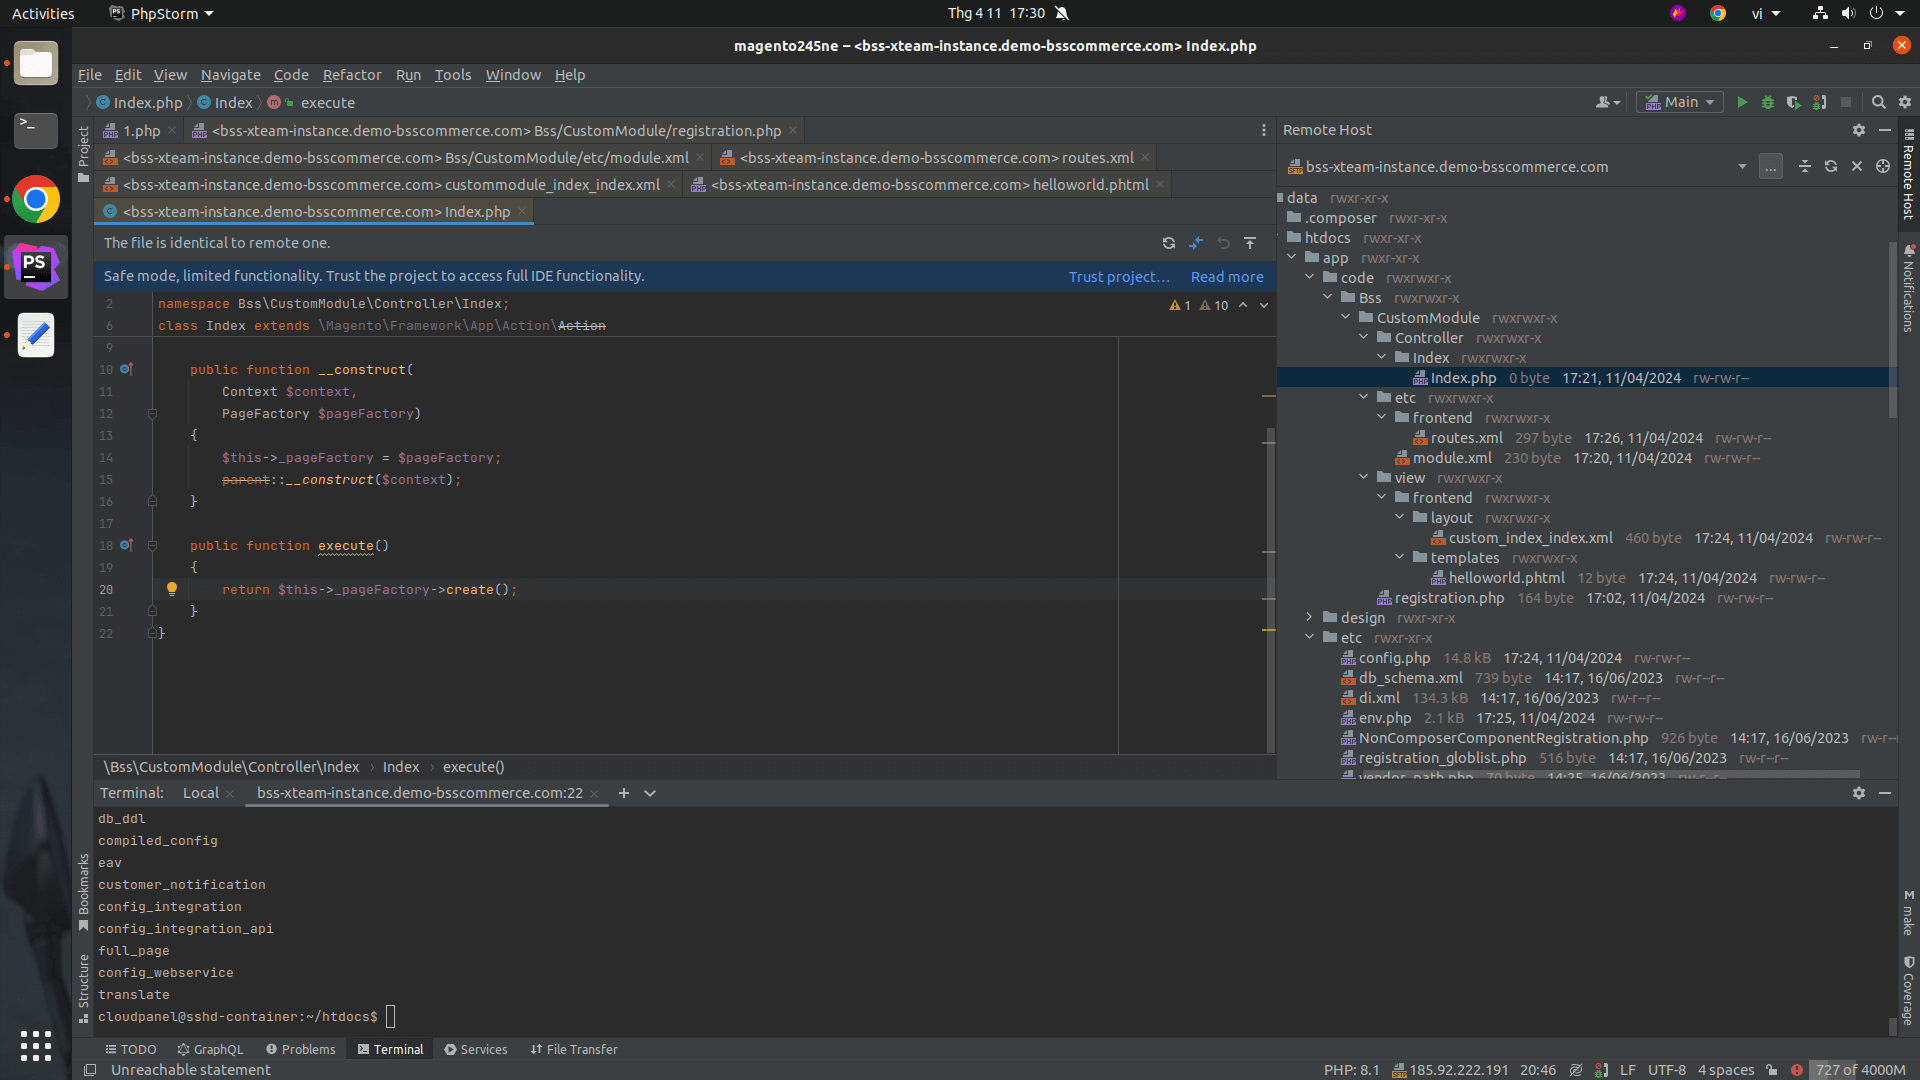
Develop the index controller file in the ModuleName/Controller/Index directory to handle user requests and route them to actions.
For example, the below controller is used to navigate to a page.
-> app/code/VendorName/ModuleName/Controller/Index/Index
<?php

namespace BSS\CustomModule\Controller\Index;

use Magento\Framework\App\Action\Context;

use Magento\Framework\View\Result\PageFactory;

class Index extends \Magento\Framework\App\Action\Action

{

/**

* @var PageFactory

*/

protected $pageFactory;

/**

* @param Context $context

* @param PageFactory $pageFactory

*/

public function __construct(

Context $context,

PageFactory $pageFactory

) {

$this->pageFactory = $pageFactory;

parent::__construct($context);

}

/**

* Returning a page created by pageFactory

*

* @return \Magento\Framework\App\ResponseInterface|\Magento\Framework\Controller\ResultInterface|\Magento\Framework\View\Result\Page

*/

public function execute()

{

return $this->pageFactory->create();

}

}
Step 4: Create a block
In Magento, a “block” is typically used to refer to a user interface element that can be used to display information or functionality on a Magento website. Specifically, a Magento “block” often consists of HTML and PHP code to render specific content or functionality.
Blocks are commonly used within Magento’s CMS (Content Management System) pages, such as the home page, product pages, category pages, etc. They can contain information such as product listings, advertising banners, contact forms, etc.
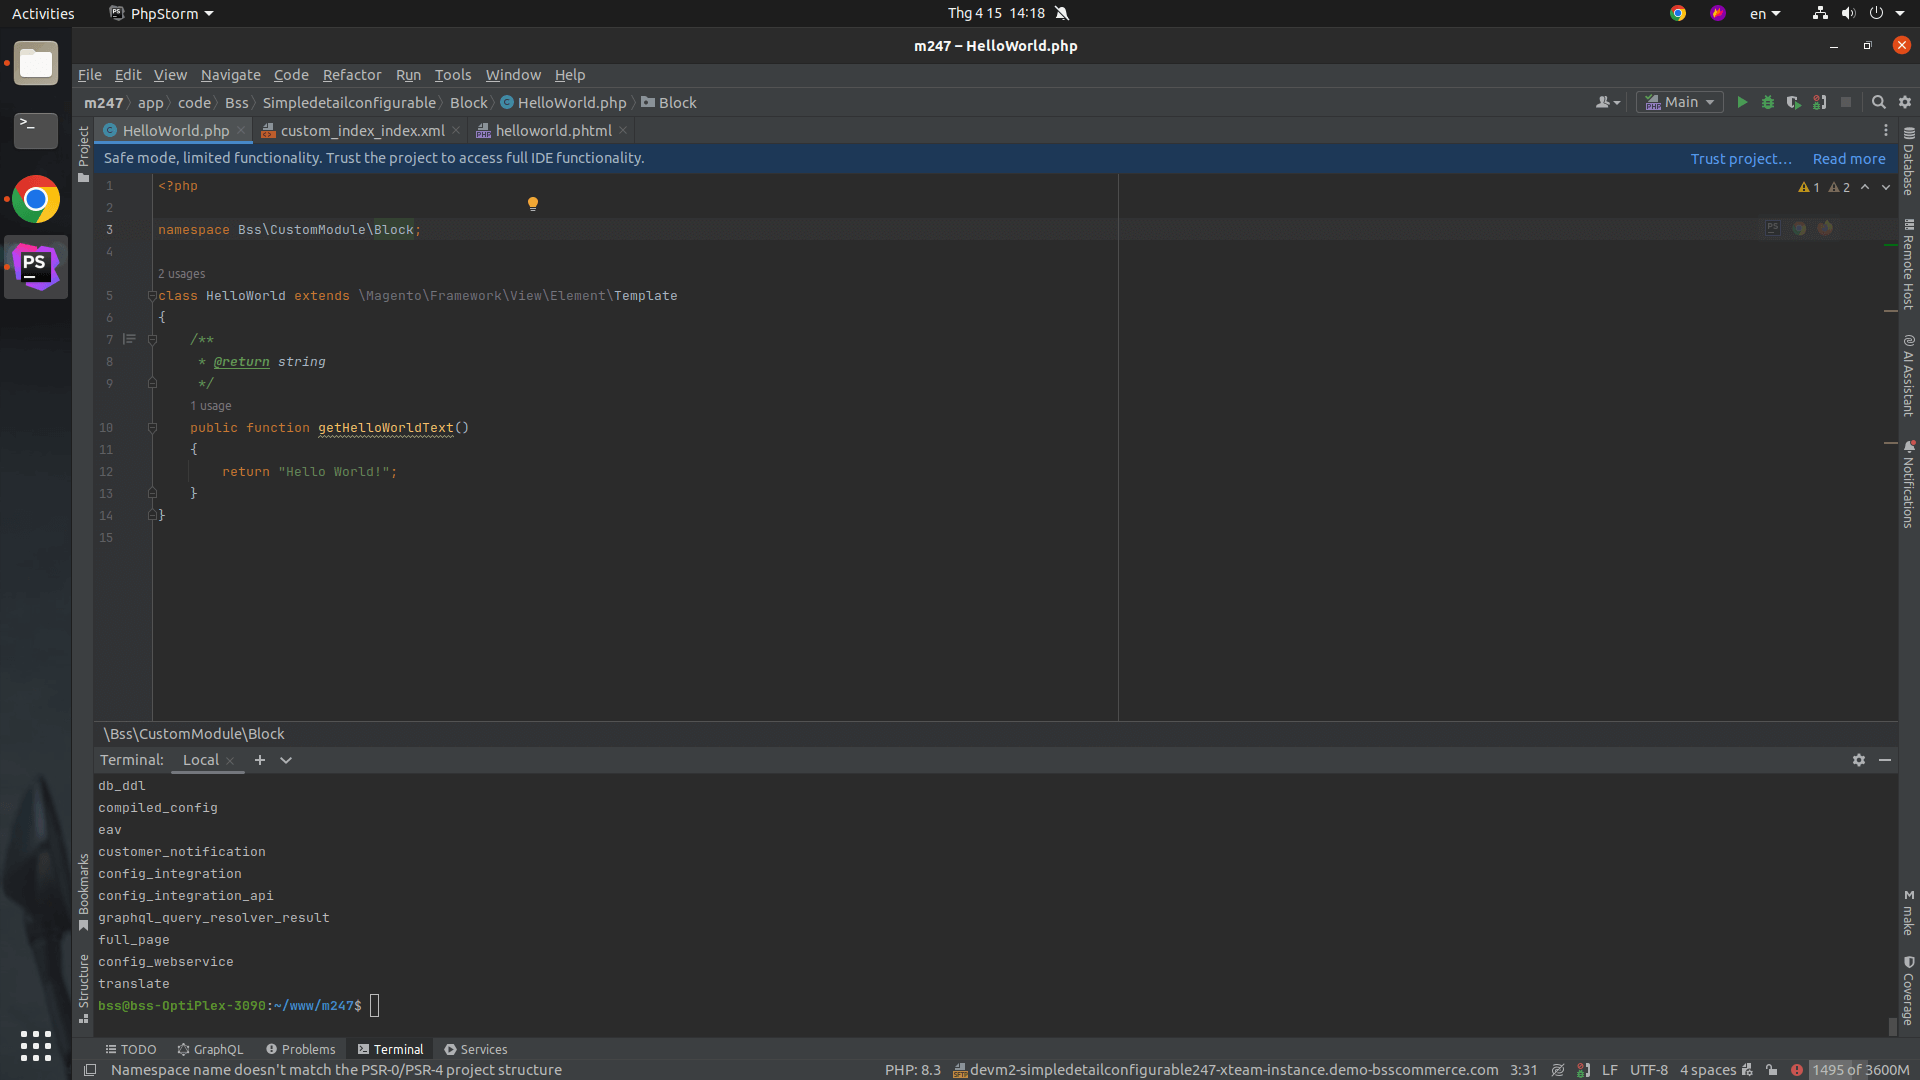
A Helloworld.php file must be created in the ModuleName/Block folder.
-> app/code/VendorName/ModuleName/Block/HelloWorld.php
<?php

namespace VendorName\ModuleName\Block;

class HelloWorld extends \Magento\Framework\View\Element\Template

{

/**

* @return string

*/

public function getHelloWorldText()

{

return "Hello World!";

}

}
Step 5: Create template and layout files
Both template and layout files are stored inside the “view folder” of the extension.
In terms of layout: Create a routeid_index_index.xml file in the frontend/layout directory within the view folder. This defines the structure and arrangement of elements on the website. Specifically, layout files determine how Magento will display blocks, titles, footers, product information, categories, and other sections of the website.
-> app/code/VendorName/ModuleName/view/frontend/layout/routeid_index_index.xml
<?xml version="1.0"?>

<page xmlns:xsi="http://www.w3.org/2001/XMLSchema-instance"

xsi:noNamespaceSchemaLocation="urn:magento:framework:View/Layout/etc/page_configuration.xsd">

<body>

<referenceContainer name="content">

<block class="BSS\CustomModule\Block\HelloWorld"

name="name_layout"

template="VendorName_ModuleName::helloworld.phtml" />

</referenceContainer>

</body>

</page>
In terms of template: It contains HTML and PHP code to display the content and interface of the website. Template files typically contain the structure and formatting of elements on the web page such as titles, footers, product information, products, etc.
-> app/code/VendorName/ModuleName/view/frontend/templates/helloworld.phtml
<?php

/** @var \VendorName\ModuleName\Block\HelloWorld $block */

$block->getHelloWorldText();
Step 6: Run the commands
php bin/magento setup:upgrade apply any database schema and data changes required by module or extension installations, updates, or removals
- php bin/magento setup:di:compile process and is used to compile Magento classes and dependencies to increase the system’s performance
- php bin/magento cache:clean is used to clean (clear) the cache in Magento.
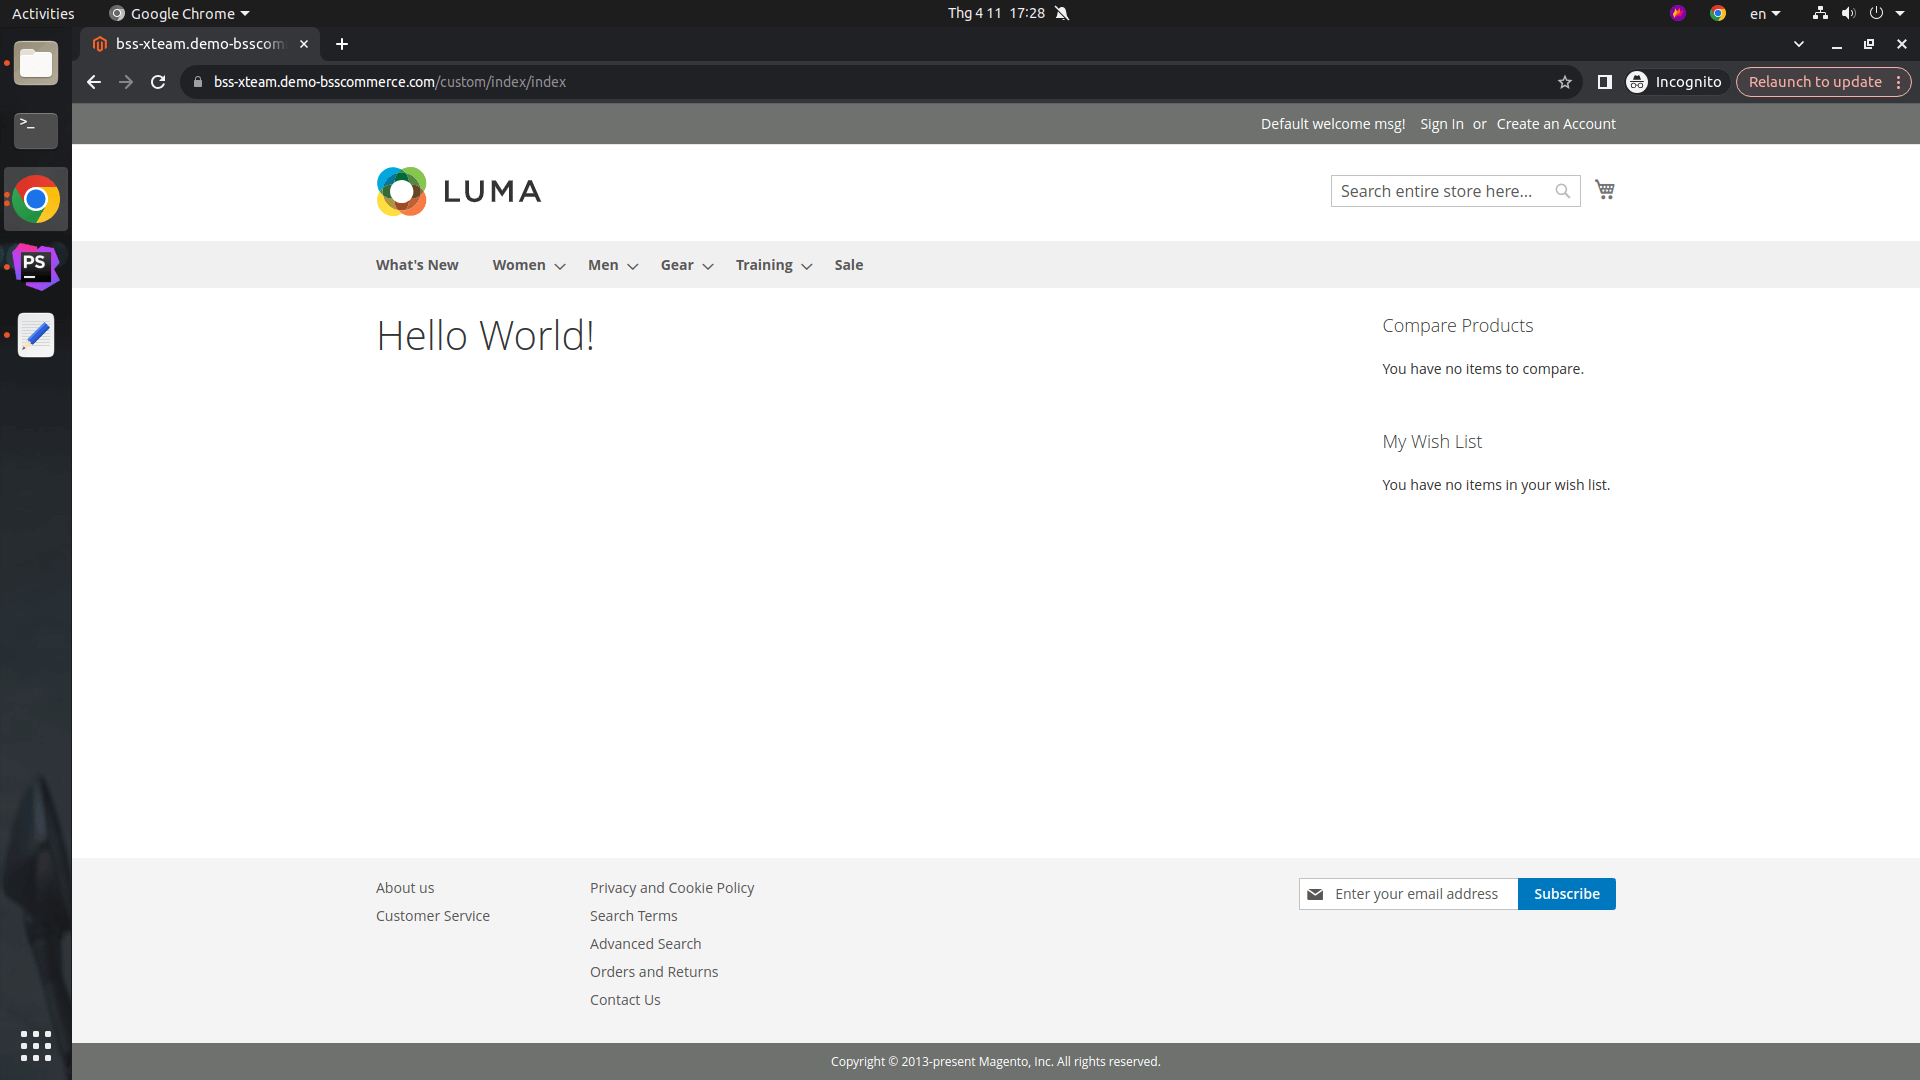
And that’s all. To view the outcome, simply open the following URL in your browser: <base_url>/routeid/index/index. Upon doing so, a page displaying “Hello World” will be visible. Make sure to use the codes accurately.
What Are The Benefits Of Magento Extension Development?
Integrate With Social Platforms
One of the most significant advantages of Magento extension is social media integration. This is a great way to increase customer engagement, as social media is one of the most powerful tools. It allows you to build your brand, interact with customers, and increase awareness among them about your products or services.
Not only will social media integration of Magento extension help you build relationships with your current customers, but it will also attract new ones. Furthermore, by monitoring how well social media pages are doing on your website, you can take steps to improve them.
Track Delivery Dates And Times
Magento’s shipping extensions are an excellent tool for monitoring delivery dates and times. They also make it easier for customers to keep track of what’s happening with their orders. Without a shipping extension, it is hard to know when an order is going to be delivered or how long it will take.
In contrast, with a shipping extension, you can see all the delivery details in one place and even set alerts so customers can be notified when their items are ready for pickup or shipment. This makes it easier to manage your business no matter where you are.
Expand Customer Base
Magento extensions are a great way to increase your capabilities and reach. They give you the ability to extend the functionality of current features, alter them, and combine them with other services in ways that are not feasible with the basic Magento platform. Along with a reliable swiss VPN, Magento Commerce extensions can help you reach a wider audience by keeping your website updated even while you’re away.
Improve User Experience
This is one of the main advantages of implementing Magento extension development.
With customers conducting their shopping journeys across multiple devices, an eCommerce site will want its storefront and web pages to fit whatever screen they are being viewed and with the correct resolution needed. Magento’s responsive web design ensures that your eCommerce site responds to customers’ preferences automatically.
And not only does Magento cater to customers’ preferences regarding the digital devices they use (thanks to its above-mentioned automatic responsiveness), but Magento also can operate multilingually and in numerous currencies, making it the choice for international developers across the globe. In addition, Magento can automatically detect a user’s location and switch between currency and language depending on the customer’s location.
Increase Utilities
With the correct tools, Magento gives you an easy approach to improve your business. You have access to numerous extensions for your convenience. Among them are a few of them:
- Product Extension: With this extension, you may upload pictures of various products or alter the product layout. You can also include other details like the price, the quantity, and so on.
- Payment Extension: With this extension, you can take payments from clients by bank transfers, credit cards, and other methods. Additionally, it supports a number of currencies, making it simple to set up various rates for other nations.
- CRM Extension: With this extension, it will be easier for you to track customer data like name and address. Additionally, it gives you real-time updates on orders and payments, which facilitates efficient business management by enabling you to share relevant data with other departments, such as the delivery and sales teams.
Bottom Line
Hopefully, with the above useful information, this post has given you valuable guidelines on how to conduct Magento extension development for your business. It’s also important to note that developing a Magento extension from scratch is not always time and cost-effective. If you find Magento extension development difficult and are looking for a ready-to-use solution, you can check out our top-class Magento 2 development services.
BSS Commerce is one of the leading Magento extension providers and web development services in the world. With experienced and certified Magento developers, we commit to bring high-quality products and services to optimize your business effectively.
As a globally trusted partner for full-service eCommerce solutions, we possess 4 unique core strengths that define us.
Firstly, with over 11 years of experience in successfully executing numerous projects for renowned brands across more than 150 countries worldwide, we possess extensive expertise, a deep understanding of markets, and comprehensive business knowledge across various industries and business models. This enables us to assist you in developing the most effective and efficient eCommerce solution suited to your needs.
Secondly, our proficient testing team, recognized as an “ISTQB Platinum Partner”, represents the pinnacle of testing proficiency that a development agency can attain at the national level.
Thirdly, at BSS Commerce, we prioritize Integrity as a core value. Once project scope, pricing, and timeline are established, you can trust that there will be minimal to no alterations in the agreed terms, and any changes will be openly communicated, ensuring complete transparency throughout the project execution.
Finally, our unparalleled commitment to customer satisfaction has earned us the trust of thousands of clients globally, reflected in our impressive 90% rate of recurring customers. Additionally, our Time-zone Flexibility allows us to fulfill urgent requirements promptly with swift deliverables.
CONTACT NOW to let us know your problems. We are willing to support you every time.

