If you’re managing a store on the Magento 2 platform, offering more payment methods gives your customers more choices when they check out, which can make their shopping experience better and reduce the chances of them leaving their cart without completing the purchase. Furthermore, having a variety of payment methods can help your store appeal to customers worldwide.
In this post, BSS Commerce will discuss 5 steps to create custom payment method in Magento 2 and how to test if the new payment method is working correctly. With this guide, you can easily and quickly create new customer payment methods for your Magento store. Now, let’s get started.
Why Should You Have Multiple Payment Methods in Magento 2?
Table of Contents
Here are some reasons why you should have multiple payment methods in Magento 2:
#1. Customer convenience
Different customers have different preferences in choosing payment method to checkout. Some may prefer to pay with a credit card, while others may prefer a digital wallet or a bank transfer. Through offering a variety of payment methods, you can cater to the diverse preferences of your customers, making their shopping experience more convenient and enjoyable.

#2. Increased sales
Offering multiple custom payment method Magento 2 can potentially lead to increased sales. If a customer reaches the checkout page and doesn’t see their preferred payment method, they may abandon their cart, resulting in a lost sale. In this way, you can reduce cart abandonment and increase your conversion rate effectively.
#3. International sales
If your Magento 2 store caters to customers from different countries, creating different Magento custom payment gateways becomes even more crucial. Payment preferences can vary greatly from one country to another. For instance, while credit cards may be popular in one country, customers in another country might prefer to use digital wallets or bank transfers.
>>> Explore now: 10 Best Payment Gateway for Magento 2 Store
#4. Risk management
Having multiple payment methods can also serve as a risk management strategy. If there’s an issue with one payment method (for example, a service outage with a payment gateway), customers can still make purchases using a different method.
#5. Competitive advantage
Offering multiple payment methods can give you a competitive advantage over other online stores that offer fewer options. Customers value convenience and are likely to choose a store that offers their preferred payment method.
Therefore, understanding your customers and their payment preferences is crucial. By offering a wide range of payment options, you can effectively cater to their needs and boost your sales. In the next section, BSS Commerce will provide details about Magento 2 create new payment method with five easy steps.
>>> Don’t miss out on our step-by-step Magento 2 tutorial <<< Click to transform your eCommerce site and boost your business!
Create Custom Payment Method in Magento 2: Full Steps Guide
To add custom payment method Magento 2 for your store during the checkout process, you must follow these instructions:
Step 1. Create the .js file implementing the component (payment method renderer)
To ensure compatibility, upgradability, and easy maintenance, it is important to implement your payment method renderer as a UI component. Instead of modifying the default application code, it is recommended to add your customizations in a separate module that is easier for management and updates in the future.
To ensure that your checkout customization is applied correctly, your custom module should have a dependency on the Magento_Checkout module. This can be specified in the module’s composer.json file.
When creating your custom module, avoid using “Ui” in the module name. This is because the “%Vendor%_Ui” notation, which is required for specifying paths, may cause issues.
In your custom module directory, create the .js file for the payment method renderer. This file should be located under the <your_module_dir>/view/frontend/web/js/view/ directory. For example, in the case of payment methods renderers in the modules, they are stored in the <Magento_module_dir>/view/frontend/web/js/view/payment/method-renderer/ directory.
Typically, your component will extend the default payment method component (default payment method renderer) implemented in the <Magento_Checkout_module_dir>/view/frontend/web/js/view/payment/default.js file. The Default component’s methods can be found in the following table:
| Method |
Description |
| getCode():string | Returns the code of the payment method. |
| getData():object | Returns an object with the payment data to be sent to the server on selecting a payment method and/or an extension (by pressing the Continue button). It must contain data according to \Magento\Quote\Api\Data\PaymentInterface. All the payment information except the method code and purchase order number is passed in the additional_data field. |
| placeOrder():bool | Place an order if all validations are passed. |
| selectPaymentMethod():bool | Adds information about the payment method selected by the user to the Quote JS object. |
| isChecked():string | Returns the code of the selected payment method. |
| isRadioButtonVisible():bool | Returns true if only one payment method is available. |
| getTitle():string | Returns the payment method title. |
| validate():bool | Used in the placeOrder() method. So you can override validate() in your module, and this validation will be performed in the scope of placeOrder(). |
| getBillingAddressFormName():string | Gets the unique billing address name. |
| disposeSubscriptions() | Terminates the object’s subscription. |
The payment method renderer is generally perceived as follows:
define(
[
'Magento_Checkout/js/view/payment/default'
],
function (Component) {
'use strict';
return Component.extend({
defaults: {
template: '%path to template%'
},
// add required logic here
});
}
);
In addition, if you need to provide credit card information for your payment method, you can utilize the credit card form implemented in the application renderer: <Magento_Payment_module_dir>/view/frontend/web/js/view/payment/cc-form.js. This renderer extends the default payment renderer and includes its own set of methods.
| Method | Description |
| getData():object | Returns an object with the payment data to be sent to the server on selecting a payment method and/or an extension (on pressing Continue button). It must contain data according to \Magento\Quote\Api\Data\PaymentInterface. All the payment information except the method code and purchase order number is passed in the additional_data field. Adds credit card data (type, issue date, number, CVV). |
| getCcAvailableTypes():array | Returns the list of available credit card types. |
| getIcons():bool | Returns links to the images for available credit card types. |
| getCcMonths():object | Retrieves the month of the credit card expiration date. |
| getCcYears():object | Retrieves the year of the credit card expiration date. |
| hasVerification():bool | A flag that shows if the credit card CVV number is required for this payment. |
| hasSsCardType():bool | Returns true if the Solo and Switch (Maestro) card types are available. |
| getCvvImageUrl():string | Retrieves the CVV tooltip image URL. |
| getCvvImageHtml():string | Retrieves the CVV tooltip image HTML. |
| getSsStartYears():object | Solo or Switch (Maestro) card start year. |
Access the system config data
To access data that cannot be defined in layout configuration, JS components, or templates directly, such as data from the application system config, your payment method may need to retrieve information from the window.checkoutConfig variable stored in the root checkout template.
To achieve this, the payment method or a group of payment methods must implement the \Magento\Checkout\Model\ConfigProviderInterface interface. The class implementing this interface should then be injected into the composite config provider through DI frontend configuration. Below are examples of code snippets demonstrating this process.
Here is an example of a .php file that implements \Magento\Checkout\Model\ConfigProviderInterface:
class MyCustomPaymentConfigProvider implements \Magento\Checkout\Model\ConfigProviderInterface
{...
public function getConfig()
{
return [
// 'key' => 'value' pairs of configuration
];
}
...
}
Below is the DI configuration file for a custom module located at <your_module_dir>/etc/frontend/di.xml:
...
<type name="Magento\Checkout\Model\CompositeConfigProvider">
<arguments>
<argument name="configProviders" xsi:type="array">
...
<item name="%Custom_provider_name%" xsi:type="object">MyCustomPaymentConfigProvider</item>
...
</argument>
</arguments>
...
</type>
Add other payment-related features
Payment-related functionalities such as reward points and gift registry can be integrated into the Review and Payment Information checkout step. These features should be developed as UI components and can be positioned either before or after the payment methods list.
Step 2. Create the .js component that registers the renderer
Create the .js UI component in your custom module directory to add the payment method renderer to the renderers list. This component should be placed under the <your_module_dir>/view/frontend/web/js/view/ directory. For instance, in the modules, the payment methods renderers are stored in the <Magento_module_dir>/view/frontend/web/js/view/payment/ directory.
Make sure that the file content resembles the following:
define(
[
'uiComponent',
'Magento_Checkout/js/model/payment/renderer-list'
],
function (
Component,
rendererList
) {
'use strict';
rendererList.push(
{
type: '%payment_method_code%',
component: '%js_renderer_component%'
},
// other payment method renderers if required
);
/** Add view logic here if needed */
return Component.extend({});
}
);
NOTE: If your module includes multiple payment methods, you have the option to register the renderers for all payment methods in a single file.
Step 3. Create a template for the payment method renderer
In the custom module directory, establish a new <your_module_dir>/view/frontend/web/template/<your_template>.html document. The template is capable of incorporating Knockout JS syntax. A model .html template can be located in various modules that implement payment methods, such as the Paypal module.
The designated template for displaying the Paypal Express payment method during checkout can be found at <Magento_Paypal_module_dir>/frontend/web/template/payment/paypal-express.html.
Step 4. Declare the payment method in layout
To create a new <your_module_dir>/view/frontend/layout/checkout_index_index.xml file, navigate to your custom module directory. Once there, proceed to add the following content to the file:
<page xmlns:xsi="http://www.w3.org/2001/XMLSchema-instance" xsi:noNamespaceSchemaLocation="urn:magento:framework:View/Layout/etc/page_configuration.xsd">
<body>
<referenceBlock name="checkout.root">
<arguments>
<argument name="jsLayout" xsi:type="array">
<item name="components" xsi:type="array">
<item name="checkout" xsi:type="array">
<item name="children" xsi:type="array">
<item name="steps" xsi:type="array">
<item name="children" xsi:type="array">
<item name="billing-step" xsi:type="array">
<item name="component" xsi:type="string">uiComponent</item>
<item name="children" xsi:type="array">
<item name="payment" xsi:type="array">
<item name="children" xsi:type="array">
<!-- Declare additional before payment components. START -->
<item name="beforeMethods" xsi:type="array">
<item name="component" xsi:type="string">uiComponent</item>
<item name="displayArea" xsi:type="string">beforeMethods</item>
<item name="children" xsi:type="array">
<item name="%your_feature_name%" xsi:type="array">
<item name="component" xsi:type="string">%path/to/your/feature_js_component%</item>
</item>
</item>
</item>
<!-- Declare additional before payment components. END -->
<!-- Declare the payment method (the component that registrates in the list). START -->
<item name="renders" xsi:type="array">
<item name="children" xsi:type="array">
<item name="%group name of the payment methods%" xsi:type="array">
<!-- Example of value: Magento_Paypal/view/frontend/web/js/view/payment-->
<item name="component" xsi:type="string">%component_that_registers_payment_renderer%</item>
<item name="methods" xsi:type="array">
<!-- Add this if your payment method requires entering a billing address-->
<item name="%payment_method_code%" xsi:type="array">
<item name="isBillingAddressRequired" xsi:type="boolean">true</item>
</item>
</item>
</item>
</item>
</item>
<!-- Declare the payment method (the component that registrates in the list). END -->
<!-- Declare additional after payment components. START -->
<item name="afterMethods" xsi:type="array">
<item name="component" xsi:type="string">uiComponent</item>
<item name="displayArea" xsi:type="string">afterMethods</item>
<item name="children" xsi:type="array">
<item name="%your_feature_name%" xsi:type="array">
<item name="component" xsi:type="string">%path/to/your/feature_js_component%</item>
</item>
</item>
</item>
<!-- Declare additional after payment components. END -->
</item>
</item>
</item>
</item>
</item>
</item>
</item>
</item>
</item>
</argument>
</arguments>
</referenceBlock>
</body>
</page>
Step 5. Run CLI Commands
In production mode, it is necessary to follow these steps, which are not applicable in development mode:
1. Compile the code: bin/magento setup:di:compile
2. Deploy the static contents: bin/magento setup:static-content:deploy
3. Clean the cache: bin/magento cache:clean
>>> How to Set Up Magento 2 Payment Methods– For mastering in setting up seamless payment solusions that match your business needs!
How Do I Test If New Payment Method in Magento 2 is Working Correctly?
Conducting thorough testing of a new custom payment method Magento 2 is crucial to guaranteeing its proper functionality and offering a seamless checkout process for your customers. Below are the basic procedures for testing a new custom payment method:
1. Enable the payment method
First, ensure that the payment method is enabled within your Magento 2 administrative dashboard. Access this by going to Stores > Configuration > Sales > Payment Methods. Locate your designated payment method and verify that it is configured as “Enabled”.
2. Configure test mode
If your payment method is compatible, you can activate the test or sandbox mode, which permits you to conduct transactions without any actual funds being transferred.
3. Place a test order
Visit your store as a customer, place an item in the shopping cart, and proceed to the checkout. Choose a new payment method for the purchase.
4. Verify the order in admin panel
Once you have completed your order, return to the admin panel and proceed to Sales > Orders. Locate your test order and verify that the status matches your expectations, such as “Processing” or “Complete”. In addition, ensure that the payment information is accurately displayed.
5. Check customer experience
Please revisit the customer account on the front end and verify if the order is displayed accurately in the order history.
Therefore, testing a custom payment method Magento 2 is a crucial step to ensuring the smooth operation of your online store. Thanks to these tips, you can identify and resolve any issues before your customers encounter them, thereby providing a seamless shopping experience.
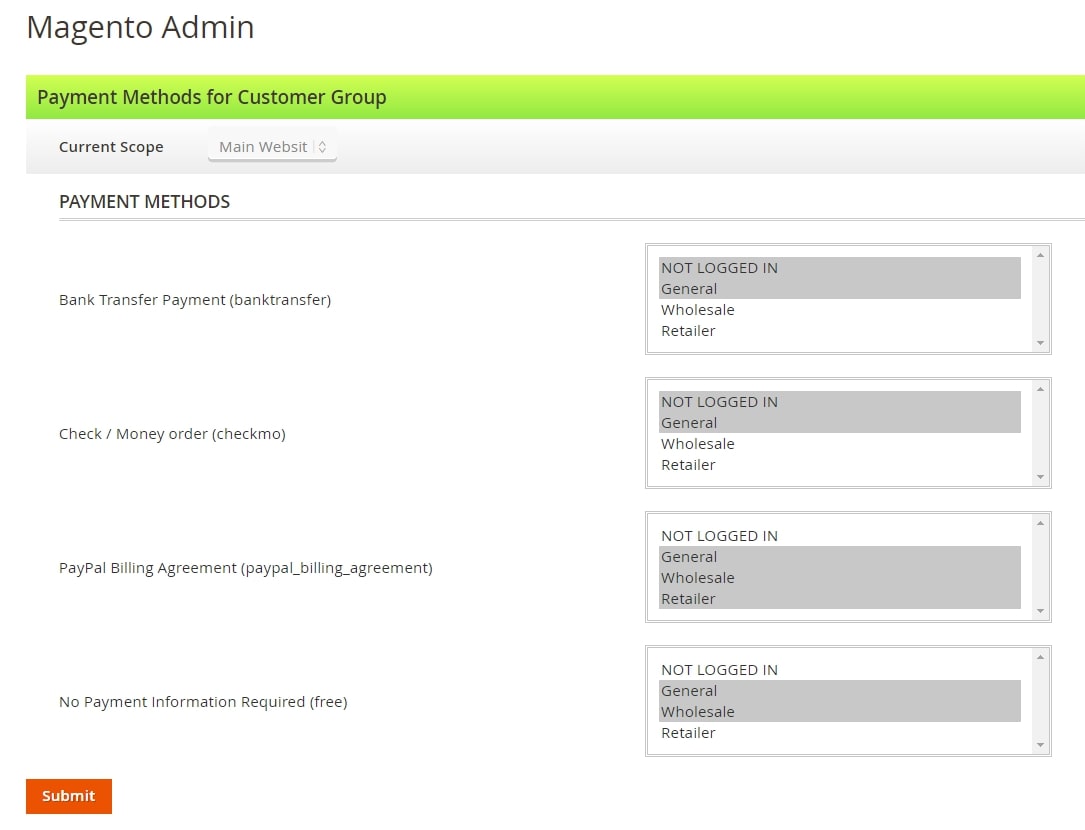
In addition, if you have any requests about limiting the new payment method to each customer group, the Magento 2 Payment Method per Customer Group extension by BSS Commerce is a trustworthy option.

The Magento 2 Payment & Shipping by Customer Group extension offers a useful feature that allows the admin to customize the shipping and payment methods displayed to each customer group. This Magento 2 module serves as the foundation for improving the checkout process and admin management by providing different options for shipping and payment:
- Enables the restriction of shipping methods for specific customer groups
- Allows for the restriction of payment methods for particular customer groups
- Seamlessly integrates with default Magento payment methods based on customer groups
- Compatible with popular integrated payment methods such as Braintree, iDEAL, and Giropay via Stripe
Here are tutorials to install and uninstall this extension:
- Install Extension Magento 2 Clearly: A Step-by-Step Guide
- How to Uninstall Magento 2 Module – 3 Simple Solutions
Wrapping Up – Custom Payment Method Magento 2
In general, adding new payment methods in Magento 2 is an essential process for establishing a successful and user-friendly online store. Thanks to the addition of multiple payment options, you can accommodate a broader spectrum of customer preferences, potentially boosting sales and customer satisfaction. Each customer has their own unique payment preferences when shopping online. By incorporating and testing diverse payment methods, you can ensure that your store is adaptable and responsive to these preferences.
BSS Commerce hopes that the content provided in this post is useful for you and will help you create custom payment method in Magento 2. Lastly, don’t forget to visit our site to explore the latest information about tips and tricks for the Magento store. Need extra help? Reach out to our Magento eCommerce development services for expert guidance.
>>> Now let’s move on to How to Magento 2 Create Custom Shipping Method

