
It has gone the time of plain text with monotone logos. Flooded by the abundance of camera phones and the popularity of elaborating advertisements allow readers demand more worthy and eye-catching content in email news alert, response emails or pieces of advertisements.
Email headers or head banners are key tools that merchants need to immediately learn hard enough to exploit effectively. If it works well, your customers will be reached and engaged in your stores. Any negligence will lead to poor performance and less attracting, even information shortage. In particularly, admins can set distinguished email header templates to assign to matching mailing situations in Magento 2.
This blog post helps readers to approach how to customize the email headers using Admin Panel, and strike out the best of them.
See this video tutorial to accomplish steps to customize the header:
Find Email Templates on Admin Sidebar
Table of Contents
In the Admin sidebar, look for Marketing. Navigate to Communication > Email templates right adjacent to the Marketing and below the Communication
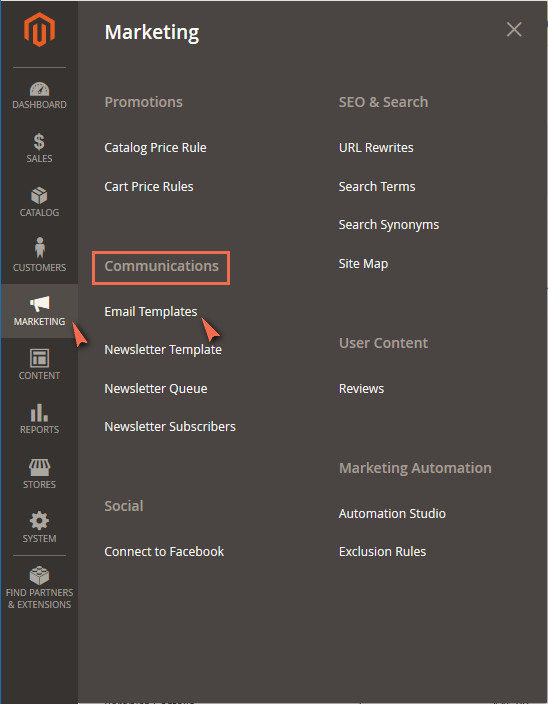
Select Email Templates in Admin Sidebar
Create new header template
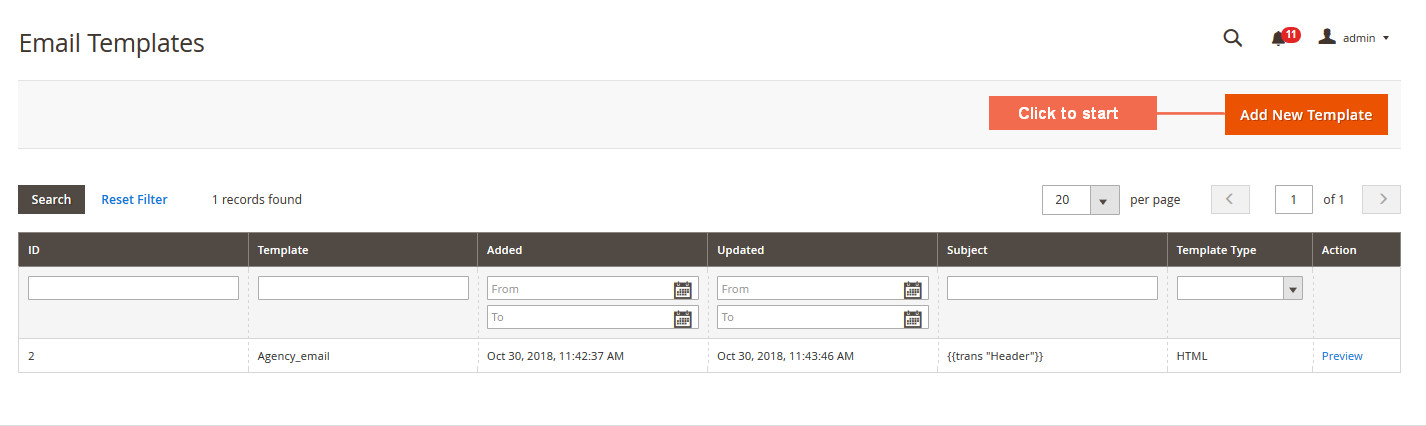
It navigates to email templates management. Find here list of your email templates with the created date and modified date. In order to customize Magento header email, you need to click to Add New Template.
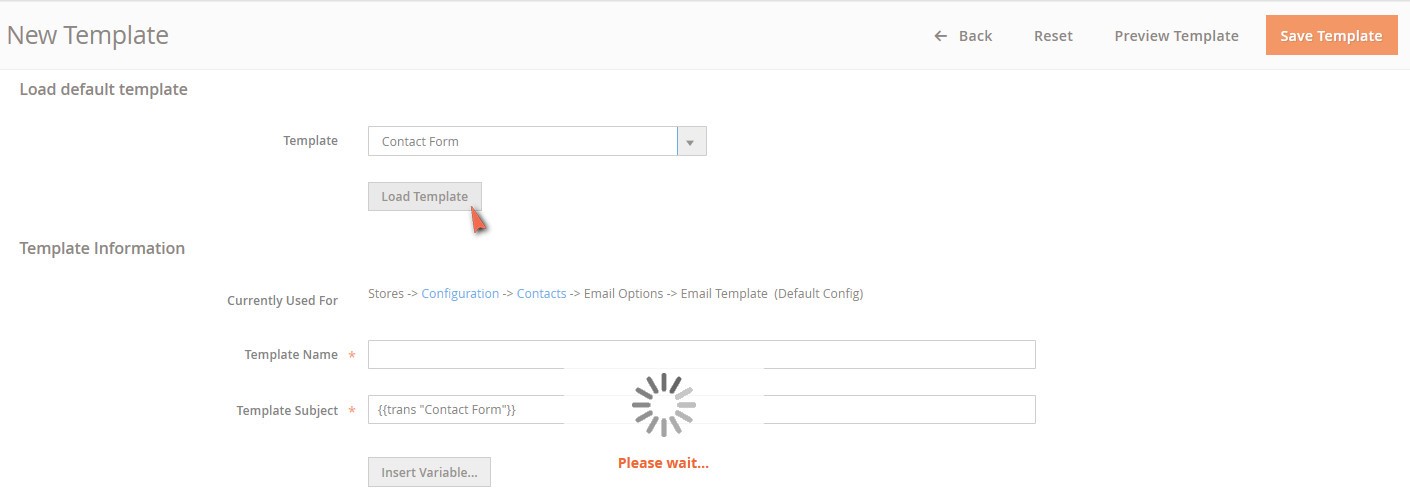
Find Header in Template and Load Template
Your current window moves to New Template. Pay attention to the first section Load Default Template. At the end of Template, click at the arrow to see the dropdown menu containing Header.
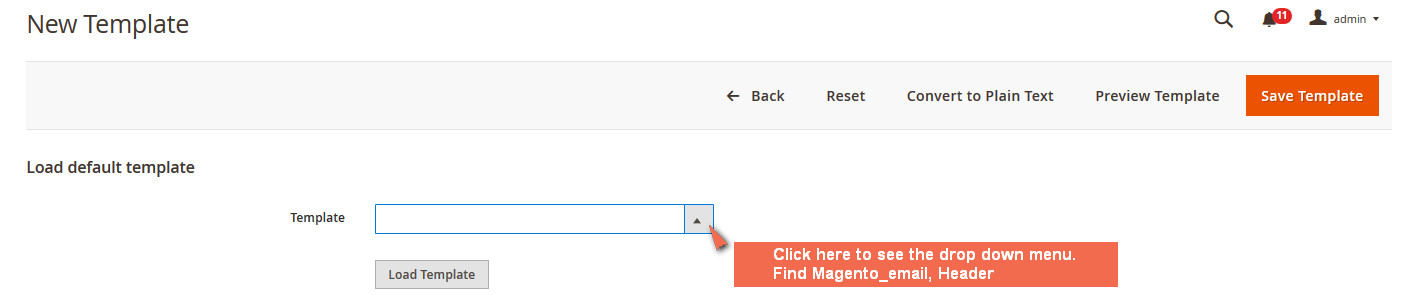
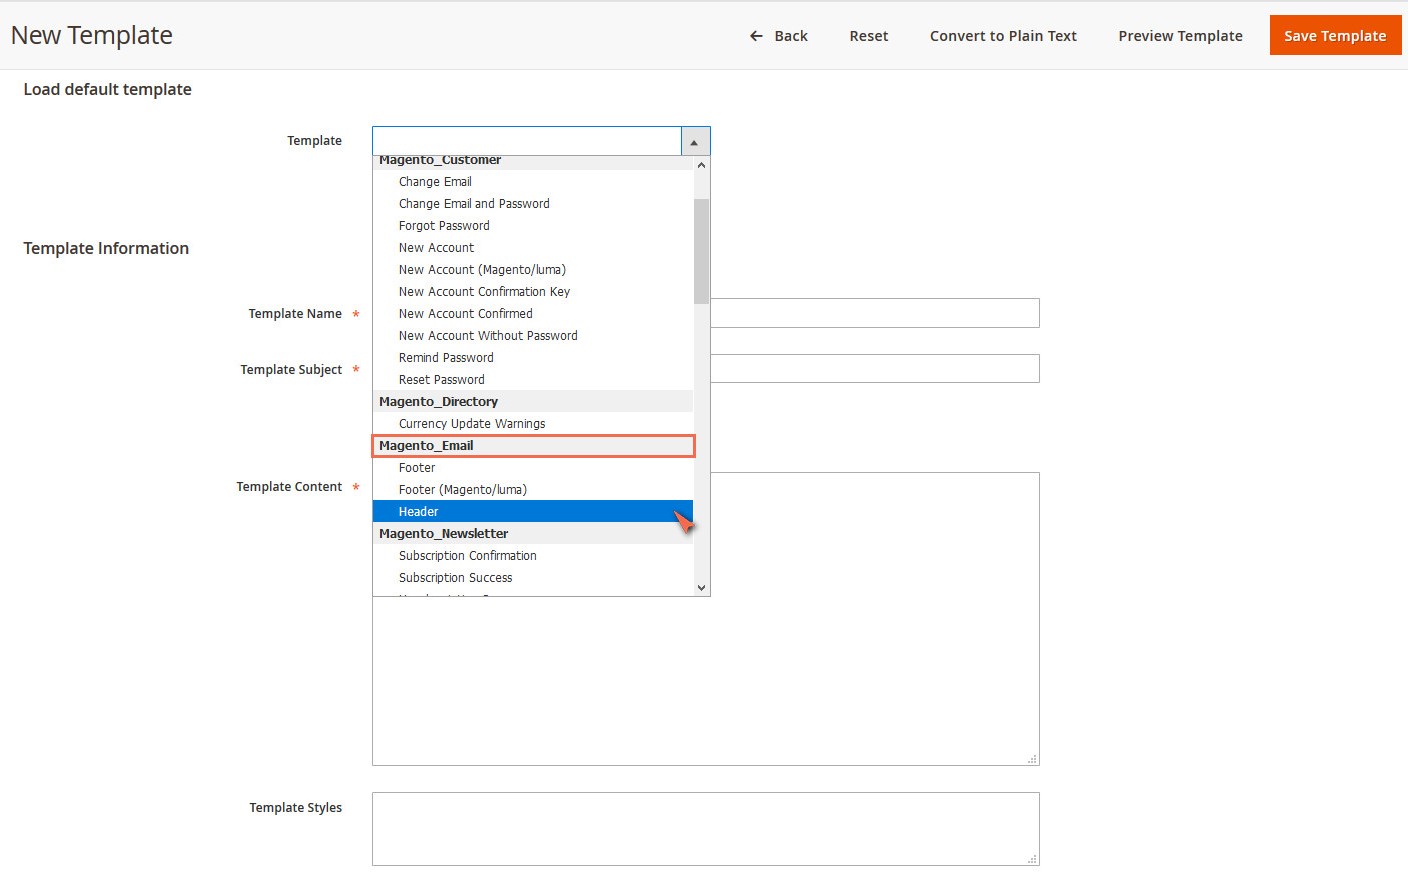
After selecting the Header, click Load Template until you see a lazy load. Wait a few second, meanwhile, you can think of your new template name and its subject.
Fill mandatory fields for new header template
Now fill in the Template Name field the name and specify Magento header template subject at Template Subject, which are requirements for this action.
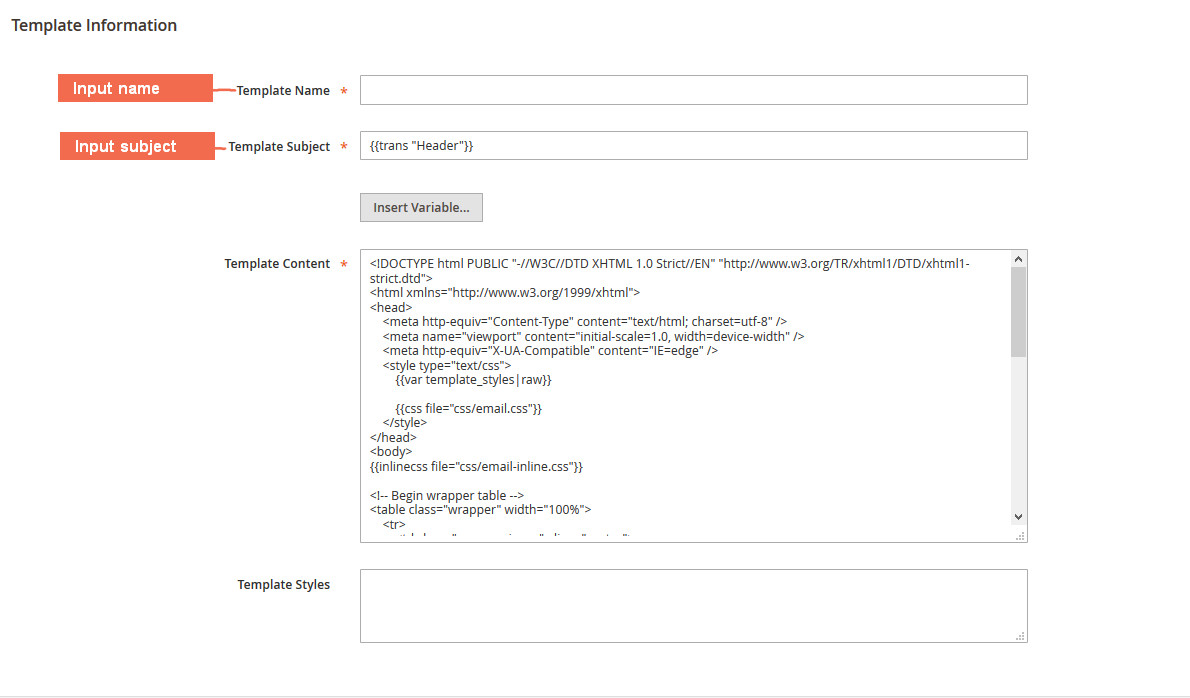
Adjust the default header template content
You now can customize the containing of your Magento header of emails. Adjust in Template Content, which is coded like this on Magento 2. You see it has included coding for logo.
<!DOCTYPE html PUBLIC "-//W3C//DTD XHTML 1.0 Strict//EN" "http://www.w3.org/TR/xhtml1/DTD/xhtml1-strict.dtd">
<html xmlns="http://www.w3.org/1999/xhtml">
<head>
   <meta http-equiv="Content-Type" content="text/html; charset=utf-8" />
   <meta name="viewport" content="initial-scale=1.0, width=device-width" />
   <meta http-equiv="X-UA-Compatible" content="IE=edge" />
   <style type="text/css">
       {{var template_styles|raw}}
       {{css file="css/email.css"}}
   </style>
</head>
<body>
{{inlinecss file="css/email-inline.css"}}
<!-- Begin wrapper table -->
<table class="wrapper" width="100%">
   <tr>
       <td class="wrapper-inner" align="center">
           <table class="main" align="center">
               <tr>
                   <td class="header">
                       <a class="logo" href="{{store url=""}}">
                           <img
                               {{if logo_width}}
                                   width="{{var logo_width}}"
                               {{else}}
                                   width="180"
                               {{/if}}
                               {{if logo_height}}
                                   height="{{var logo_height}}"
                               {{else}}
                                   height="52"
                               {{/if}}
                               src="{{var logo_url}}"
                               alt="{{var logo_alt}}"
                               border="0"
                           />
                       </a>
                   </td>
               </tr>
               <tr>
                   <td class="main-content">
                   <!-- Begin Content -->
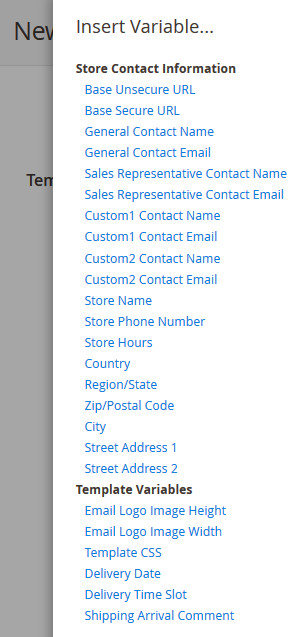
To begin the content, click Insert Variable.. to add among these Items. This is quite unnecessary, but in case you need for specific mailing purposes, otherwise, they are designed for the email body.
Store Contact Information includes:
Base Unsecure/ Secure URL, General Contact Name/ Email, Sales Representative Contact Name/Email, Custom1-2 Contact Email/Name. Store Name, Store Phone Number, Store Hours, Country, Region/State, ZIP, City, Street Addressed.
Template Variables includes:
Email Logo Image Height –Width, Template CSS, Delivery Information and Shipping Arrival Comment.
For example, I click Store name, there is a code pasted after Begin Content line, goes:
{{config path="general/store_information/name"}}
Apply styles for your header
Next, define the style by adding the code to this field.

Final step: Save – Preview and more
After all, back to the first row and click Preview Template if you want to see how change is applied and carry on adjusting. Click Save Template to Complete the Template.
You can select Reset to revert all changes that have been made on the default templates and restart again. Or click Convert to Plain Text to see only text, opt out this HTML version.

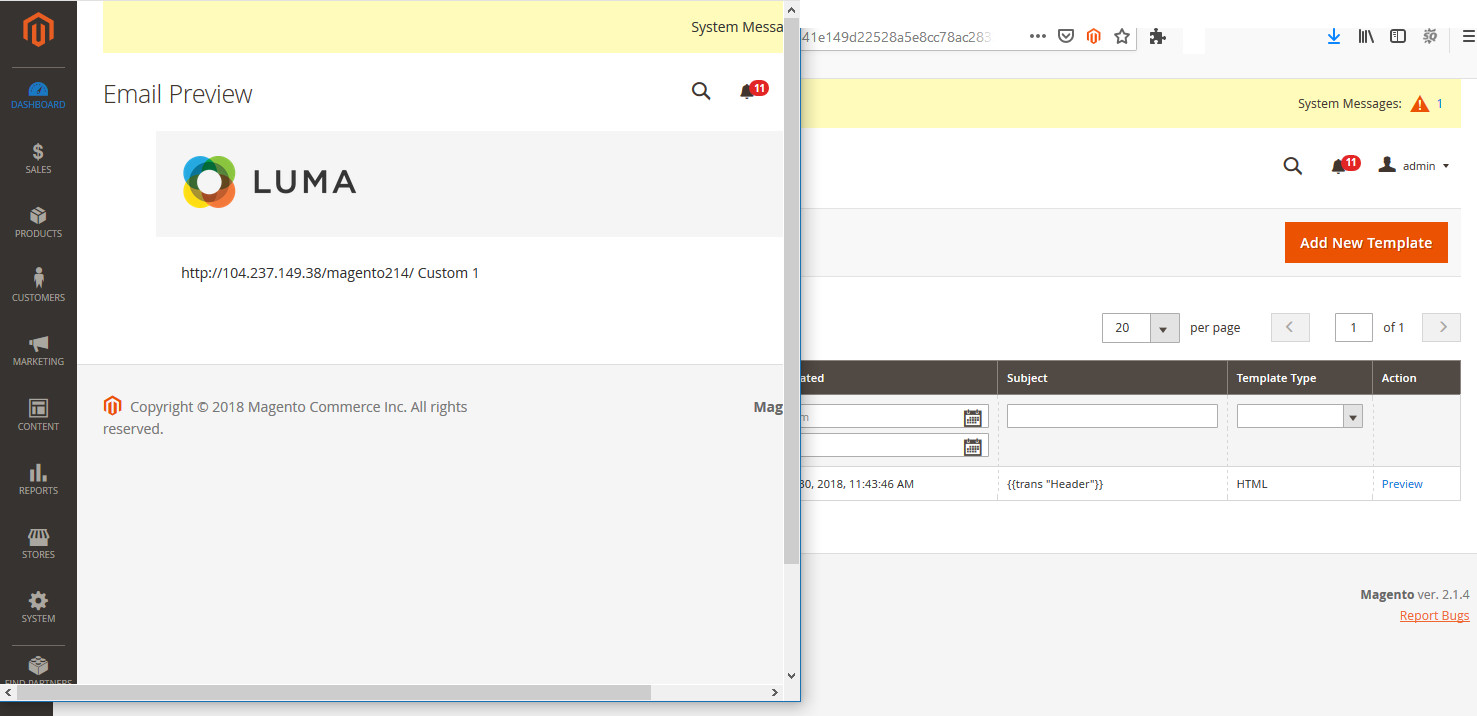
In case you choose Save Template, Magento directs you to the email template management where you can see the templates you have made, also preview in a new small window like this one.
Final thoughts
I hope the video tutorial and explanation in words are easy for you to catch. If you would like to move on with other sections, please see our next post How to customize email footer in Magento 2. You find it hard to keep up with many changes in the stores?
CLICK NOW: Admin Email Notification for Magento 2 extension, a solution helps you conveniently follow main events of your store now!
