Email templates contain the content and formatting of the message which is called as transactional email. The store owner will send a series of responsive email when the customer takes action during your store such as customer activity, sales, product alert, system announcement, admin action.
Changing the email logo in a transactional email in Magento is pretty easy to do it. You can follow my guide in step by step to know how to configure your transactional email properly.
Clearly, your Magento 2 email logo appearing in the transaction emails is very important, if not, your customers will underestimate and dissatisfied about your store’ image. Let’s do it.
Step 1: Upload your Magento 2 email logo
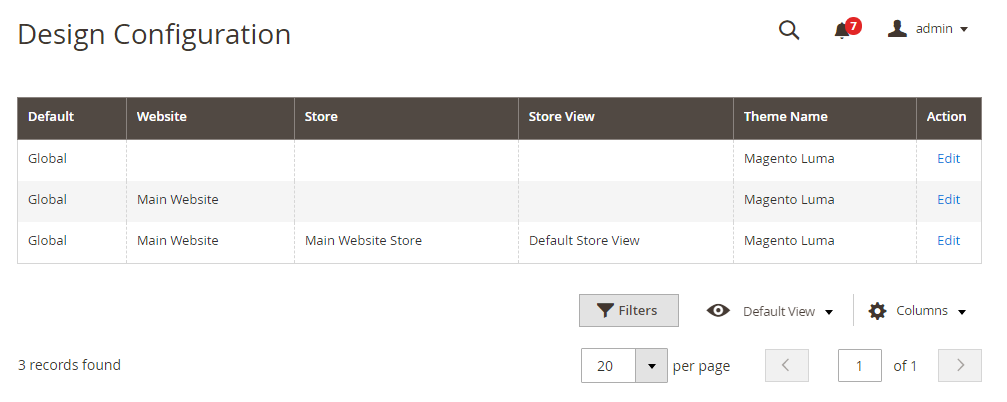
On the Admin Side Bar, navigate to Admin Panel → Content → Configuration.

Magento 2 design configuration
And find the store you want to configure, click Edit.
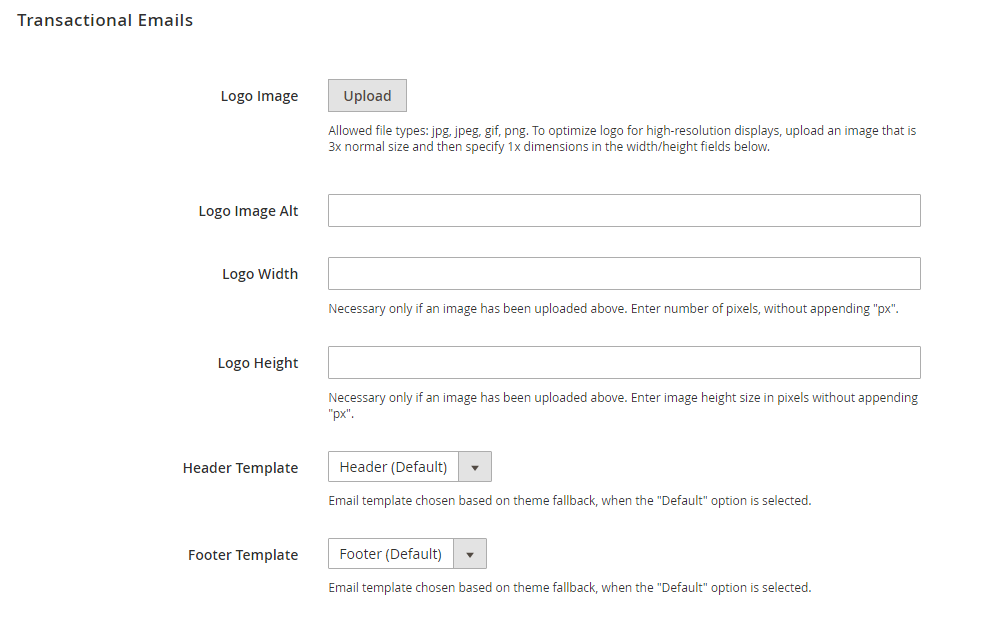
Scroll down and find Transactional Email section. And do the following:

Configure Magento 2 transaction emails
- Logo Image: choose your logo image and click Upload. Before uploading it, make sure that your logo image is compressed.
- Logo Image Alt: Alternative Text to your logo to describe what your logo image looks like.
- Logo Width and Logo Height: Enter each value in “px” here to display your logo image, not the actual size of its image.
Step 2: Choose the Header and Footer Template
You can choose the Header and Footer Template for different store
- Header Template: is used for all email transaction
- Footer Template: is used for all email transaction or you select Default option
When finished, click Save Configuration.

