
Many factors must come together for a professional website design to be appealing and functional. Today, images are a crucial component of every website, but depending on how they are used, they can benefit or harm your website. In this article, we will guide you on how to optimize Magento 2 image sizes on your website. Don’t miss out!
Types Of Image In Magento 2 Store
Table of Contents
There are 4 Magento 2 product image types, including
- Base image
- Thumbnail image
- Small image
- Swatch image
Base Image
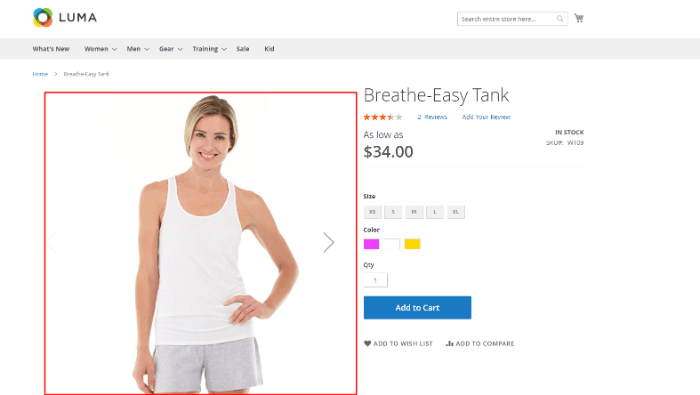
The base image serves as the page’s primary illustration. It is the most substantial and superior of the four sorts. Customers can click to enlarge the image if the one you upload is larger than the image container. Viewers have a two-to-three-fold zoom-out option.
As an illustration, after zooming, an image with 500 × 500 pixels (without zoom) can become 1100 x 1100 pixels.
By Magento 2 default, the base image is the most prominent image on a product page, and Magento displays at appropriate 700 x 500 pixels. Therefore, it is unsurprising that Magento 2 demands the maximum resolution of photos compared to other image versions.
Therefore, the idea behind Magento foundation pictures is that you submit high-resolution photos and let Magento produce them at the appropriate sizes.
Thumbnail Image
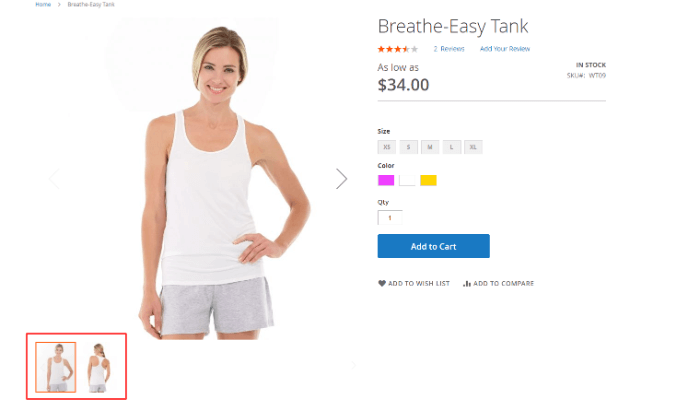
You can frequently see the thumbnail image on the product detail page. Additionally, the shopping cart and the Related Items section both have these photographs.
This product image type’s standard dimensions are 100 pixels wide by 100 pixels high.
Small Image
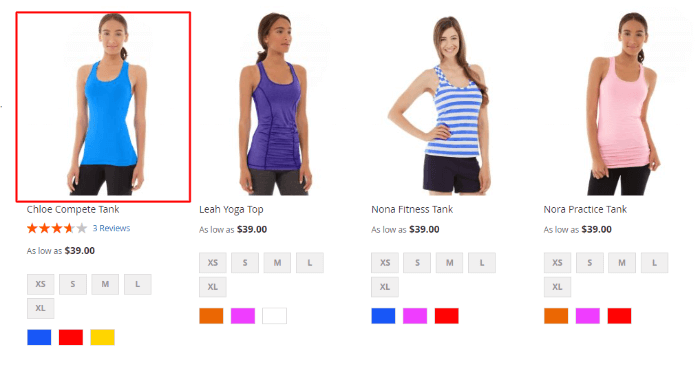
The homepage, category page, and search results page are just a few sites that employ this small image type. It is also applied to little boxes on product sites, such as recommendation boxes for up-sells, cross-sells and bundle product options.
Additionally, you can see small photos in product listings on category and search results pages, such as the New Products Lists and other similar pages. This Magento 2 image size can be as big as 470 by 470 pixels.
We recommend this product image type’s dimensions for 250 pixels wide by 250 pixels in height.
Swatch Image
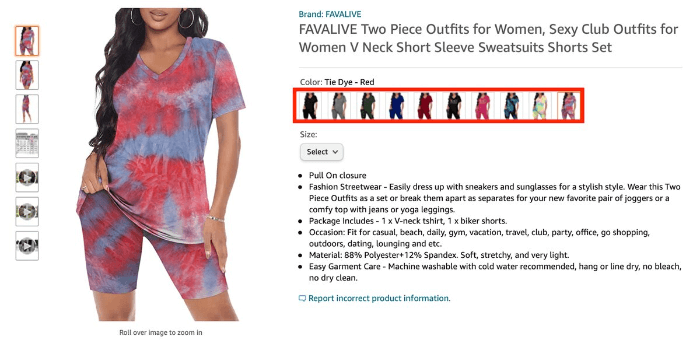
This enables customers to more clearly see the store’s merchandise and select the version of that item they would like to buy. Each color option is shown with a swatch image when your product has numerous colors. Customers may easily view the item they want simply by clicking on the swatch image.
You can edit this Magento product image type variant in advanced store configurations.
A Magento swatch image may be about 50 by 50 pixels in size.
How Do Magento Image Sizes Impact Your Website?
Everyone knows how vital page load speed is to effective website design and how it influences SEO, page rank, and conversion rates. Even if the image looks small on the website, its size file impacts how quickly a page loads.
Hence, it is preferable to keep all pictures and graphics on a single page to a total of 1 MB or less to promote quick loading speed.
Moreover, optimizing Magento 2 image sizes enhances your SEO when used with a top SEO strategy. It’ll be more prominent in search engine results for your website. Large files cause your site to load slowly, and search engines despise slow sites. Additionally, Google is likely to crawl and index your photographs for Google image search more quickly.
Ideally, high-quality photos improve the user experience by making browsing your online business more interesting for visitors. And by maintaining Magento 2 image optimization, retailers guarantee a smooth user experience.
As a result, website users are more eager to explore your content and stay on your site longer.
How To Optimize Magento 2 Image Sizes
Automatically Optimize Image Size by Magento Default
Magento 2 default allows you to resize unnecessarily large images automatically. You can freely config the maximum allowed width and height of the images. When not needed, you can also disable the feature.
As a result, your Magento 2 image sizes are reduced, which improves the performance of your storefront.
Below is the complete guide to resizing the image by default:
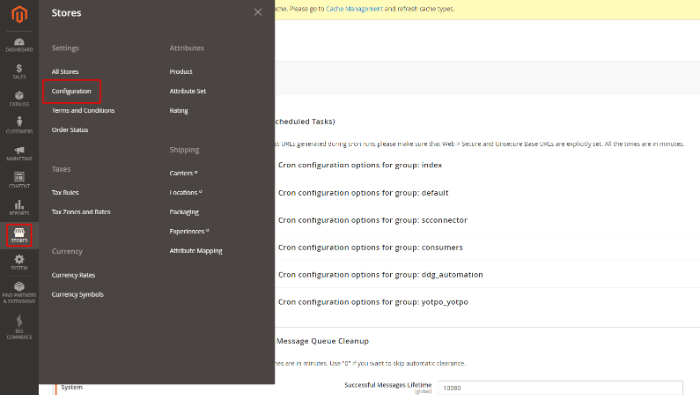
First, go to Stores > Configuration.
Next, find the Advanced section and click System.
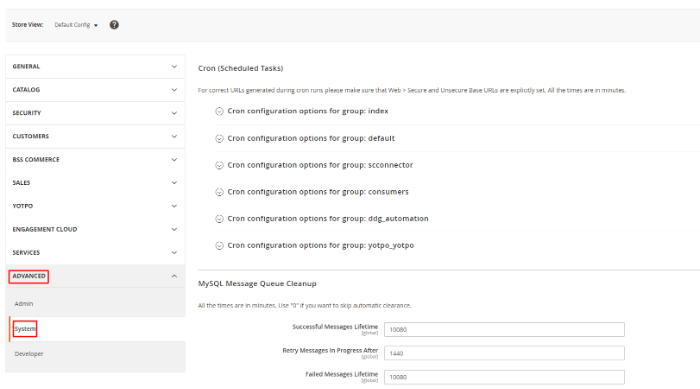
Finally, scroll down to the bottom of the page, and find Images Upload Configuration.

Here, you can select the maximum permitted width & height for the Magento product image size and whether or not to activate frontend resize. In your Media Gallery, optimized images are generated automatically and take the place of your original images.
Manually Add Code
Alternatively, you can also alter the 800 by 800 pixel size of your product images and overcome Magento default. You would only need to go to the view.xml file.
Step 1 – Find the view.xml File
View.xml contains almost all of the configurations for the product image (including width and height). Therefore, you must modify the view.xml file if you wish to update or resize product images in Magento 2.
You can easily find the View.xml in a theme’s directory.
<theme_dir>/etc/view.xml
Otherwise, find the view.xml file in your parent theme’s etc/ folder and copy it to your theme folder if your theme doesn’t already have one. This adheres to Magento’s fallback system.
Step 2 – Identify the Ideal Image ID and Type.
In Magento, an id and a type property are assigned to every product image. They have described in the view.xml file’s <image> node:
<images module="Magento_Catalog">
	<image id="unique_image_id" type="image_type">
	...
	</image>
<images/>
Locate the unique id for your image, which provides the description of the product image.
Step 3 – Resize Product Images in Magento 2
You can alter the width and height of any “image id” in this file to your taste.
<images module="Magento_Catalog">
    <image id="category_page_grid" type="small_image">
        <width><!-- Replace this with width in px : 300--></width>
        <height><!-- Replace this with height in px: 450 --></height>
    </image>
</images>
Step 4 – Clean The Cache
In order to apply the configurations, clear the Magento cache.
Go to System > Tools > Cache Management to access this menu. Then, to clean Magento Cache, click the Flush Magento Cache button.

In another way, the changes will be reflected as desired when you run the following command:
php /bin/magento catalog:images:resize -aAdditionally, don’t forget to check out our in-depth Magento tutorial for beginners to be more proficient in using the Magento platform
Leverage Third-Party Extension
As you can see, it requires coding knowledge in the previous method. Luckily, beginners and store owners who want to save time and effort with minimum risks can leverage third-party extension.
Your website will load considerably faster if you reduce the Magento 2 product image size. For instance, a 15MB image on a 3G connection can take 17 seconds to load, which is a 18,650 percent longer wait time than a 0.08MB compressed file that loads instantaneously for visitors.
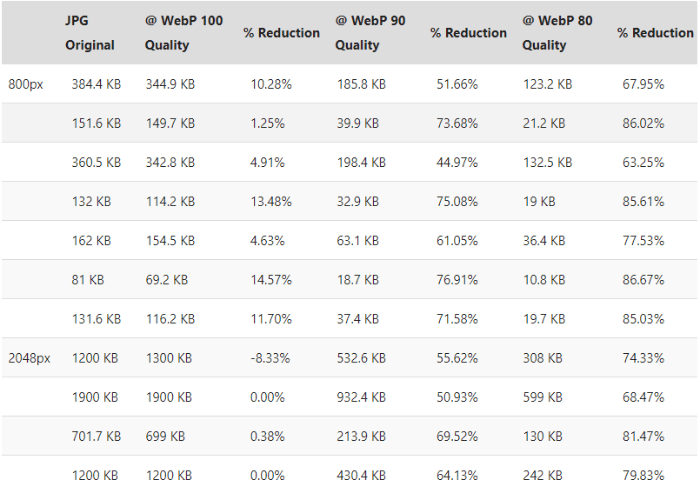
We suggest using Magento 2 Convert Images to WebP if you’re unsure about the images you should submit (like .jpg, .png, .svg, .gif, etc.). A popular photo format on the internet today, WebP provides improved lossless and lossy compression since they are 26% smaller when compared to PNGs and 25–34% smaller than equivalent JPEG images.
This extension streamlines and accelerates the WebP online conversion procedure. With just one easy adjustment, every image on your Magento 2 site will be converted to WebP, eliminating the need for manual format changes.
Conclusion
In a nutshell, BSS Commerce hopes that this article has provided you with helpful information about how to optimize Magent 2 image sizes. To gain more customer attraction, it is vital to upload photographs and other media kinds; however, this step slows down the site’s loading time. After that, it includes a bad user experience and a high bounce rate.
As a result, for the most practical, we suggest you resize Magento 2 images by default and use Magento 2 Convert Images to WebP to convert the types of the image files. Since manually converting jpg to webp takes too long, this extension can help you optimize the display of your webp images by automatically defining the webp quality.
Besides reducing image sizes, there are other advanced techniques to significantly enhance your web loading speed. However, it will be challenging to implement them without solid technical expertise. For this reason, we recommend referring to our Magento 2 speed optimization services.
BSS Commerce is the top-class Magento 2 development agency in the world, with over 11 years of experience. Our certified team of experts has received 5-star ratings on reliable platforms like TrustPilot and Magento Marketplace. A 90% customer return rate is strong proof of our exceptional dedication to serving customers.