As you know, Magento 2 import-export function is supported by default Magento to help store owners to save time and effort when adding a lot of data to the backend or wanting to get data to use for another website. Therefore, understanding how to import and export is vital, especially for store owners who may be not specified in technology. In this blog, we will give you a detailed explanation about Magento 2 Import Export and introduce you the way to import/ export data to your website.
Magento 2 Import
Table of Contents
Magento 2 Import Export function is divided into 2 separate parts: Import and Export. Firstly, we together find out how to import to Magento 2 websites.
To import data, you need to navigate to System→ Data Transfer →Import.
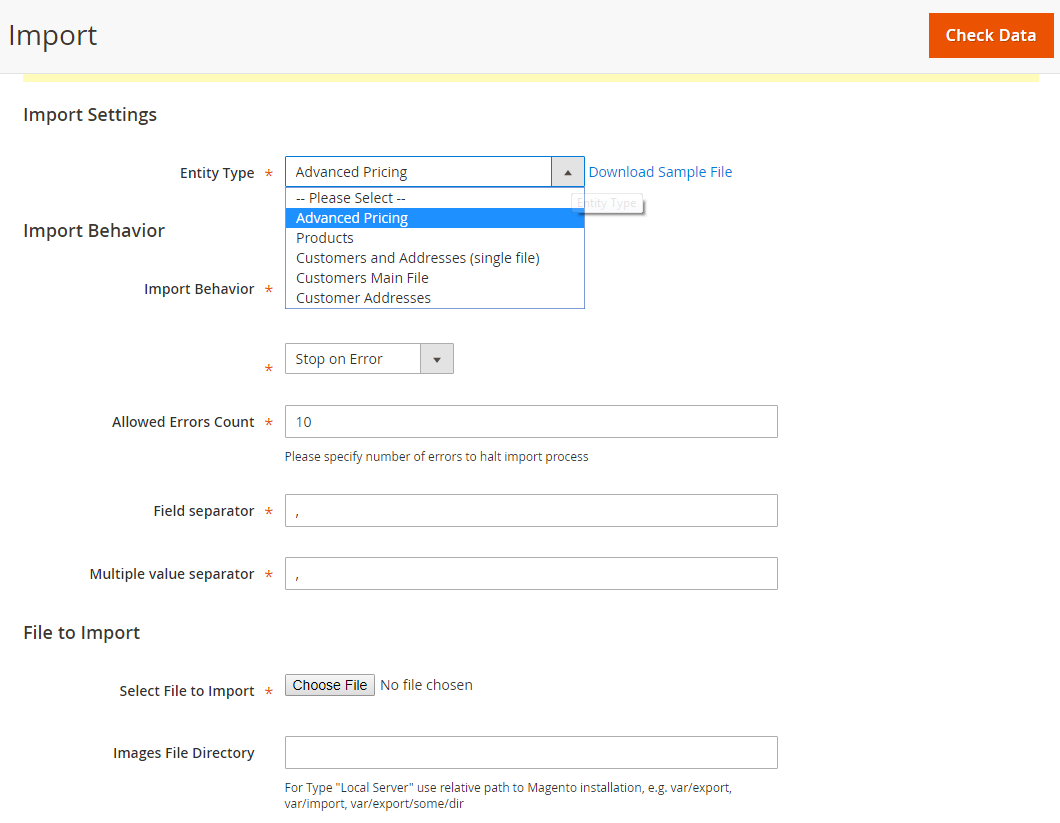
Magento 2 Import settings
In Entity Type: you select one of the four options in the dropdown list
- Advance Pricing: import data which is related to tier pricing. You can download the sample file to see what needs to complete.
- Products: import all information about products, which frees you from a manual process of creating each product in Catalog.
- Customer and Addresses: import customer information such as name components, email and so on as well as detailed customer addresses.
- Customer Main File: import only customer information such as name components, emails, websites, group, and so on.
- Customer Address: mainly import data of customer address such as city, region, tax, and so on.
To import other entity types that default Magento 2 import-export function does not support, let’s check these useful following blog posts:
- How to Import Product Attributes to Magento 2
- How to Import Product Reviews to Magento 2
- How to Import URL Rewrites to Magento 2
- How to Import Wishlist Items to Magento 2 Websites
- How to Import Export Categories in Magento 2
When you select each option, there is a link of sample CSV file to download and then complete all data to import.
After preparing a CSV file of necessary import data, you need to choose Import Behaviors that you want to process.
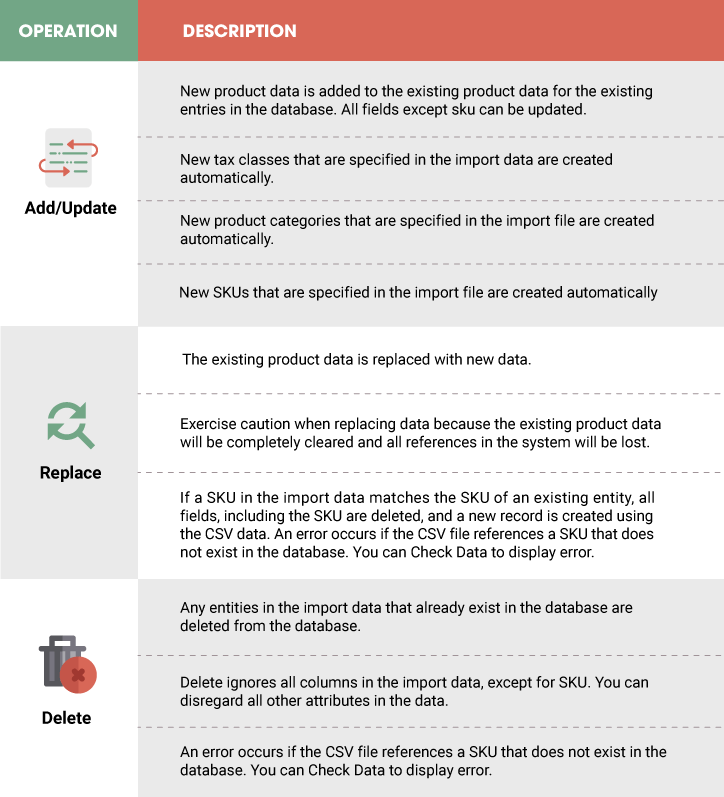
Magento Import Export Behaviors
Then you choose how the system performs when any errors occur in the import process:
- Stop on Error: stop Import when there is an error
- Skip Error Entries: Skip errors and continue the import process
In Allowed Errors Count: fill in the number of errors that can occur before the import process is stopped. The default value is 10.
In Field separator: the default value of a comma (,) is accepted
In Multiple value separator: the default value of a comma (,) is accepted. In a CSV file, a comma is the default separator. To use a different character, make sure that the data in the CSV file matches the character that you specify.
In Select to Import: click Choose file button to upload your prepared CSV file
In Images File Directory: enter the relative path to the location on the Magento server where uploaded images are stored. For example: var/import.
Finally, you click Check Data to validate data in the uploaded CSV file.
- If the CSV file does not include any errors, the Import button will appear for you to click and start the import process. After successfully importing, a message will be notified for you about results.
- If the CSV file is not valid, incorrect data or errors are listed for you to edit in the CSV file.
Magento 2 Export
The second part of Magento 2 Import Export function is Export. To export data, you go to System→ Data Transfer →Import.
In Entity Type: you select one of the four options in the drop-down list.
- When you choose Advanced Pricing or Products, an Entity Attribute table including attribute Label and Attribute Code will be displayed for you to select which one to exclude from the export results.
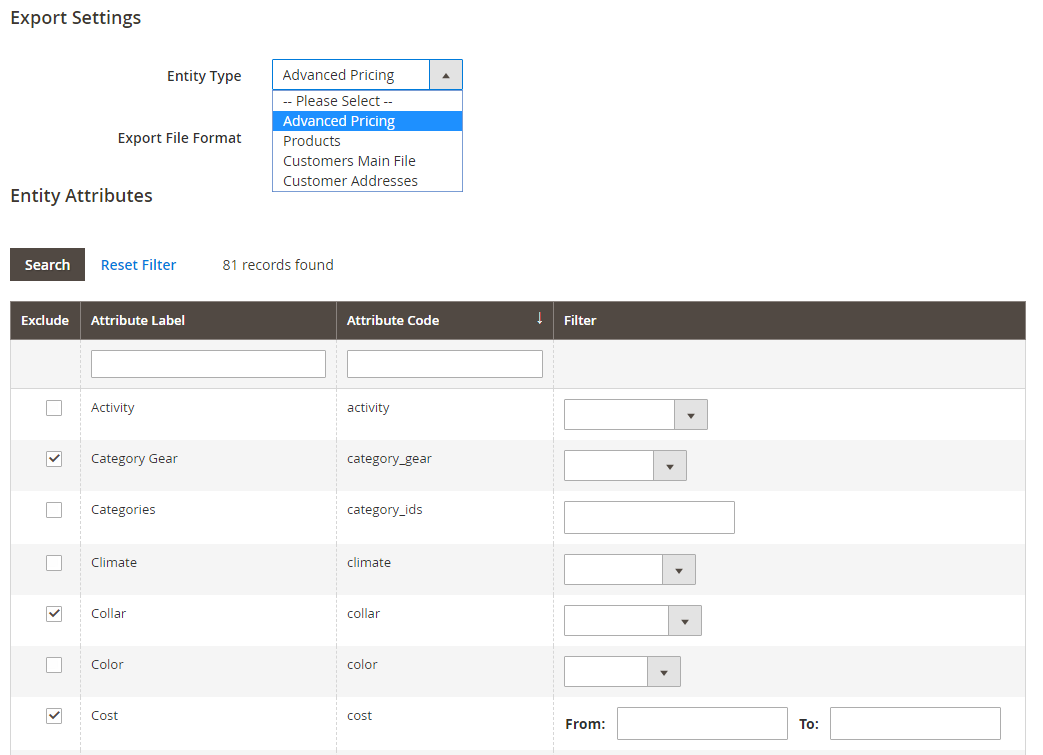
Magento 2 Export settings when choosing Advanced Pricing or Products
If you want to export custom product attribute, this blog is beneficial for you: How to Export Custom Product Attributes in Magento 2.
- When you choose Customer Main File:
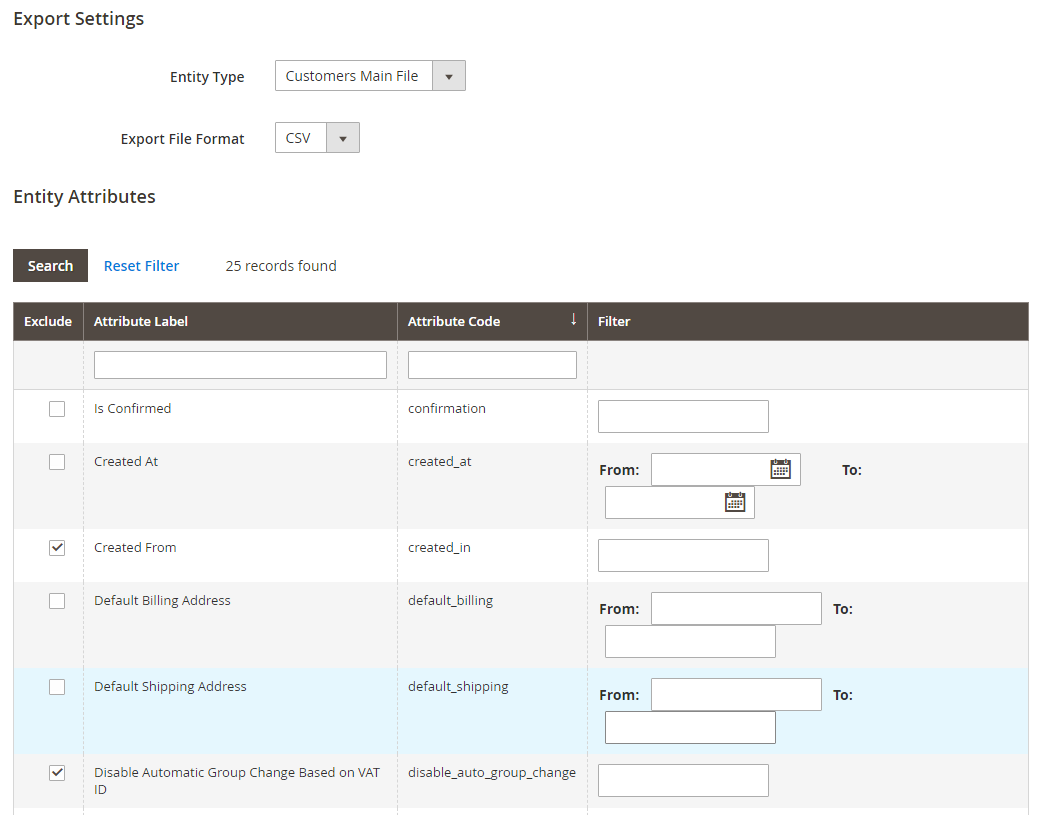
Magento 2 Export settings when choosing Customer Main File
- When you choose Customer Address:

Magento 2 Export setting when choosing Customer Addresses
After you select, the final step to do is click Continue button to download the CSV file.
For example, this is a CSV file we get after exporting Products:
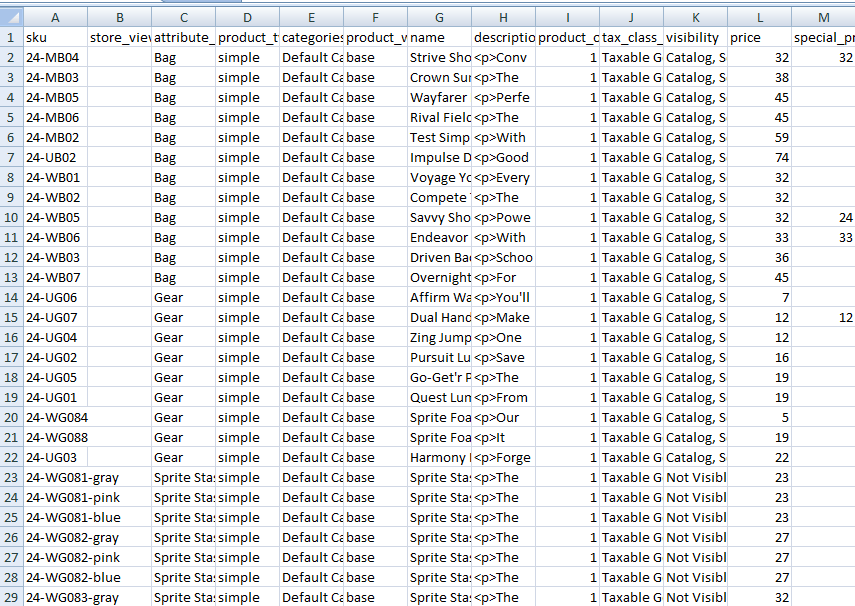
The CSV file is exported
Magento 2 Import Export Final Thought
Magento 2 Import Export is an essential function for every store owners. It helps you to save much time and effort when working with Magento backend.