The Comprehensive Guideline about Wix to Magento Migration
While Wix is a user friendly website builder with in-built eCommerce features and is best suited for beginners, Magento is a strong open source eCommerce platform characterized by higher scalability and customization.
As your business grows, you may outgrow the limitations of Wix and require the advanced features of Magento. This guide will talk about complete Wix to Magento migration step-by-step guides for a smooth transition and how to maintain your online presence. Let’s kick off!
Contents
Introduction to Wix and Magento
Wix – The User-friendly Website Builder
- Focus: Wix is a general website builder with a strong emphasis on ease of use.
- Target Audience: Ideal for beginners and small businesses with little technical experience.
- Strengths: Wix stands out with its intuitive drag-and-drop user interface. Wix gives you a huge range of gorgeous pre-designed templates that enable you to start quickly. Wix also includes various built-in features for marketing, SEO, and managing customer interactions. Therefore, choose Wix if you’re a beginner, have a small business, or prioritize ease of use and affordability.
Magento (Adobe Commerce) – The Powerful Ecommerce Platform
- Focus: Magento is an open-source platform specifically designed for building online stores.
- Target Audience: Magento caters to businesses of all sizes, but it’s particularly powerful for medium-sized and enterprise-level companies with in-house developers.
- Strengths: Magento has flexibility and customization that is unrivaled. It has numerous tools to help you manage products, inventory, and marketing campaigns . On top of that, Magento is famous for its strong SEO features which ensure that your eCommerce site ranks well on search engine result pages.
- Choose Magento if: You have a medium-sized or large business, need extensive customization options, and have the technical resources to manage the platform.
On the other hand, you can reference the difference between Wix and Magento via this insightful Wix vs Magento comparison post from BSS Commerce.
The Solutions for Wix to Magento Migration
Wix is a great platform for starters who want to design outstanding websites and online shops. At the moment your company is growing, you are likely to need more features as well as the ability to control. Magento, a leading eCommerce platform, offers robust functionalities and scalability. This guide explores the solutions available to navigate a smooth Wix to Magento migration, ensuring a successful transition for your online store.
The three main methods for Wix to Magento 2 migration include:
- Method 1. Manual Migration
- Method 2. Use The Magento 2 Import Export Extension Combo
- Method 3. Work with BSS Commerce’s Migration Service
- Method 1. Manual Migration
Step 1: Export Wix Data to CSV file
If you have a Wix website, you can use the Wix Export tool to save all your data with this platform. This tool makes it possible to save out product lists, orders, pictures and many other files from the Wix website.
First login into your Wix account then go to the Export section on your site. From here, choose which specific pieces of information you want to take out of there then click on the Export option after which it would save as ZIP file.
1. Exporting Product Lists from Wix
How to export your store products and their data to a CSV file:
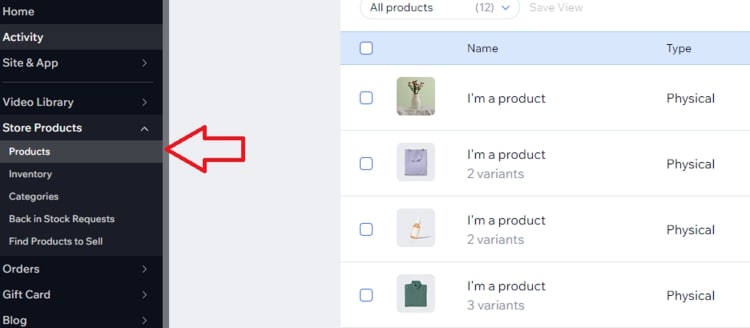
- Step 1. Go to your Wix store’s admin panel and navigate to the left-side menu. Click on “Store Products” and select “Products” from the pull-down menu.
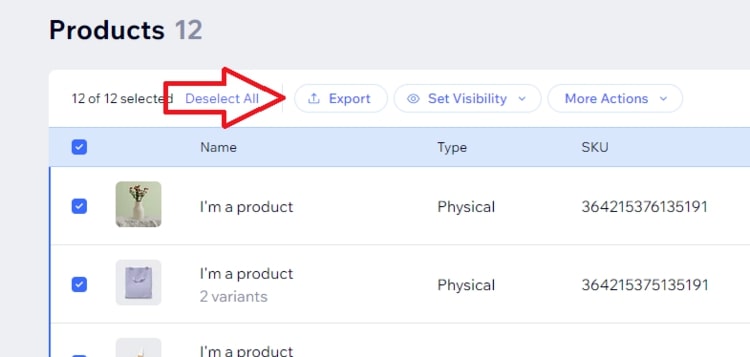
- Step 2. Select all the data you want to export:
- To export all products, tick the box located at the top left corner.
- If you wish to export a specific category or filtered products, click on “Filter”, select the desired product type, and click “Done”.
- To export selected products, tick the boxes next to the specific products you want to export.
- Step 3. Finally, choose the ‘Export’ button to kick off the export process.
2. Exporting Orders from Wix
Step-by-step guides to exporting your orders to a CSV file directly from your admin dashboard:
- Step 1. Go to your Wix admin and click on the Orders tab.
- Step 2. From the list of all available orders, select the ones you want to export by checking the boxes next to them. Alternatively, you can choose to export all orders by selecting the box next to Order.
- Step 3. Click on the Export button.
- Step 4. Now, you can choose how you want your exported orders to be displayed:
- If you select “Item purchased,” each item will be displayed in its own row.
- If you select “Orders,” each order will be displayed in one row, even if multiple items were purchased.
- Step 5. Uncheck any columns that you do not want to include in the exported file.
 3. Exporting Images from Wix
To migrate the images from your Wix store to your Magento store:
- Step 1. Go to the Wix Media Manager by typing “Media Manager” into the search bar on your dashboard.
- Step 2. In the Media Manager, you will find a comprehensive list of all the media files you have uploaded to your Wix store.
- Step 3. Choose the specific image you wish to transfer to your computer by clicking on the More Actions icon.
- Step 4. Click on the Download option.
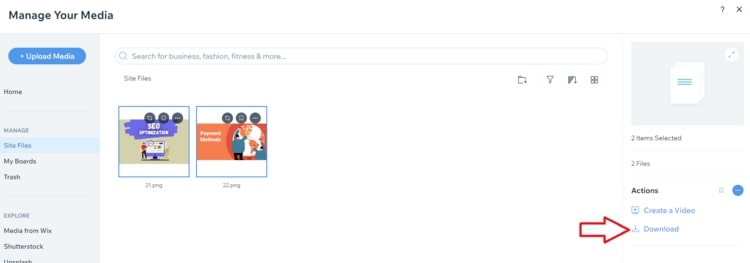
- Step 5. If you want to download multiple media files simultaneously, hold down the Command/Control key on your keyboard, select the desired files, and then click on Download.
4. Exporting Blog Posts from Wix
Wix does not offer a built-in feature to export blog posts directly. Nevertheless, you can save your blog content to Google Drive or another cloud-based storage platform, and subsequently import the content to Magento.
5. Exporting Contacts from Wix
In case you have contact information on your Wix store, you can export them to a CSV file for integration into your Magento store. Wix enables you to export a maximum of 50,000 contacts, either individually or as a complete list.
- Step 1. Go to Contacts in your Wix admin panel.
- Step 2. Choose the contacts you wish to export by selecting the checkbox next to them or opt for exporting All Contacts.
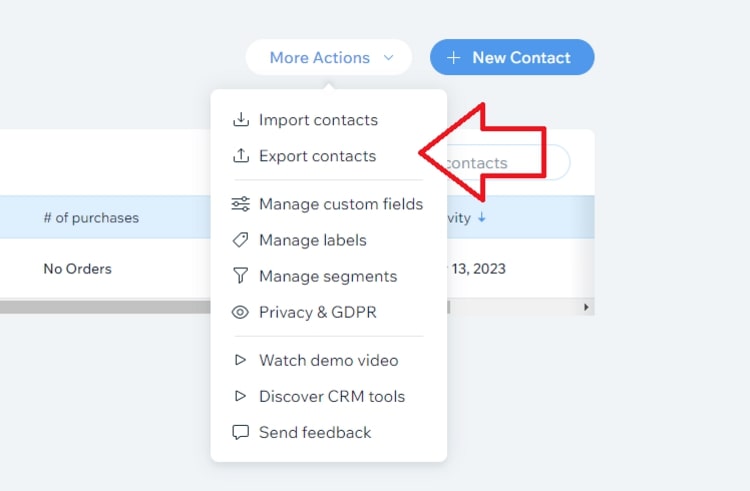
- Step 3. Click on More Actions, then choose Export Contacts.
- Step 4. Pick the appropriate file format (Regular CSV, Google CSV, or Outlook CSV).
- Step 5. Choose Export, then save the exported file on your computer.
Step 2: Manually Import Data to Magento
TAKE NOTE: When product data is imported, new information is appended to the current entries in the database. With the exception of the SKU field, all other fields can be modified through the import process. The existing product data will be entirely replaced by the newly imported data. It is important to be careful when replacing data, as all current product information will be erased and any references in the system will be lost.
Step 1: Data Preparation
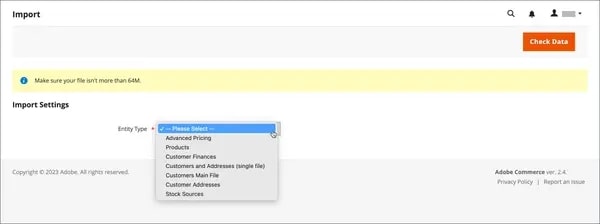
1. Navigate to System > Data Transfer > Import in the Admin sidebar.
2. Choose the Entity Type from the options provided in the Import Settings:
- Advanced Pricing
- Products
- Customer Finances
- Customers and Addresses
- Customers Main File
- Customer Addresses
- Stock Sources
3. Download the Sample File by clicking on the respective button.
4. Find the downloaded file in your web browser’s download location and open it. The sample file contains column headings with placeholder data related to different product types.
5. Review the structure of the sample file and use it as a reference to create your CSV import file, ensuring that the column headings are accurately spelled.
6. Confirm that the size of your import file adheres to the specified limit mentioned in the notification.
7. In case the import data includes paths to product images, ensure that the image files have been correctly uploaded to the designated location.
- By default, the Commerce server stores images in: pub/media/import.
- If the images are hosted on an external server, ensure that you possess the complete URL to the directory containing the images.
Step 2: Select the import behavior
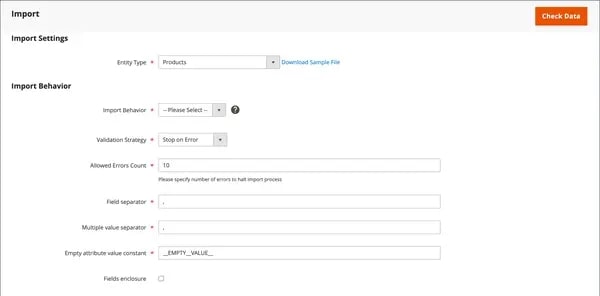
1. Choose one of the following options for Import Behavior:
- Add/Update (For products, you can update all fields except SKU through import.)
- Replace
- Delete
2. Determine the action to take when an error is encountered during data import:
- Stop on Error
- Skip error entries
3. Specify the maximum number of allowed errors before the import is canceled. The default value is 10.
4. Keep the default value of a comma (,) as the field separator.
5. Keep the default value of a comma (,) as the multiple value separator. In a CSV file, a comma is used as the default separator. If you wish to use a different character, ensure that the data in the CSV file matches the specified character.
6. Keep the default value of _EMPTY_VALUE_ as the constant for empty attribute values.
7. If you need to enclose any special characters that may be present in the data using an escape sequence, select the Fields Enclosure checkbox.
Step 3: Identify which file you want to import
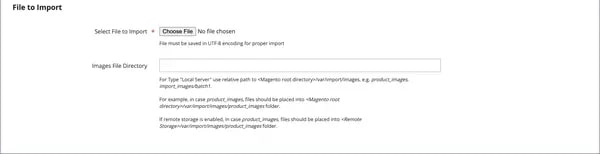
- 1. Select the file you wish to import by clicking on Choose File.
- 2. Locate the CSV file you have prepared for importing and then click on Open.
- 3. Enter the relative path to the location on the Commerce server where uploaded images are stored for the Images File Directory.
Step 4: Verify the imported data
1. Click on the “Check Data” button located in the upper-right corner.
2. Please wait for a few moments while the validation process is being completed.
If the imported data is deemed valid, you will see the following message displayed:

Success message – file is valid
3. Selecting the “Import” button if the file is valid. If there are any issues with the data as indicated in the message, make the necessary corrections and attempt to import the file once more.
4. The import process will continue until all data has been processed, unless an error is encountered.
- If an error message is shown in the Validation Results, address the issue in the data and try importing the file again.
- A notification will appear once the import process has been successfully completed.

In addition, to view the import history:
- Navigate to System > Data Transfer > Import History in the Admin sidebar.
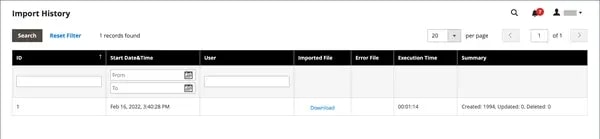
TAKE NOTE: By default, the import history files are located in the <Magento-root-directory>/var/import_history folder. However, if the Remote storage module is enabled, the import history files can be found in the <remote-storage-root-directory>/import_export/import_history folder.
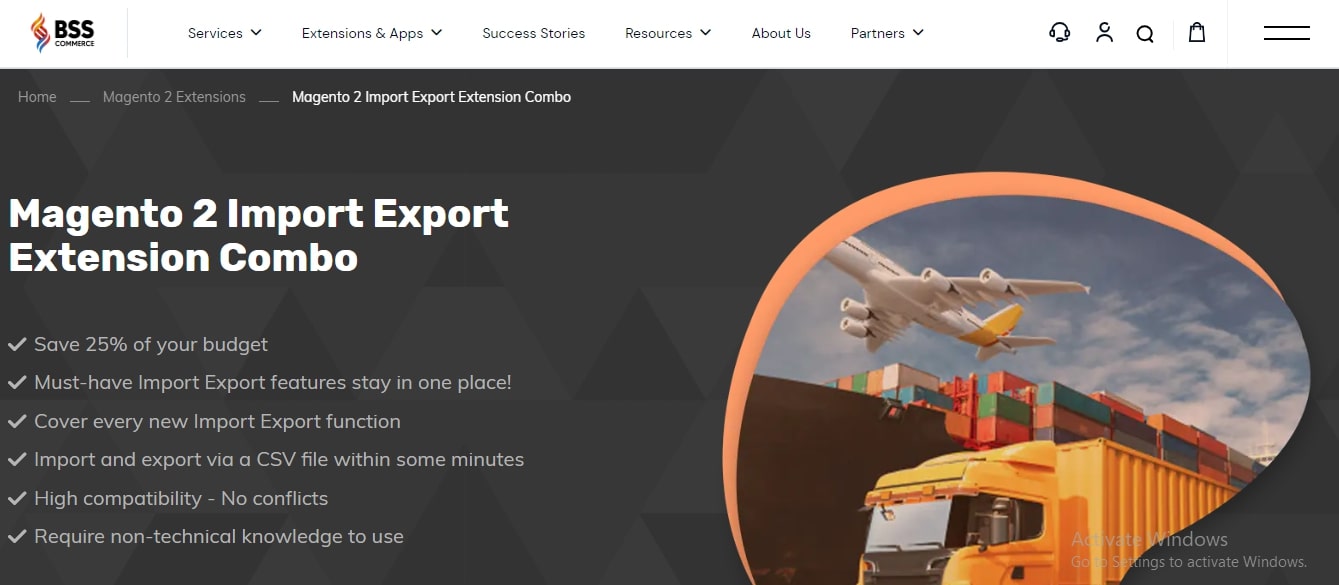
Method 2. Use The Magento 2 Import Export Extension Combo
The Import & Export extension Combo for Magento 2 enables merchants to efficiently transfer product reviews using a CSV file. In this file, essential data like customer names, review titles, review details, product SKUs, and rating options are included. This allows store owners to allocate reviews to specific customers and products, as well as set review statuses during the import process.
Now, BSS Commerce will guide on installing the Import/Export module:
- Step 1.Download the extension
- Step 2. Establish a new folder at the following location: [Magento root folder]/app/code/Bss/ImportExportCore
- Step 3. Extract the source code of the extension in the designated directory.
- Step 4. Navigate to the Magento 2 root directory and execute the subsequent commands:
php bin/magento setup:upgrade
php bin/magento setup:di:compile
php bin/magento setup:static-content:deploy
php bin/magento cache:clean
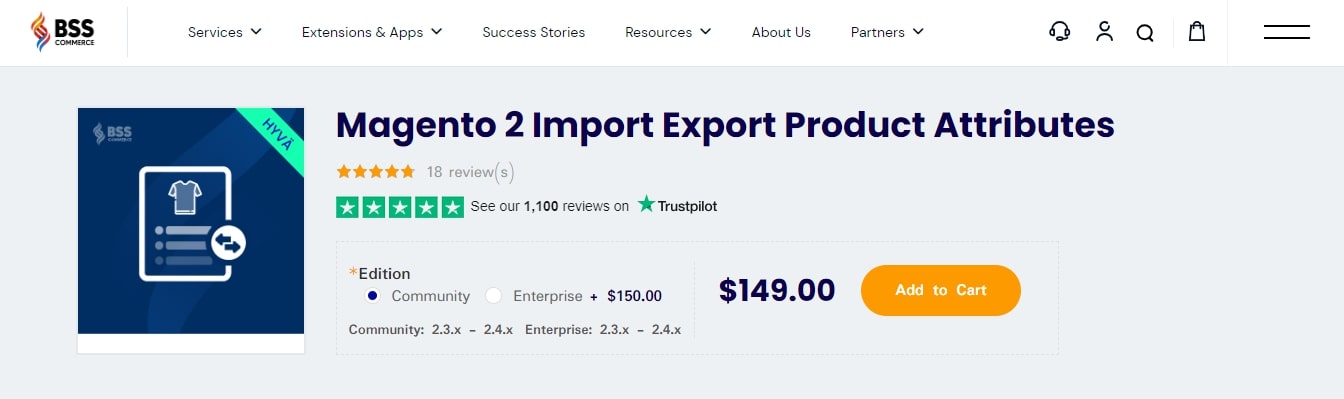
Once the core module installation is completed, proceed with the installation of the separated Magento 2 import and export product attributes in the package.
TAKE NOTE: The module is already designed to work seamlessly with the Hyva theme, eliminating the need for any additional package installations.
1. To enable the Magento 2 Import Export Product Attribute extension, you must first install the Import Export Core module. The extension will only function properly once the Core module is successfully installed.
- Step 1. Download the Core module
- Step 2. Create a directory: [Magento root folder]/app/code/Bss/ImportExportCore
- Step 3. Extract the source code of the extension into the directory created in Step 2
- Step 4. Go to the Magento 2 root directory and enter these commands:
php bin/magento setup:upgrade
php bin/magento setup:di:compile
php bin/magento setup:static-content:deploy
php bin/magento cache:clean.
2. Install the Magento 2 Import Export Product Attribute extension
- Step 1. Unzip the file.
- Step 2. Create a new directory named “app/code/Bss/ProductAttributesImportExport/”. This directory will serve as the module’s internal identifier. You can find this identifier in the “composer.json” file within the extension ZIP file. Look for the “psr-4” node.
- Step 3. Place the contents of the extension ZIP file into the directory created in step 2.
- Step 4. Upload the directory “app/code/Bss/ProductAttributesImportExport/” to the root directory of your Magento installation. The root directory is the one that contains directories like “app”, “bin”, “lib”, and more. Ensure that the directory structure matches the existing structure.
- Step 5. Navigate to the Magento 2 root directory.
- Step 6. Run the command: “php bin/magento setup:upgrade”.
- Step 7. Execute the command: “php bin/magento setup:static-content:deploy”.
- Step 8. Finally, clear all caches.
On the other hand, if you have completed all the steps mentioned above and the extension is still not functioning correctly, you can either delete the file or modify the module’s filename in order to maintain the normal functioning of your website. For further assistance, please reach out to us via sales@bsscommerce.com or Skype: support.bsscommerce. Our dedicated team of supporters will be available to help you resolve any issues within 24 hours.
Method 3. Work with BSS Commerce’s Migration Service
If you lack the necessary funds and time to transfer data from WooCommerce to Magento, or if you are not equipped to handle the technical challenges involved in the migration process, it may be beneficial to explore the migration service offered by BSS Commerce – Magento 2 development company.
What distinguishes BSS Commerce’s migration service from others?
#1. BSS Commerce boasts an “ultimate” tester team that holds the prestigious title of “ISTQB Platinum Partner,” representing the pinnacle of testing proficiency for a development agency on a national scale.
#2. With over a decade of experience handling numerous projects for globally recognized brands from over 150 countries, BSS Commerce possesses a wealth of market knowledge and business acumen across various industries and business models, enabling us to craft the most effective and efficient eCommerce solutions for you.
#3. At BSS Commerce, we prioritize integrity as a core value. Once the scope, pricing, and timeline have been established, you can trust that there will be minimal to no changes in variables, and any alterations will be communicated to you transparently, ensuring complete openness throughout the project.
#4. Our dedication is what sets us apart and has earned the trust of thousands of customers worldwide, reflected in our impressive 90% rate of returning customers. In addition, our time-zone flexibility allows us to accommodate urgent requirements with swift deliveries.
To sum up, BSS Commerce provides a smooth transition from WooCommerce to Magento. Our team of experts manages the entire process to guarantee minimal disruption to your business. Reach out to us now for a free consultation regarding our Magento 2 migration service.
How to Check After Migrating Wix to Magento
After migrating your eCommerce store from Wix to Magento, conduct the following verifications to confirm the success of the migration:
- Data Validation: Confirm the accurate transfer of all data, such as products, orders, customers, catalogs, and other elements. Export this data from your Wix site in XML or CSV formats and then import it into the Magento 2 site using an import and export extension.
- Functional Testing: Evaluate all functionalities of your new Magento store, including product browsing, cart item addition, checkout process, payment processing, and more.
- SEO Configuration: Validate that all SEO settings are properly set up in Magento, covering meta tags, URLs, redirects, and other aspects.
- Performance Evaluation: Monitor the performance of your Magento store by examining page load times, server response times, and other performance indicators.
- Design and Layout: Confirm that the design and layout of your Magento store meet your expectations by reviewing all pages, such as the home, product, category, cart, and checkout pages.
- Security Audits: Verify the presence of all security measures, such as SSL certificates and secure payment gateways, to safeguard your Magento store.
Therefore, follow these instructions early on to minimize the chances of losing vital data while migrating. Should you encounter any problems during these inspections, it is imperative to resolve them promptly to guarantee a seamless transition for your customer.

Why Should You Choose a Reliable Partner for Magento 2 Migration Services?
Here’s the main reason why choosing a reliable partner for your Magento 2 migration is the key to a smooth migration and a thriving future for your business:
Data Security
When migrating Wix to Magento 2, data security is a paramount concern. A reliable partner for Magento 2 migration services will ensure that all your sensitive data, including customer information, order details, product data, and more, are securely transferred from your current platform to Magento. They will use secure methods and protocols to prevent any data breaches or leaks during the migration process.
Moreover, they will also help you set up necessary security measures on your new Magento store, such as SSL certificates, secure payment gateways, and more, to protect your data in the future.
Experience and Knowledge
Migrating to a new platform like Magento 2 can be a complex process that requires a deep understanding of both your current platform and Magento. A reliable partner with substantial experience and knowledge in Magento 2 migration can guide you through this process smoothly. They will know how to handle potential issues that may arise during the migration and how to optimize the performance of your new Magento store. Their expertise can save you a lot of time and effort and ensure a successful migration.
Flexible and Reliable
A reliable Magento 2 migration partner will be flexible and adaptable to your specific needs and requirements. They will provide a customized migration plan that suits your business model and goals. They will be there to support you throughout the migration process and even after the migration is completed to ensure everything runs smoothly. Their reliability means you can trust them to deliver the results you expect without any unnecessary delays or problems.
Choosing a reliable partner for Magento 2 migration services can make a significant difference in the success of your migration project. It’s an investment that can pay off in the long run by ensuring a smooth transition, secure data, and optimal performance for your new Magento store.
FAQs – Wix to Magento Migration
1. How Can I Perform a Wix to Magento Migration?
There are three methods to perform a Wix to Magento migration, including:
- Method 1. Manual Migration
- Method 2. Use The Magento 2 Import Export Extension Combo
- Method 3. Work with BSS Commerce’s Migration Service
2. Why Should I Choose Magento Over Wix?
You should choose Magento for a powerful, scalable eCommerce platform with tons of customization and SEO options, ideal for growing businesses. or even greater functionality, check out BSS Commerce Magento Extensions, designed to enhance your store’s capabilities and streamline management processes.
However, Wix is a beginner-friendly, cost-effective option for smaller stores with a focus on ease of use.
3. Will There Be Any Downtimes or Disruptions During the Wix to Magento Migration?
The Magento 2 migration service by BSS Commerce assists in reducing any possible downtime or disturbance to your online activities while migrating to Magento. Our team uses cutting-edge methods and meticulously crafted plans to guarantee a smooth transition that has little effect on your business.
4. How Long Is the Wix to Magento Migration Process?
The duration of migrating Wix to Magento can differ based on the intricacy of your existing eCommerce system, the extent of your product catalog, and the customizations needed. If you opt for our Magento migration service, our team of specialists will assess your unique requirements and furnish you with a precise timeline estimation.
Bottom Line – Wix to Magento Migration
In conclusion, via this post, you can deeply understand how to migrate Wix to Magento 2 thanks to three professional methods. Fortunately, BSS Commerce offers a seamless Magento 2 migration service, allowing you to effortlessly transfer your website’s products, images, extra fields, variants, and attributes. In addition, you can migrate your categories and their corresponding images. Should you require further migration options, rest assured that different alternatives and additional charges are available.
If you require any additional customization or migration assistance, BSS Commerce is at your disposal and ready to assist you at any time.