
In Magento, there are 2 ways to add new or edit data to a table in the database: write a database script in PHP and use the Declarative Schema.
Today, we will learn more about how to create table using db schema in Magento 2.
1. Use the PHP script
Magento 2 provides special mechanisms for creating database tables, modifying existing tables, or adding data to them. This mechanism allows changes to be transferred between different settings.
Using this mechanism, there is no need to use manual SQL operations repeatedly when you reinstall the system. Instead, an installation (or upgrade) script that contains data is created. The script runs whenever a module is installed.
Magento 2 includes 4 script types: InstallSchema, InstallData, UpgradeSchema UpgradeData, and Recurring scripts. Installation scripts run only once, while upgrade scripts are executed when the module’s version_module is changed.
InstallSchema
File Setup/InstallSchema.php.
 <?php
/**
* Copyright © 2016 Magento. All rights reserved.
* See COPYING.txt for license details.
*/

namespace Learning\GreetingMessage\Setup;
use Magento\Framework\Setup\InstallSchemaInterface;
use Magento\Framework\Setup\ModuleContextInterface;
use Magento\Framework\Setup\SchemaSetupInterface;

/**
 * @codeCoverageIgnore
 */
class InstallSchema implements InstallSchemaInterface
{
    /**
    * {@inheritdoc}
    * @SuppressWarnings(PHPMD.ExcessiveMethodLength)
    */
    public function install(SchemaSetupInterface $setup, ModuleContextInterface $context)
    {
          /**
          * Create table 'greeting_message'
          */
          $table = $setup->getConnection()
              ->newTable($setup->getTable('greeting_message'))
              ->addColumn(
                  'greeting_id',
                  \Magento\Framework\DB\Ddl\Table::TYPE_INTEGER,
                  null,
                  ['identity' => true, 'unsigned' => true, 'nullable' => false, 'primary' => true],
                  'Greeting ID'
              )
              ->addColumn(
                  'message',
                  \Magento\Framework\DB\Ddl\Table::TYPE_TEXT,
                  255,
                  ['nullable' => false, 'default' => ''],
                    'Message'
              )->setComment("Greeting Message table");
          $setup->getConnection()->createTable($table);
      }
}
The main code stays in the install () method with the $ setup variable. This is the main variable, because it lets connection to the Connection () object which implements manipulation of the database.
The Connection () object belongs to the class Magento\Framework\DB\Adapter\Pdo\Mysql.
InstallData
File Setup/InstallData.php
 <?php
/**
 * Copyright © 2016 Magento. All rights reserved.
 * See COPYING.txt for license details.
 */

namespace Learning\GreetingMessage\Setup;

use Magento\Framework\Setup\InstallDataInterface;
use Magento\Framework\Setup\ModuleContextInterface;
use Magento\Framework\Setup\ModuleDataSetupInterface;

/**
 * @codeCoverageIgnore
 */
class InstallData implements InstallDataInterface
{

    /**
     * {@inheritdoc}
     * @SuppressWarnings(PHPMD.CyclomaticComplexity)
     * @SuppressWarnings(PHPMD.ExcessiveMethodLength)
     * @SuppressWarnings(PHPMD.NPathComplexity)
     */
    public function install(ModuleDataSetupInterface $setup, ModuleContextInterface $context)
    {
          /**
           * Install messages
           */
          $data = [
              ['message' => 'Happy New Year'],
              ['message' => 'Merry Christmas']
          ];
          foreach ($data as $bind) {
              $setup->getConnection()
                ->insertForce($setup->getTable('greeting_message'), $bind);
          }
    }
}
UpgradeSchema
 <?php
/**
 * Copyright © 2016 Magento. All rights reserved.
 * See COPYING.txt for license details.
 */

namespace Learning\GreetingMessage\Setup;

use Magento\Framework\Setup\UpgradeSchemaInterface;
use Magento\Framework\Setup\ModuleContextInterface;
use Magento\Framework\Setup\SchemaSetupInterface;

/**
 * Upgrade the Catalog module DB scheme
 */
class UpgradeSchema implements UpgradeSchemaInterface
{
    /**
     * {@inheritdoc}
     */
    public function upgrade(SchemaSetupInterface $setup, ModuleContextInterface $context)
    {
        $setup->startSetup();
        if (version_compare($context->getVersion(), '0.0.2', '<')) {
            $setup->getConnection()->addColumn(
                $setup->getTable('greeting_message'),
                'season',
                [
                    'type' => \Magento\Framework\DB\Ddl\Table::TYPE_TEXT,
                    'length' => 16,
                    'nullable' => false,
                    'default' => '',
                    'comment' => 'Season'
                ]
            );
        }
        $setup->endSetup();
    }
}
UpgradeData
 <?php
/**
 * Copyright © 2016 Magento. All rights reserved.
 * See COPYING.txt for license details.
 */

namespace Learning\GreetingMessage\Setup;

use Magento\Framework\Setup\UpgradeDataInterface;
use Magento\Framework\Setup\ModuleContextInterface;
use Magento\Framework\Setup\ModuleDataSetupInterface;

/**
 * Upgrade Data script
 */

class UpgradeData implements UpgradeDataInterface
{
    /**
     * {@inheritdoc}
     * @SuppressWarnings(PHPMD.ExcessiveMethodLength)
     */
    public function upgrade(ModuleDataSetupInterface $setup, ModuleContextInterface $context)
    {
        $setup->startSetup();
        if ($context->getVersion()
            && version_compare($context->getVersion(), '0.0.2') < 0
        ) {
            $table = $setup->getTable('greeting_message');
            $setup->getConnection()
                ->insertForce($table, ['message' => 'Happy Thanksgiving', 'season' => 'fall']);

            $setup->getConnection()
                ->update($table, ['season' => 'winter'], 'greeting_id IN (1,2)');
        }
        $setup->endSetup();
    }
}
As mentioned above, Upgrade files only run when the version of the module changes. That is the reason why we use the code inside the “if”.
Recurring.php
1  class \VendorName\ModuleName\Setup\Recurring implements
2  \Magento\Framework\Setup\InstallSchemaInterface
3  {
4      /**
5       * {@inheritdoc}
6       */
7       public function install(SchemaSetupInterface $setup,
8  ModuleContextInterface $context)
9      {
10        //Recurring schema event logic
       }
   }
Magento implements the RecurringData class after every stage of data installation or upgrade. This class performs final modifications to the database repository after the data has been installed or updated.
Disadvantages
However, the usage of this mechanism has also revealed many disadvantages.
Take a look at the following examples:
1. The chaos in the system: The existence of different script types in the system causes its instability and complexion. One of the most common mistakes many developers make is to change the Install script instead of creating a new one. This results in the ignored changes.
2. The complicated installation: For example, you install a table in a database and make adjustments to that table. It is hard for you to imagine the final outcome of the tables in the database. This is even more difficult when you implement multiple tables and multiple upgrades.
3. There is no update confirmation and predictable errors before the installation process.
4. With the development of many new versions, the size of the UpgradeSchema and UpgradeData files become larger. The reason is parts for the new version are added to the script without deleting the contents of the old versions.
5. The latest module version usually contains all changes and updates in the code. During the installation process, Magento will go through all the module versions and through all updates until the final version is reached.
2. Declarative Schema
The second ways to create table using database schema in Magento 2 is using declarative schema. When you install or upgrade using PHP scripts, your stable work is still ensured, but that is not enough. Magento is constantly developing.
In 2018, Magento introduced the Declarative Schema feature to avoid overloading and speed up installation and upgrade. This is a new method to work with the database and you do not need to write different scripts for each new module version. Besides, you can declare the last desired state of the database and the system automatically adjusts it without performing backup operations. In addition, this method allows you to delete data when uninstalling modules.
Magento 2.3 does not require using a Declarative schema. However, upgrade scripts will be removed in favor of the Declarative schema.
To prepare the module for the Declarative Schema, you need:
– Build data / schema patch
– Configure declarative schema for the module
– Convert upgrade script with declarative schema (This step applies to published modules using upgrade script)
* Note: a module converted to a declarative schema will not convert back to an upgrade script.
Hence, after you know the advantages of using a Declarative Schema, you will learn more about the structure and declaration of this feature.
Let’s take an example to make better understandings:
Db_schema structure
We declare the database structure in the file:
<Module_Vendor>/<Module_Name>/etc/db_schema.xml
High level node
The node schema determines the location of the schema.xsd file.
<schema xmlns:xsi=”http://www.w3.org/2001/XMLSchema-instance” xsi:noNamespaceSchemaLocation=”urn:magento:framework:Setup/Declaration/Schema/etc/schema.xsd”>
*Note: The location of the XSD file:
/vendor/magento/framework/Setup/Declaration/Schema/etc
Table node
Each db_schema.xml file must contain one or more table nodes. Each table node represents a table in the database. A table node may contain the following properties:
| Attribute | Description |
| name | Tabe name |
| engine | SQL engine. This value must be innodb or memory. |
| resource | The segmented database to install the table. This value must be: default, checkout or sales |
| comment | Table comment |
A table node can contain 3 types of subnodes:
- column
- constraint
- index
Column subnode
The Column subnode will declare a column in the table. Each column requires its own declaration.
Each Column can have the following properties:
| Attribute | Description |
| xsi:type |
Determine the type of the column:
|
| default |
Initialize column with specified default value. The default value must have the same data type defined in xsi: type. |
| disabled | Disable or delete the declared table, column, constraint or index. |
| identity | Indicate whether a column is auto incremented. |
| length | Specifies the length of a column in text and binary |
| nullable | Indicates whether the column can be nullable. |
| onCreate |
This is a DDL trigger that allows you to move data from an existing column to the newly created column. This trigger only works when a column is created. |
| padding | The size of an integer column. |
| precision | Number of digits allowed in a real data type |
| scale | Number of digits after decimal in a real data type. |
| unsigned |
For numeric data types, specify whether the column can contain positive and negative values or only positive values. |
Constraint subnode
The Constraint subcode always has the following properties:
| Attribute | Description |
| type | One of primary, unique, or foreign |
| referenceId |
A custom identifier is only used to map relationships within the file db_schema.xml. Names of Entities in databases are generated by the system. The most convenient way to set the value of this attribute is to use the value written in the file module db_schema_whitelist.json when you run the command |
foreign constraints are similar to foreign keys in SQL. This type of binding connects the two tables together. The following properties define foreign constraints:
| Attribute | Description |
| table | Table name |
| column | A column in the current table refers to a specific column in another table. |
| referenceTable | Table is referenced |
| referenceColumn | A column in ReferenceTable |
| onDelete |
Foreign key trigger. The value must be CASCADE, SET NULL, or NO ACTION |
Index subnode
Index subnodes have the same structure as internal constraints but contain different logic. While constraints are used to define limits, indexes are used to speed up DQL activities. The following properties define an Index:
| Attribute | Description |
| referenceId |
A custom identifier is only used to map relationships within the file db_schema.xml. Names of Entities in databases are generated by the system. The most convenient way to set the value of this attribute is to use the value written in the file module db_schema_whitelist.json when you run the command |
| indexType | The value must be btree, fulltext, or hash |
Perform operations with the database
Next, let’s learn about common operations with databases using declarative schemas
Create Table
Take an example of creating a table: catalog_product_entity of the entity_id primary key:
When you create a new table, remember creating magento 2 db_schema_whitelist.json file by using the command: php bin/magento setup:db-declaration:generate-whitelist –module-name= ModuleName
Clear the table
To delete the catalog_product_entity table in the database, you need to remove the table declaration code from the db_schema.xml file.
Rename the table
When renaming, declarative schema will create a table with a new name and remove the old table. Data is transferred from the old table to the new one defined by the onCreate attribute.
For example, rename the catalog_product_entity table to new_catalog_product_entity.

*Note: You cannot transfer data and rename columns at the same time.
After renaming the table, be sure to recreate the file: db_schema_whitelist.json.
Add columns to the table
For example, when you add a custom column to the table, you add the code to the file db_schema.xml.
When adding a column to the table, be sure to recreate the file db_schema_whitelist.json.
Delete a column of a table
To delete a column from the table, you delete the code that declares the column in the file db_schema.xml.
(In contrast to the new addition).
* Note: one column can be removed only when that column exists in the file.
Change the type of column
To change the type of the column, you need to modify the property: xsi: type in the declaration code of that column in the file.
Rename the column
To rename a column, delete the original column declaration and create a new column. In the new column declaration, use the onCreate attribute to specify which column will move data from.
Use the following structure to move data from the same table.
1 onCreate="migrateDataFrom(entity_id)"
Remember to recreate the file: db_schema_whitelist.json
For example, add the index CATALOG_PRODUCT_ENTITY_ATTRIBUTE_SET_ID to the catalog_product_entity table.
Create a foreign key
For example:add a foreign key CATALOG_PRODUCT_ENTITY_STORE_ID_STORE_STORE_ID to the table.
Create constraint:
Remove a foreign key
You remove the above declaration code of the foreign key which needs deleting.
*Note: the foreign key can only be removed once it exists in the file: db_schema_whitelist.json
Develop data and schema patches
A data patch is a class that includes instructions for modifying data. It is declared in the <Vendor>/<Module_Name>/Setup/Patch/Data/<Patch_Name>.php file and implements class \Magento\Framework\Setup\Patch\DataPatchInterface.
A schema patch is a class that contains instructions for modifying schema. It is declared in the <Vendor>/<Module_Name>/Setup/Patch/Schema/<Patch_Name>.php file and implements class \Magento\Framework\Setup\Patch\SchemaPatchInterface.
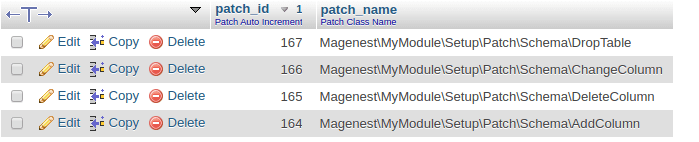
Unlike declarative schema, patches are applied only once. A list of patches is stored in the patch_list table of the database. Each unapplied patch will be applied when running setup: upgrade.
If you plan to enable rollback for your patch during the module uninstallation, you must deploy \ Magento \ Framework \ Setup \ Patch \ PatchRevertableInterface.
The declarationative schema removes the version from the setup_module table, leaving the Composer version only. Therefore, you can create all patches and new modules without specifying the setup_module version.
The order of installing patches is handled through a dependency-based approach. The patches may be independent or dependent on other patches. The independent patch can be installed in any sequence. A dependency patch requires a minimum number of patches to install successfully.
To identify a dependency in a patch, add the public static function getDependencies() method to the patch class and return the class name of the other patches which this patch depends on. The dependence can exist in any module.
1 public static function getDependencies()
 2 {
 3     return [
 4 \SomeVendor\SomeModule\Setup\Patch\Data\SomePatch::class
 5     ];
 6 }
Run the following command to revert all installed data patch of composer:
bin/magento module:uninstall Vendor_ModuleName
Run the following command to revert all installed non-composer data patch:
bin/magento module:uninstall Vendor_ModuleName
Old scripts will work with new versions of Magento. However, if you want to convert the old script to a new format, deploy \ Magento \ Framework \ Setup \ Patch \ PatchVersionInterface. This interface allows you to specify the setup version of the module in your database.
If the module version is higher or equal to the version specified in your patch, the patch will be ignored. If the version in the database is lower, then the patch will install.
3. Conclusion
After learning more about the Declarative Schema we can see more advantages of this feature compared to writing using PHP.
- Avoid missed / repeated SQL operations: we’ll just install what is needed
- There is a dry-run mode for trial installation which helps detect errors before installation
- Optimize performance: Declarative helps save considerable time by moving from the current version to the last point
- Support for rollback: We can go back to the previous version.
In this article, we already show you how to create table using database schema in Magento 2. We hope our article is helpful and good luck to you!
BSS Commerce is one of the leading Magento 2 Plugins providers and Magento 2 development service in the world. With experienced and certified Magento developers, we commit to bringing high-quality products and services to optimize your business effectively. Furthermore, we offer FREE Installation – FREE 1-year Support and FREE Lifetime Update for every Magento extension.