What are Magento 2 robots meta tags? Well, here’s the answer!
People often mistakenly believe that the more your site is exposed to search engines, the better for SEO. But in fact, there are some pages that should be excluded from search results, or restrict the way search engines use it.
For SEO, the robot meta tag is often considered one of the most useful tools that allow you to give special instructions directly to search engines. This helps you to control how and if your content appears on Google, Bing, and other search engines.
Given how important it is, we write this article to help you understand Magento 2 Robots meta tags thoroughly.
Let’s explore the information below!
What Is Magento 2 Robots Meta Tag?
Table of Contents
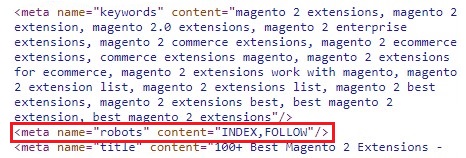
Magento 2 Robots Meta Tag is a piece of code that is in the tag of the HTML document. It is used for Indexation-controlling the Magento 2 web page.

Robots Meta Tag for Magento 2 tells what pages you want to hide (noindex) and what pages you want them to index from search engine crawlers. It also tells search engines what to follow and what not to follow the content of the Magento 2 web pages or Magento 2 website.
Interested in Magento 2 SEO? Come to Magento 2 SEO Guide now.
Why Is Magento 2 Robots Meta Tag Important For SEO?
Not all of your content needs to be indexed and shown in Google. To get a high ranking for your Magento 2 website, you need a wise instruction for the bots about what NOT to index. If all of your content is crawled, the performance of SEO will not be good for sure.

A few examples of what you should restrict from crawlers: 404 not-found pages, duplicate content, outdated product pages, pages in the staging environment, thank-you pages, internal search results, and more.
In short, the bigger your Magento 2 website is, the more you’ll deal with managing crawlability and indexation. If you want Google and other search engines to crawl and index your pages as efficiently as possible, you have to know how to correctly combine page-level directives with Magento 2 robots.txt and sitemaps.
>>> READ MORE: The Best Combo of Magento SEO Extensions to give the complete SEO solution for your site.
How to Setup Robots Meta Tag in Magento 2 Default?
Step 1: Log in to Admin Panel

Step 3: Expand the Search Engine Robots
Step 4: Default Robots – Choose a combination from the drop-down
There are 4 combinations among robots meta tags nofollow, noindex, follow, and index:
- INDEX, FOLLOW: Allow crawlers to index and follow the links.
- NOINDEX, FOLLOW: Disallow indexing but allows crawlers to follow the links.
- INDEX, NOFOLLOW: Allow crawlers to index the current pages but block them from following the links.
- NOINDEX, NOFOLLOW: Disallow indexing and following of the current page and links on that page.
Step 5: Write custom instructions
In the Edit custom instruction of robots.txt File, you can write the needed custom instructions for Magento 2 robots.txt.
Take a look at the following examples for customizing Magento 2 Robots.txt:
Allows Full Access
User-agent:*
Disallow:
Disallows Access to All Folders
User-agent:*
Disallow: /
Default Instructions
Disallow: /lib/
Disallow: /*.php$
Disallow: /pkginfo/
Disallow: /report/
Disallow: /var/
Disallow: /catalog/
Disallow: /customer/
Disallow: /sendfriend/
Disallow: /review/
Disallow: /*SID=
Step 6: Click Save Configuration and flush cache
However, it is only applied to the website. If you want to hide or restrict the indexation of a specific page you have to edit the code using HTML editors. For example, you can restrict indexation with the following code:
<html >
<head >
<meta name=”robots” content=”noindex, follow”/ >
<title>page title>
</head >
Optimize Robots Meta Tag With BSS Magento 2 SEO Extension
By default, admins have to change the “INDEX, FOLLOW” by fixing the source code of the pages manually. But with BSS Commerce latest extension, Magento SEO Extensions, you can complete your need to change the robot’s meta tag for any page within a few clicks at the backend.

Back to our topic, there are 3 combinations you can set up with our robot meta tag:
- NOINDEX, NOFOLLOW
- NOINDEX, FOLLOW
- INDEX, NOFOLLOW

Here is how easily you can configure it:
Choose the robot meta tag for specific pages, categories or folder
Just fill in the URL pattern of the page you want to set up. Choose the tag combination you want. Click “Save” then flush the cache to complete. Admins can have as many pages changed as they want without any need for developers.
Set NOINDEX, FOLLOW for a list of regular pages
We select a collection of pages that we think should be set to noindex, and follow for better SEO performance such as checkout, CMS page, customer account pages, etc. You can choose the page based on your purpose.
Summary
Guiding search engines to crawl and index your website the way you want can be a challenging task. We hope this article about Magento 2 robots meta tag can help you.
You may have trouble when setting up robot meta tags for specific pages if you don’t know about code. So feel free to ask us if you have any questions!
Or you can continue reading our next SEO guide for Magento 2, which is about the secret 301 Redirect Technique!

Remember to check our SEO package with more utilities for your Magento 2 websites:
- Gather 9 Magento 2 extensions in one.
- Solve duplicate content issues by Canonical URLs and Hreflang Tags.
- Improve UX/UI by using SEO Advanced Breadcrumbs, 301 Redirect, Open Graph, Rich snippets, and Twitter Cards.
- Get higher control over indexation with Magento 2 HTML/XML sitemap and Robots Meta Tag.
- Add meta information faster with the Meta Tags Template.
BSS Commerce is one of the leading Magento extension providers and web development services in the world. With experienced and certified Magento developers, we commit to bring high-quality products and services to optimize your business effectively. Furthermore, we offer FREE Installation – FREE 1-year Support and FREE Lifetime Update for every Magento extension.
CONTACT NOW to let us know your problems. We are willing to support you every time.


