")
Magento 2 Sale Label is a helpful tag and even the most professional Magento user may do not know all the benefits. When a customer first enters an online store, the only thing that attracts them is those products that are on sale. Obviously, WE all want to get the best price!
Let’s discover everything about the Magento 2 Sale Label with our article.
Types Of Label In Magento 2
Table of Contents
Magento 2’s Product Label functionality allows merchants to design bespoke labels for their products. It’s useful for highlighting a group of products with discounts or special offers. Labels can be customized for specific establishments or consumer groups.
Product Label
Magento 2 Product Label allows merchants to design bespoke labels for their products. It’s useful for highlighting a group of products with discounts or special offers, and labels can be customized for specific establishments or consumer groups.
You may help clients navigate through your site and draw their attention to the things you wish to sell by including extra details immediately on your product pages with labels of special offers and promotions. You can effortlessly regulate customer purchases while also assisting them in browsing and finding things they want.

Sale Label
You can create many labels by using product labels. But one of the essential labels should be the Sale Label.
You may help clients navigate through your site and draw their attention to the things you wish to sell by including extra details immediately on your product pages with labels of special offers and promotions. You also can effortlessly regulate customer purchases while also assisting them in browsing and finding things they want. For example: “Hot,” “New,” “Save 20%,” “Low Stock,” and more.
The Benefits Of Creating A Magento 2 Sale Label For Magento 2 Store
Choose anything you want
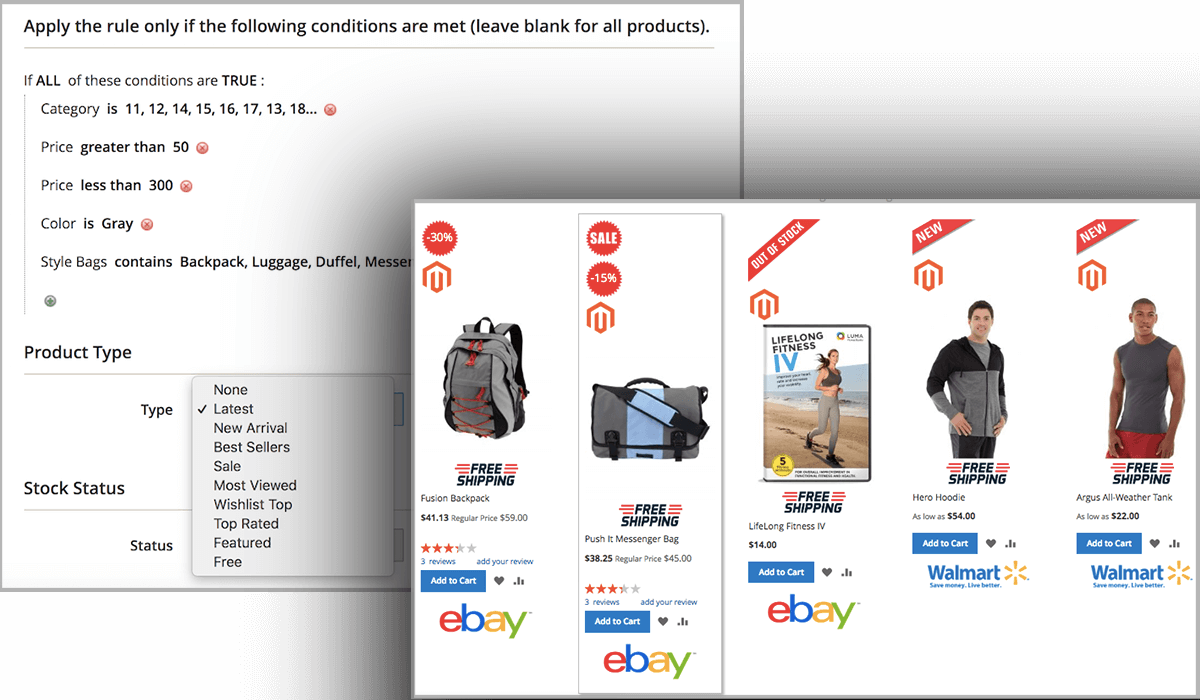
Labels will only appear if all of your precise requirements have been completed. Because the extension uses Magento’s built-in Conditions capability, you can create particular rules for how the stickers are displayed based on product attributes like SKU, Category, and so on.
SCOUR NOW >>> How To Multi-Select Layered Navigation In Magento 2 Effectively if you want to choose label effectively.
There are labels everywhere
You may choose to display your attractive labels on Category Pages, Product Pages, or both with the Product Labels extension! You can put this label on every product on your website.
Do not miss this chance to call out your customer!
READ NOW >>> Magento 2 Layered Navigation Extension Is Not Work Effectively? Cause And Solution To Fix Them Now to make your labels work.
Variables as a source of dynamism
The Product Labels extension allows you to create labels using predefined variables, giving you a lot of versatility when promoting a special offer.
Your customer can not miss your label. And because everyone likes sales off, they will be interested in your label. Your website traffic increases. Your conversation rate boost.
You can also use the FOMO effect – Fear Of Missing Out by letting your customers when the sales will end, and the result will much better!
Real Estate on the Product Page
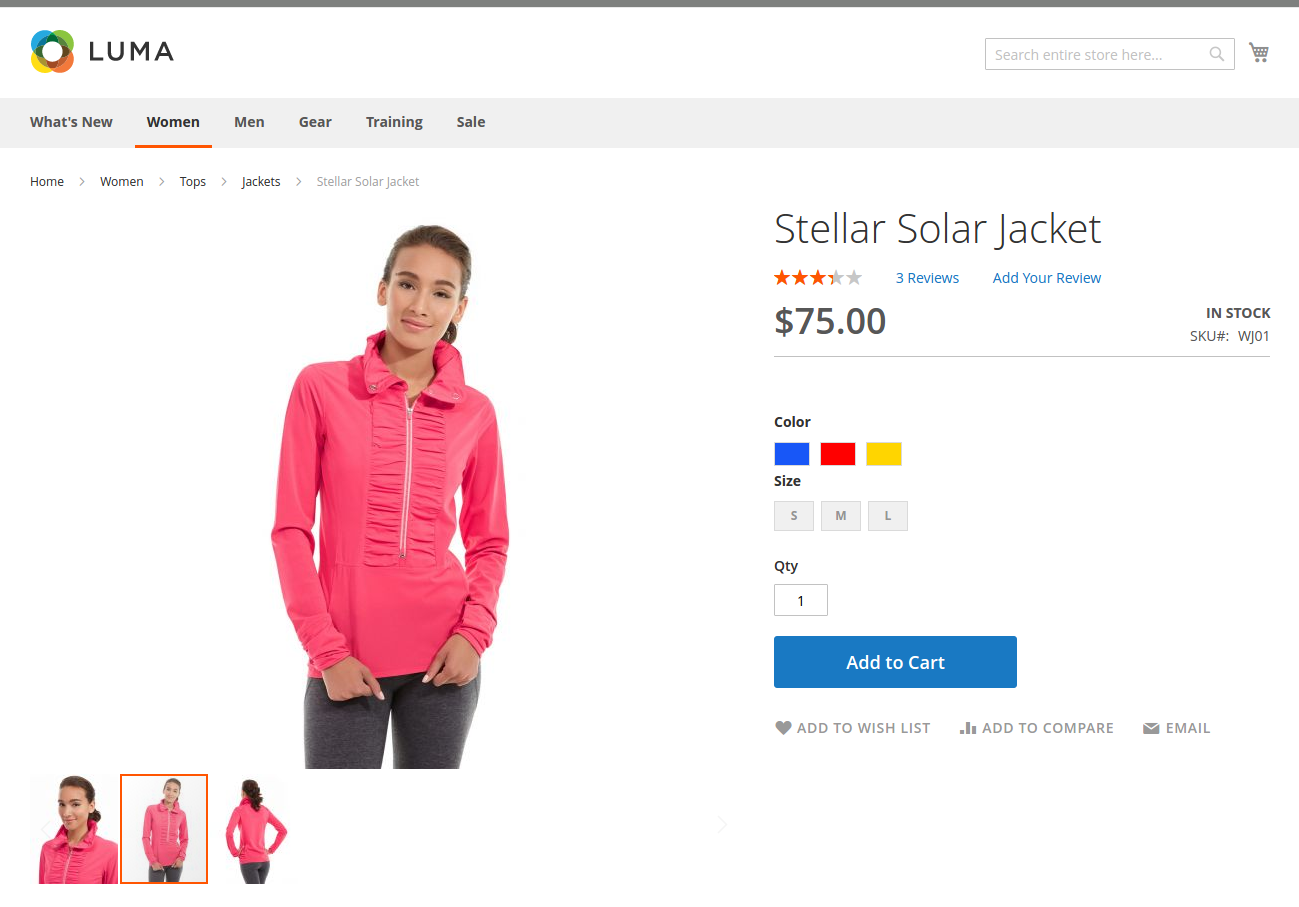
Sale Label allows you to set labels on Product Images in various locations, but it also allows you to show them under the Short Description. This will enable you to make the most of the space available on your Product Pages.
On a tight deadline
Product labels can be set to appear at predetermined periods. When you have those beautiful promos going on, you can use this functionality to make sure your clients notice and save spending time removing stickers after the discount period has ended!
The importance of positioning
Find the ideal spot on the Product Image to display your sticker! You have a choice of 9 different venues to ensure that you discover that special someone.
How To Set Up Sale Label In Magento 2
Create Featured Products Widget
- Navigate to the Content > Widgets section and press the Add widget button.
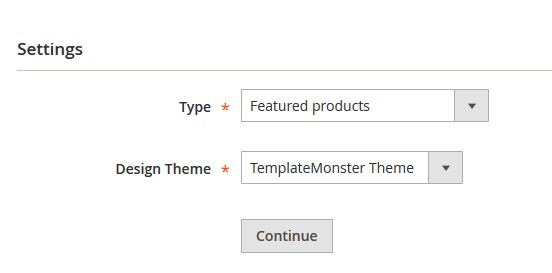
- In the Settings section in the Type field, select Featured products.
- Then choose the current theme from the Design Theme dropdown.
- Press the Continue button.
Storefront Properties
- In the Widget Title field, enter a title for internal reference only (not visible on the frontend).
- Set Assign to Store Views to “All Store Views” to make the widget available for all Store Views.
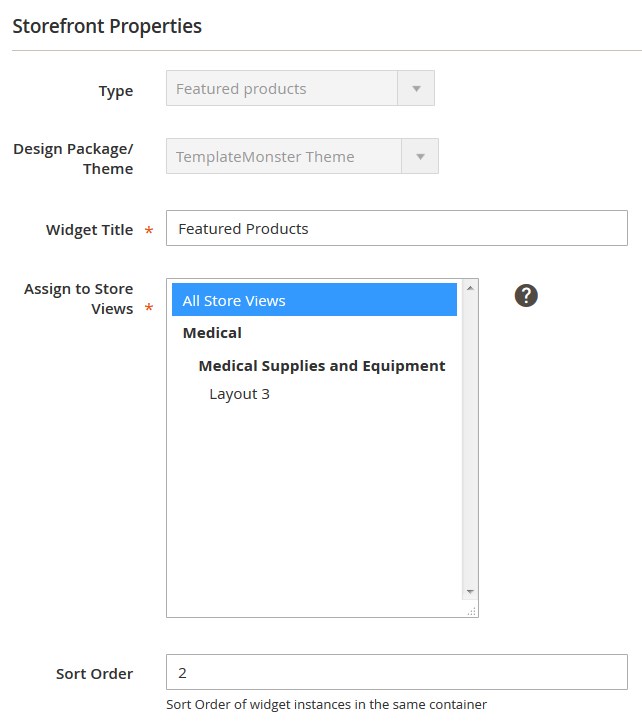
To select more than one, hold the Ctrl key down and select each option.
- Enter a number in the Sort Order field. The top position is zero.
Layout Updates
Then specify the place where you want to display the module in the Layout Updates section.
We are going to display the widget on the Home Page.
- Press the Add Layout Update button.
- Set Display On to the Specified Page.
- Select CMS Home Page from the Page option dropdown.
- Choose Main Content Area container and select the template for the widget (Product Grid or Product List)
Widget Options
- To set up the widget, go to Widget Options section on the left.
- In this section, you should select the product type, which you want to display.
- We will choose Manual Products.
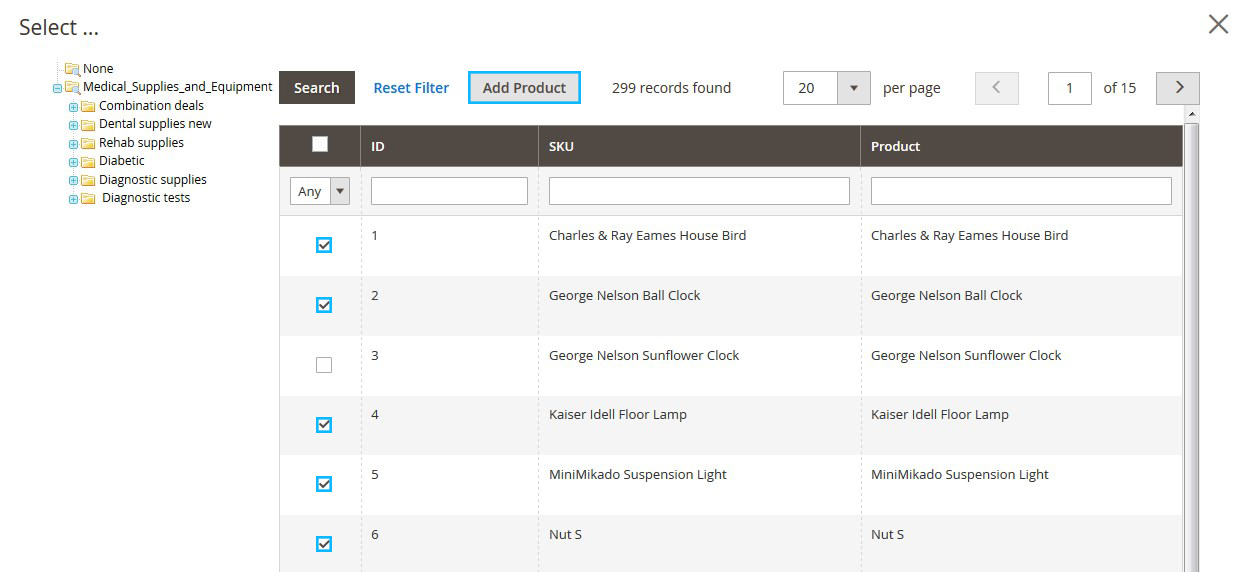
- Move to the Choose custom products option and press the Select … button
- Tick the products, you want to show with the help of the widget and click Add Product.
- Then specify the title for the Manual Products.
- Go to the Labels tab.
- Set the Show Label option to Yes and enter the text for the label in the Manual Products label option.
- Navigate to the View tab.
You can set the following options:
Product Image width — set the product image width in px. Example: 240
Product Image height — set the product image height in px. Example: 260
Product Name length — set the product name length to display within the widget.
Products to Display — set the number of products to display.
Products per View — specify the number of posts per view.
Carousel — enable/disable the carousel (If the carousel is enabled, a new field will come up).
Products per View — number of products to display in the carousel. Doesn’t apply within sidebar template (there is an option equal to 1).
Use arrows — enable/disable the arrows for carousel navigation.
Prev button css class — Css class for the previous button (e.g., for font icon).
Next button css class — Css class for next button.
Use Pagination — you can use dots for carousel pagination.
- Save the widget.
- Clear the Magento cache.
Conclusion
Below is a brief description of the Magento 2 Sale Label. We hope that it can help you in building up your Magento store.
If you may want to know more about the backorder, CHECK NOW >>> ALL Must-To-Know Pros And Cons Of Magento 2 Backorder
BSS Commerce is one of the leading Multi-platform eCommerce solutions and Magento 2 web development services providers in the world. With experienced and certified developers, we commit to bring high-quality products and services to optimize your business effectively.
CONTACT NOW to let us know your problems. We are willing to support you every time.