
This is a Magento 2 beginner tutorial on how to upload product images to make your product page look visually attractive.
Images are powerful, especially in eCommerce. Images make your website more beautiful and professional for your customers. And product images also help customers make purchase decisions quicker.
Long story short, it’s crucial to upload your product images to your Magento 2 website.
And in this Magento image upload article, we will show you step by step how to upload product images as well as how to move, edit, or delete them.
The Importance Of Magento Image Upload
Table of Contents

First, let’s make it clear about the importance of Magento 2 Product Image.
Needless to say, visual elements are always more eye-pleasing than text.
Shoppers will always lay their eyes on your product images before reading the product description. A product image complements the product description, making it more appealing to the shoppers.
Especially when shopping online, shoppers can’t touch the product, so they need to visualize it before purchasing.
As a result, Magento 2 image upload is the most effective way to communicate with your customers about the details of your products.
How To Upload Magento 2 Product Images
For each product, you can upload as many images as you need, rearrange their order and control how each image is used.
Manage Product Images
In the backend, go to Catalog > Manage Products and open the product in Edit mode.
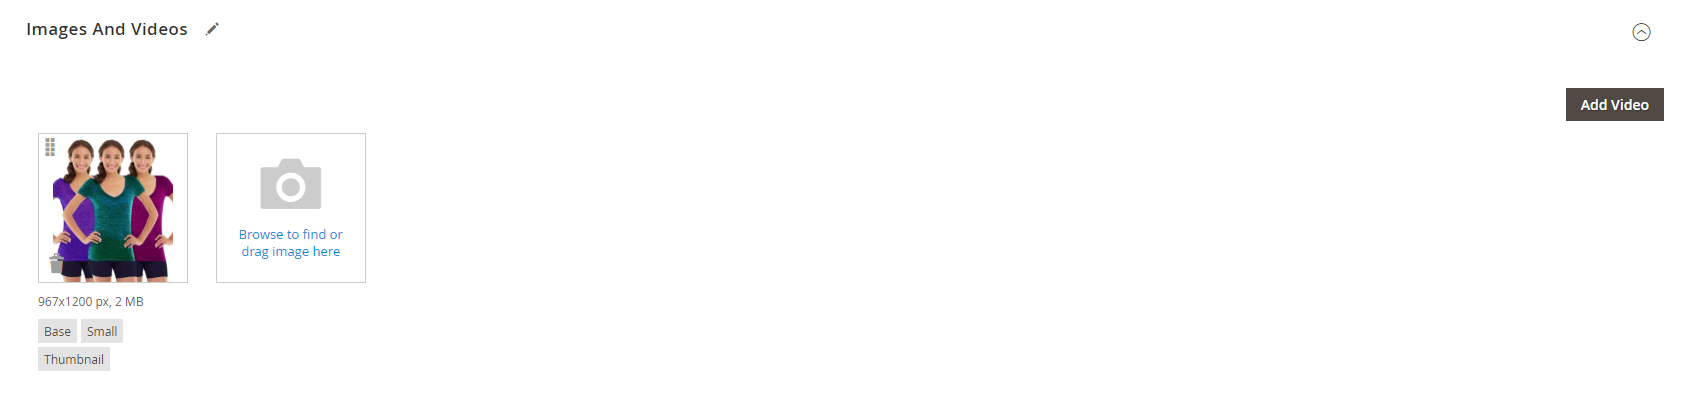
Then scroll down and expand the Images and Videos section.
Upload Magento 2 Product Images
To upload image Magento 2, you can do one of the two following method:
- In the Images box, drag an image from your desktop and drop it on the camera tile.
- Click the camera tile in the Images box, then select the image file on your computer, and click Open.
Note:
- For the best compatibility, we recommend you to upload product images with the sRGB color profile.
- The image file name length cannot exceed 90 characters.
Rearrange Images
To change the order of the images in the gallery, click the Sort icon at the bottom of the image tile and drag the image to a different position in the Images box.
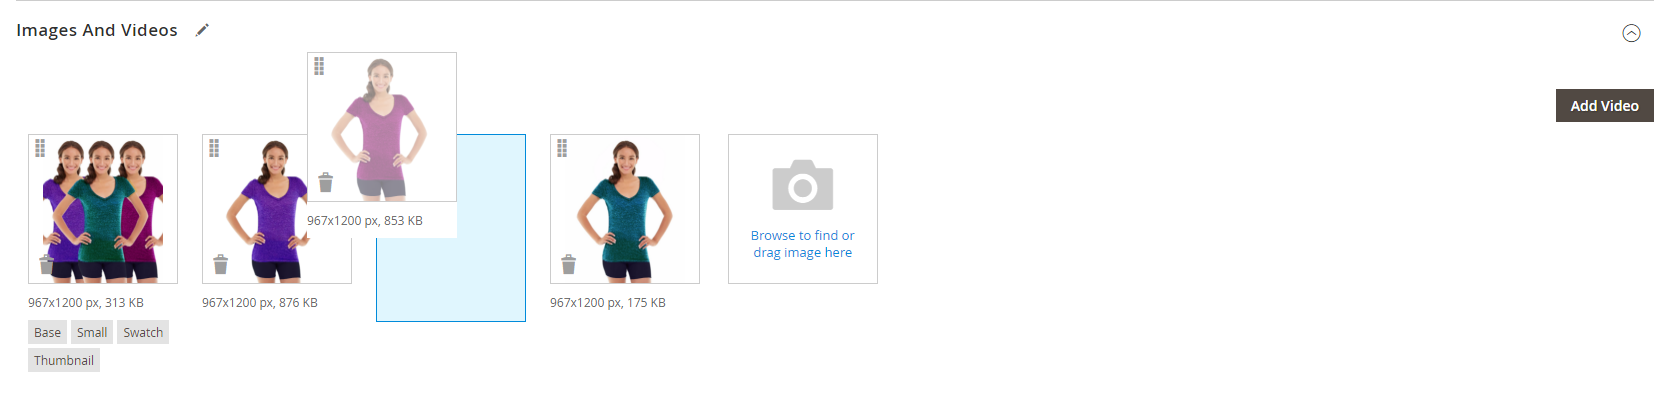
Delete a Product Image
To remove a product image from the gallery, click the Delete icon in the upper-right corner of the image tile and click Save.
Set Image Details
Click the image that you want to open in detail view, then you can enter alt text, assign a role (thumbnail, small image, base image, swatch) or hide the image.
Along with this Magento 2 upload image tutorial, don’t forget to read these other helpful articles from us:
The Best Solution to Optimize Your Images
As we mentioned, product images are a crucial component of every Magento 2 website, but depending on how you use them, they can benefit or harm your website.
So the size of your product images is a noteworthy aspect. The image size can effective website design as well as SEO and conversion rates.
Hence, it is recommended to keep all your Magento 2 images on a single page to a total of 1 MB or less for fast loading speed.
And hereby we want to introduce you to the best solution to optimize the size of images on your website:
Magento 2 Convert Images to WebP by BSS
This extension helps you convert all your images on your website to the WebP format to remain the images’ quality but compress it to be about 30% smaller.
Using Magento 2 Convert Images to WebP by BSS, you don’t need to do manual image format conversation anymore. The module will automatically convert them all to WebP with only some clicks.
This extension enables you to choose to change the image format on some specific page on your website. You can choose to convert images on the product page, category page, home page, or CMS page.
You can choose not to convert some specific images, too.
For example, you want to convert JPG format to WebP format on product pages, except for the images on the product A product page. All you need to do is fill in the product ID in the extension configuration.
Highlight features:
- Automatically convert images under other formats (e.g jpg, png, jpeg) to Webp to optimize the loading and display speed of your website.
- Choose specific places you want to convert your images to Webp format: All, Product Page, Category Page, Home Page, CMS Page.
- Reduce time spent on conversion, automate every media upload, and deliver better-looking images.
Conclusion
In this article, we have shown you the best Magento 2 beginner guideline on how to upload, move, edit, or delete product images.
We hope this Magento image upload blog post is helpful and good luck to you!
If you are looking for a credible Magento development company, this is when BSS Commerce comes in handy. With the solid 11+ years of experience, our experts are committed to optimizing your Magento store effectively by offering these services below:
- Magento website development
- Magento 2 integration services
- Magento upgrade services
- Magento maintenance service
Don’t hesitate to let us know if you have any further questions, we are thrilled to support you dedicatedly!