The Detailed Guidance on WooCommerce to Magento 2 Migration
WooCommerce is a great plugin for creating online stores, but once your business begins to expand, you need more than a plugin. Magento is a great eCommerce solution that provides a scalable and highly usable tool with opportunities for further development, sophisticated additional options, and different variations of settings that may be absent in WooCommerce.
In this guide, BSS Commerce will provide a range of full guides for WooCommerce to Magento 2 migration, divided into three easy steps and the key elements to review after migrating.
Contents
- Introduction to WooCommerce and Magento
- 3 Methods to Perform WooCommerce to Magento 2 Migration
- WooCommerce to Magento Post-Migration Checklist
- Final Words – WooCommerce to Magento 2 Migration
- FAQs – WooCommerce to Magento 2 Migration
Introduction to WooCommerce and Magento
Though they serve different purposes, WooCommerce and Magento stand as the most popular platforms used in the creation of online retail stores.
WooCommerce
WooCommerce is an impressive plugin that can be integrated into WordPress; it is an appropriate solution for those webmasters who already have their own websites and want to add eCommerce facilities to them. It is also relatively easy to use, making it suitable for beginners or small businesses that are looking for a more affordable option.
Choose WooCommerce if: you are setting up an online shop; you feel familiar with WordPress; and you have some money for plugins.
Pros
- Cost-effective: Free to download and install, with a wide range of affordable plugins for additional features.
- User-friendly: Easy to set up and manage, especially for those familiar with WordPress.
- Large community: There are various resources, including forums, tutorials, and developers, that can help you with any problem you might face.
- Scalable: Can handle a decent amount of products and traffic for smaller businesses.
Cons
- Limited features: Out-of-the-box functionality is basic, requiring plugins for advanced features
- Scalability limitations: May struggle with very large product catalogs or high traffic volumes
- Security concerns: Requires ongoing maintenance to keep WordPress and plugins secure
Magento (Adobe Commerce)
Magento is a solution for eCommerce which was built using the open-source content management system CMS platform whereas an Opencart will contain only minor functionalities perfect for small stores.
Choose Magento if: While this method is highly effective, it may not suit your specific needs: you have a broad range of products, many visitors to your site, or complex functions and fully personalized design.
Pros
- Highly Scalable: Built to handle large product catalogs and high traffic volumes.
- Extensive features: Offers a wide range of built-in features for marketing, SEO, promotions, B2B functionalities, and more.
- Highly customizable: Allows for extensive customization of the store’s look and user experience.
Cons
- Cost: Requires investment in software licensing, development, and potentially ongoing maintenance.
- Complexity: Steeper learning curve compared to WooCommerce, often requiring developer expertise.
>>> Read more: Magento vs WooCommerce: Which one was developed for you?
The Final Verdict: Using WooCommerce as a starting platform for an online shop is highly effective, but it has some drawbacks when the business grows. Although you are growing your product catalog and increasing customer traffic, WooCommerce might have difficulties with performance.
Fortunately, when it comes to upgrades, Magento has quite a strong suit for its users. It also ensures that it can cater to larger inventories and more traffic as your business grows in size and complexity. That is why you should consider transferring WooCommerce to Magento. Here is the detailed guidance from the BSS Commerce website, with three different methods explained in detail below. Now, let’s turn to the following section to learn more.
3 Methods to Perform WooCommerce to Magento 2 Migration
Method 1. Manual Migration
Step 1: Export WooCommerce data to a CSV file
1. Go to the All Products section and then click on Products.
2. Proceed to click on the Export button located at the top of the page. This action will lead you to the Export Products screen.
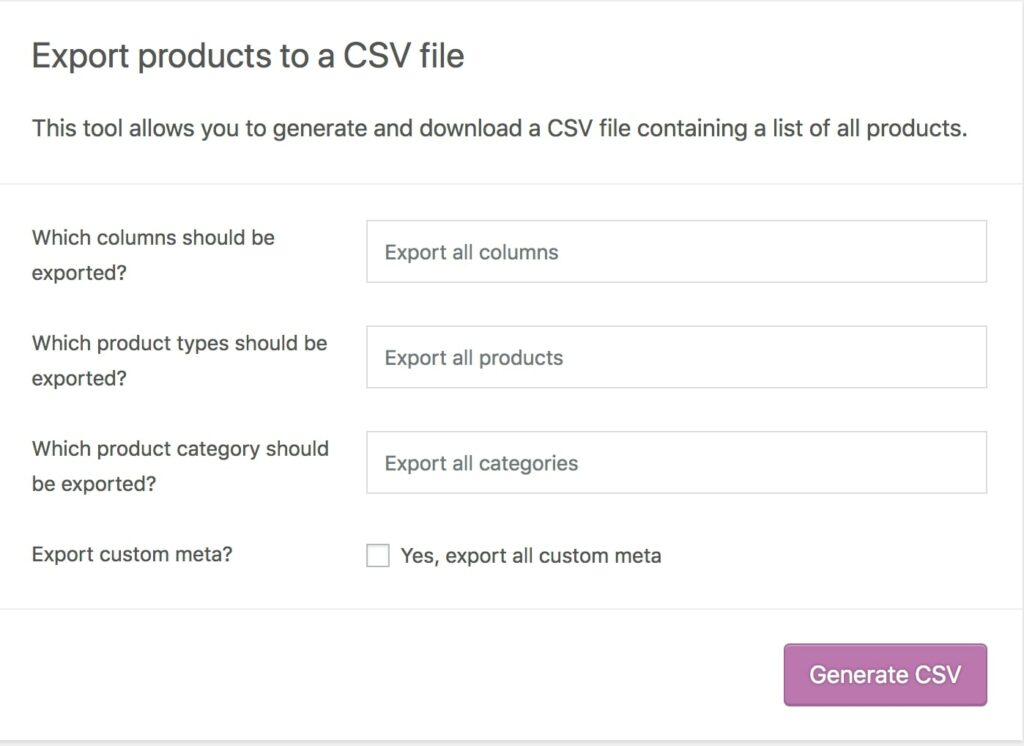
3. Choose to Export All Columns or select specific columns to export using the dropdown menu.
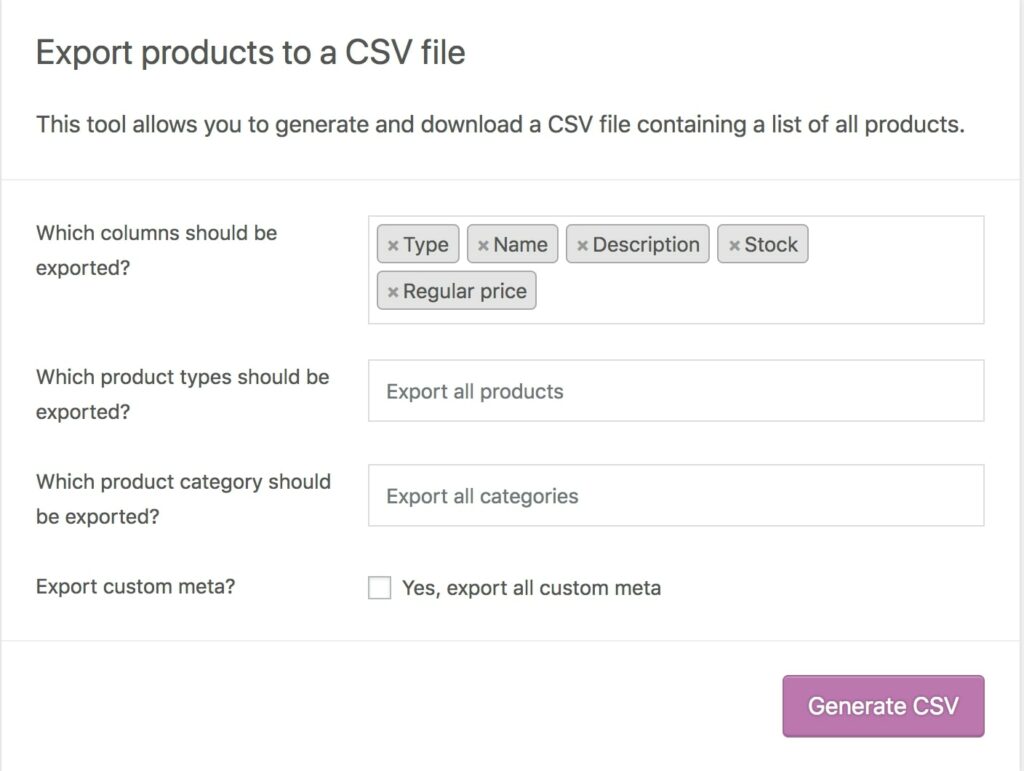
4. Opt to Export All Products or select specific product types to export using the dropdown menu.
5. Choose to Export All Categories or select specific categories to export using the dropdown menu.

6. If necessary, check the box to Export Custom Meta. This option is useful for exporting metadata from other plugins. Metadata columns will be exported with meta:-prefixed to the metadata.
7. Click on Generate CSV button and wait for the export process to complete
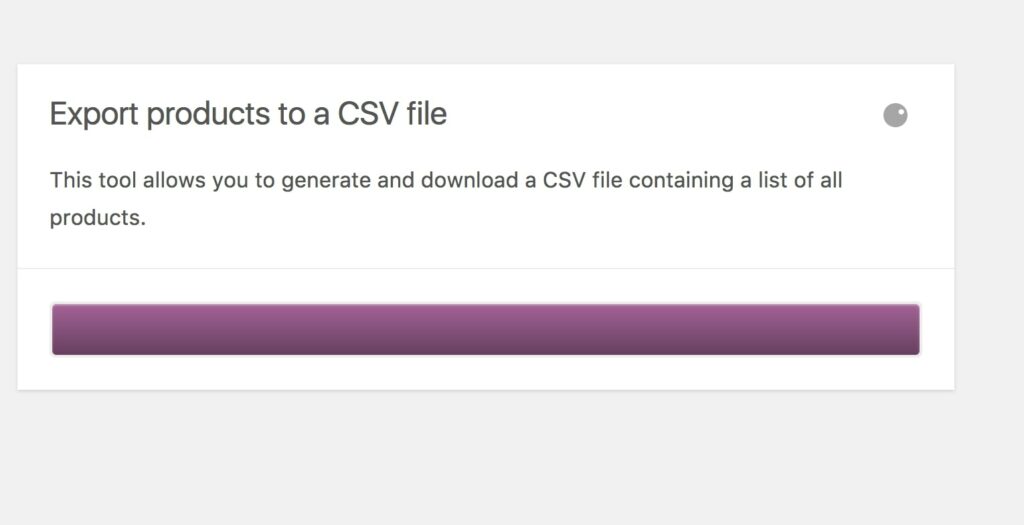
8. Once Export is finished, your products will be successfully exported and the CSV file will be downloaded by your browser.
Step 2: Manually Import Data to Magento
The next step is to import the WooCommerce data into Magento to transfer all the necessary information. Magento allows for importing goods, customer details, addresses, product images, and advanced pricing data.
To ensure seamless integration of the downloaded CSV files into Magento, please check platform compatibility between the two platforms. On the other hand, you can download the Magento CSV example files and compare them with the CSV file downloaded for WooCommerce.
PREPARE THE DATA
1. On the Admin sidebar, navigate to System > Data Transfer > Import.
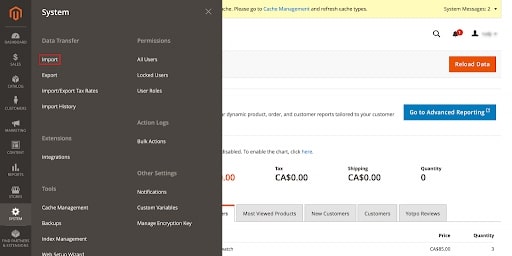
2. In the Import Settings section, choose the desired Entity Type from the following options:
- Advanced Pricing
- Products: Read this blog for a detailed guide: How to Import Products in Magento 2
- Customer Finances
- Customers and Addresses
- Customers Main File
- Customer Addresses
- Stock Sources
3. Click on the “Download Sample File” button
4. Locate the export file in the downloads folder of your web browser and proceed to open it
TAKE NOTE
- Take a closer look at the structure of the sample file and use it to prepare your CSV import file. Make sure that the column headings are spelled correctly. (The size of your import file does not exceed 2 MB)
- In case your import data includes paths to product images, ensure that the image files have been successfully uploaded to the appropriate location. By default, the designated location on the Commerce server for these images is pub/media/import.
- However, if the images are stored on an external server, please ensure that you possess the complete URL to the directory containing the images.
CHOOSE THE IMPORT BEHAVIOR
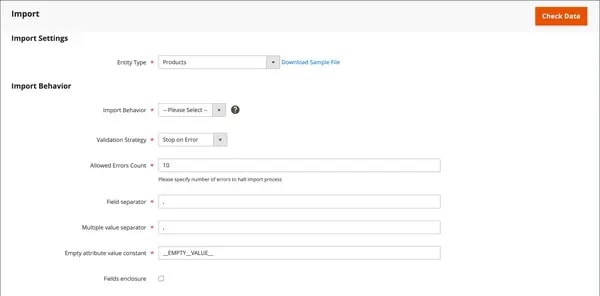
1. Choose one of the following options to set the import behavior:
- Add/Update
- Replace
- Delete
2. To determine the action when an error is encountered during the import process, select one of the following:
- Stop on Error
- Skip error entries
3. For the Allowed Errors Count, put down the maximum number of errors that can take place before the import is stopped. In default, the value of this element is set to 10.
4. The default field separator in a CSV file is a comma (,). If you want to use a different character as the separator, ensure that the data in the CSV file matches the specified character.
5. The multiple value separator which is used if the column value is a list is also a comma (,). If the user prefers a different character to be used as the separator then it is necessary for the data which is in the CSV file to be properly aligned.
6. By default, the constant value for an empty attribute is set to _EMPTY_VALUE_.
7. If you need to enclose special characters found in the data as an escape sequence, select the Fields Enclosure checkbox.
IDENTIFY THE IMPORT FILE
1. Click Choose File to select the file to import
2. Locate the CSV file you have prepared for importing and then click on Open.
3. To set Images File Directory enter the relative path to the directory on the Commerce server where the images uploaded with this form are stored.
CHECK THE IMPORT DATA
1. Click on the Check Data button located in the upper-right corner. Wait for a few moments for the validation process to finish.
2. If the imported data is valid, it will show a success message below saying that the file contains valid data. If the file is valid, continue to the next step by clicking at the Import link.

3. If there are any issues with the data as highlighted in the message, make the necessary corrections and attempt to import the file once more.
4. The import process will continue until all data has been processed unless an error is encountered. If you encounter an error message in the Validation Results, address the issue with the data and try importing the file again.

5. You will receive an error message stating that the URL key already exists. A message will appear once the import process has been completed.
Therefore, manually migrating WooCommerce to Magento 2 is a time-consuming and tough process, especially for beginners. Now, let us explore an alternative migration approach to address your challenges.
Method 2. Use the Magento 2 Import Export Extension Combo
The Import/Export Product Reviews extension for Magento 2 enables merchants to efficiently transfer product reviews using a CSV file. In this file, essential data like customer names, review titles, review details, product SKUs, and rating options are included. This allows store owners to allocate reviews to specific customers and products, as well as set review statuses during the import process.
Now, BSS Commerce will guide you on installing the Import/Export Core module:
Step 1. Download the extension
Step 2. Establish a new folder at the following location: [Magento root folder]/app/code/Bss/ImportExportCore
Step 3. Extract the source code of the extension in the designated directory.
Step 4. Navigate to the Magento 2 root directory and execute the subsequent commands:
- php bin/magento setup:upgrade
- php bin/magento setup:di:compile
- php bin/magento setup:static-content:deploy
- php bin/magento cache:clean
Once the Core module installation is completed, proceed with the installation of the separated Magento Import and Export extensions in the package.
Step 1: Download and extract all Import Export extensions
Step 2: Create a new directory named app/code/Bss/MODULENAME/, replacing MODULENAME with the internal identifier of each module. You can find this identifier in the “composer.json” file within the downloaded extension ZIP file. Look for the “psr-4” node.
Create these directories to install Import Export extension:
- app/code/Bss/CmsPageImportExport/
- app/code/Bss/CategoriesImportExport/
- app/code/Bss/NewsletterImportExport/
- app/code/Bss/ProductAttributesImportExport/
- app/code/Bss/ReviewsImport/
- app/code/Bss/UrlRewriteImportExport/
- app/code/Bss/WishlistItemImportExport/
- app/code/Bss/OrderImportExport/
Step 3: Upload all the directories to the root directory of your Magento installation. The root directory of Magento is the one that contains the “app”, “bin”, “lib”, and other directories.
Step 4: Navigate to the Magento 2 root directory and follow the following command: php bin/magentosetup:upgrade
Step 5: Run the command: php bin/magentosetup:static-content:deploy
Step 6: Clear the cache
In the upcoming section, check out the user guide and learn how to import and export product reviews with the Magento extension, created by BSS Commerce, as follows:
First of all, navigate to System > Import by BSS, then choose Product Review from the Entity Type drop-down menu.
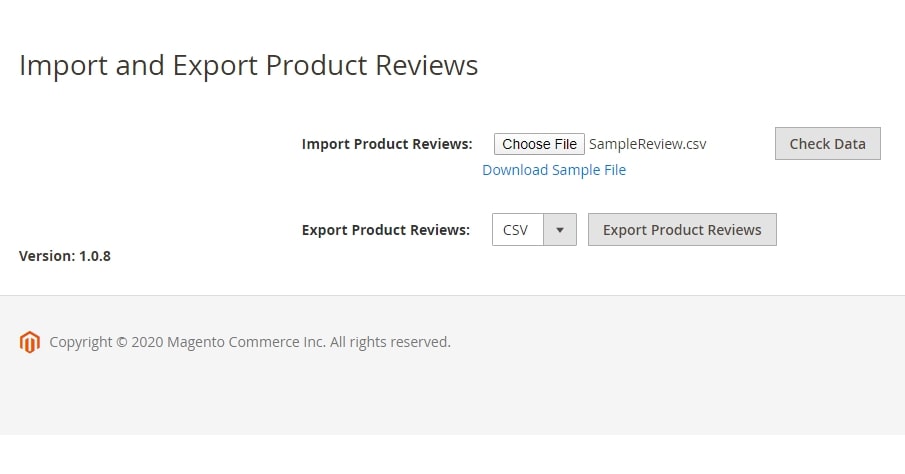
IMPORT PRODUCT REVIEWS
Before importing product reviews using a CSV file, ensure that the CSV file contains all the required information. You can obtain a sample CSV file by clicking on the “Download Sample File” option. Once downloaded, open the file and proceed to complete the necessary fields.
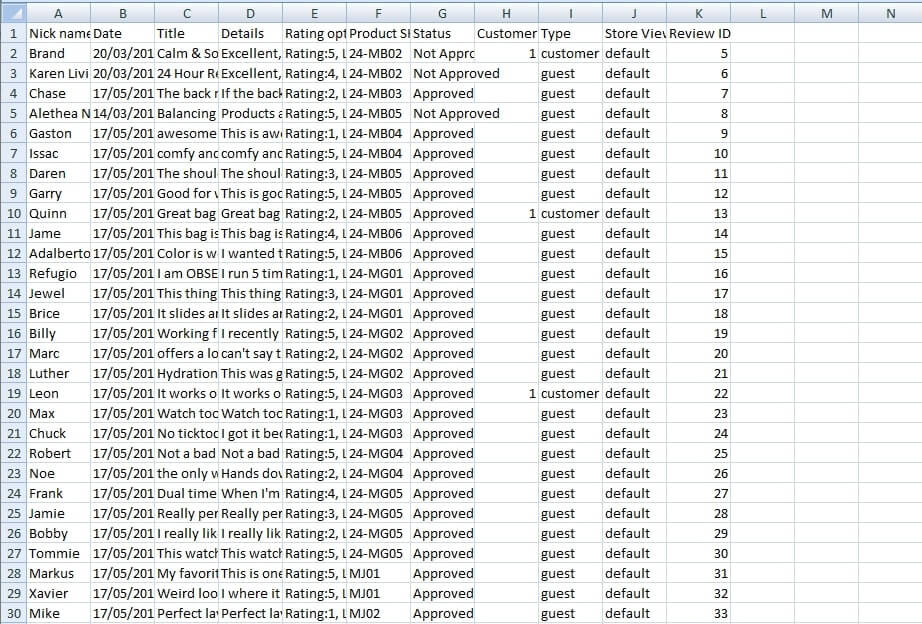
To ensure accurate data entry, adhere to the following guidelines for each field:
1. Date: Use the format “dd/MM/yyyy HH:mm:ss”
2. Status: Choose either “Approved” or “Disapproved”
3. Rating options: Use the format “rating_code1:number, rating_code2: number, rating_code3: number”.
4. Type: Select one of the three types available: It is divided into three access levels, namely; Admin, Customer, or Guest. If the format is incorrect or no customer ID is entered the module will be assigned as Guest by default.
5. Customer ID: Enter the customer ID in the correct format. If no customer ID is entered or the format is incorrect, the module will default to Guest.
6. Store View Code: Put in the store view code for the required store to include the reviews. If the format is incorrect the error module will go to Default Store View.
7. Review ID
- Review data cannot be imported if the format is incorrect.
- The module will automatically update the product review based on one review ID if you submit a Review ID that is identical to an existing Review ID.
- The module will add a review with a new Review ID if you leave the Review ID field empty and the rest of the review’s data differs from the available reviews displayed in the front end.
- In the event that the Review ID exceeds the database’s maximum review ID, the module will still add this new review.
- In case you leave Review ID of a review blank and all of its remaining data is the same as those of available reviews, the module will take it as an existing row.
When the CSV file is completed, select the option to validate the data by clicking on “Check Data.”.
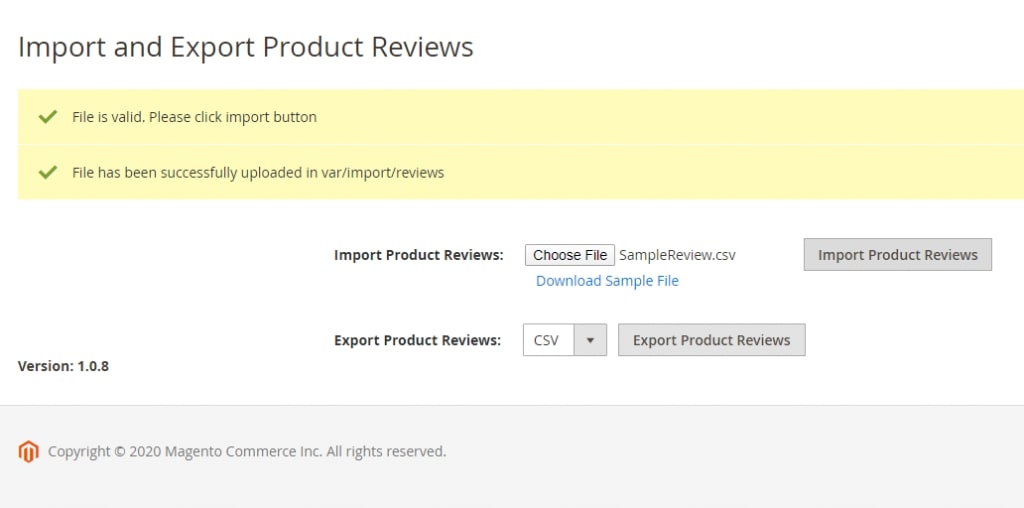
If there are no errors in your file, you will see the Import Product Reviews button, which you can click to initiate the import process.
Once you have imported the CSV file, you will receive notifications regarding the import:
A message will confirm the successful import and provide the number of rows that were inserted.
You will also be informed about the number of existing rows or any invalid rows that were encountered during the import process.
After the import is complete, you can manage the newly added reviews in the following sections of the admin panel:
- Admin → Product page → Product reviews
- Admin → Customer page → Product reviews
- Admin → Marketing → User content → Reviews
- Admin → Report → Reviews
Bonus tip: To import product reviews, you can use an alternative method as well:
- Upload the CSV file in the “var/import/reviews” folder.
- Run the following command in the root folder of your Magento installation: php bin/magento bss:reviews:import import/reviews/sample.csv
EXPORT PRODUCT REVIEWS
Select the Export Product Reviews option to download a CSV file containing all the information from product reviews on the Magento 2 website.
Method 3. Use BSS Commerce’s Migration Service
In case you don’t have enough money and time to migrate from WooCommerce to Magento or don’t have the knowledge to address the technical issues in the migration process, let’s consider using BSS Commerce’s Migration Service.
What sets apart BSS Commerce’s migration service?
1. BSS Commerce boasts an exceptional team of testers who hold the prestigious certification of “ISTQB Platinum Partner.” This certification represents the highest level of testing proficiency attainable by a development agency on a national scale.
2. With over 11 years of experience, BSS Commerce has successfully executed numerous projects for renowned brands from more than 150 countries worldwide. This extensive experience has endowed us with a deep understanding of diverse markets and business models, enabling us to assist you in constructing the most optimal eCommerce solution.
3. BSS Commerce emphasizes upfront clarity and minimizes surprises throughout the project. After finalizing the scope, pricing, and timeline, you’ll be informed of any changes well in advance, ensuring transparency throughout the entire process.
4. Dedication is the key factor that earns the trust of thousands of customers worldwide, resulting in an impressive 90% rate of returning customers. By offering time-zone flexibility, BSS Commerce can fulfill urgent requests promptly.
To conclude, BSS Commerce offers a seamless migration path from WooCommerce to Magento. Our expert team will handle the entire process, ensuring minimal disruption to your business. Contact us today for a free consultation on the Magento 2 Migration Service.
WooCommerce to Magento Post-Migration Checklist
You’ve successfully migrated from WooCommerce to Magento. Now it’s time to ensure a smooth transition and leverage the full potential of your new environment. This post-migration checklist will guide you through the essential steps to finalize the process, verify data accuracy, and optimize your Magento store for optimal performance.
1. Check the post-migration data
After the migration process, it’s crucial to verify the accuracy of the migrated data. This includes products, customers, orders, and other relevant data. Make sure all the data is correctly transferred and displayed in the Magento admin panel. Also, check the frontend to ensure that all products are visible and purchasable.
2. Configure the payment method
Magento supports a variety of payment methods. You need to configure your preferred payment methods in the Magento admin panel. This includes setting up payment gateways like PayPal, Stripe, or bank transfer methods. Remember to test these payment methods to ensure they work correctly.
3. Add the Magento theme
Choose a Magento theme that suits your business needs and install it. Magento has a wide range of themes available, both free and paid. After installing the theme, customize it to match your brand identity. This includes colors, fonts, layout, and other design elements.
4. Test the transactions
Conduct thorough testing of the entire purchase process. This includes adding products to the cart, checkout process, payment, and order confirmation. Make sure that all steps work smoothly and there are no errors or broken links. Also, test the process in different browsers and devices to ensure compatibility.
5. Integrate your store with necessary extensions
Magento has a vast marketplace of extensions that can add extra functionality to your store. Depending on your business needs, you might need to install extensions for SEO, marketing, analytics, shipping, etc. After installing the extensions for Magento, configure them as per your requirements and test them to ensure they work correctly.
Final Words – WooCommerce to Magento 2 Migration
As your eCommerce business flourishes, the limitations of WooCommerce might become apparent. Fortunately, Magento offers a compelling upgrade path, providing the scalability, advanced features, and extensive customization options you need to thrive. Migrating from WooCommerce to Magento allows you to take your online store to the next level, equipping it to handle larger product catalogs, higher traffic volumes, and ambitious growth plans.
If you have any trouble with the WooCommerce to Magento 2 migration, consider using our Magento 2 Migration Service to simplify your migration process.
FAQs – WooCommerce to Magento 2 Migration
1. What are the methods for performing WooCommerce to Magento 2 migration?
There are three main methods for performing a WooCommerce to Magento 2 migration:
- Method 1. Manual Migration
- Method 2. Use the Magento 2 Import Export Extension Combo
- Method 3. Use BSS Commerce’s Migration Service
2. What is the post-migration checklist after migrating data from WooCommerce to Magento?
To ensure a smooth transition and optimal performance, follow this post-migration checklist:
- Check the post-migration data
- Configure the payment method
- Add the Magento theme
- Test the transactions
- Integrate your store with the necessary extensions
Checkout this Magento tutorial for beginners to be proficient in using the Magento platform.
3. Why should I choose WooCommerce over Magento?
Here’s why you might choose WooCommerce over Magento for your online store:
- Suitable for smaller stores
- Cost-effectiveness
- Ease of use
- Large community support
Learn more about Magento via our insightful What is Magento eCommerce article
4. Will there any downtimes or disruptions during the WooCommerce to Magento 2 migration?
BSS Commerce’s goal is to minimize any possible downtime or disruption to your online operations while migrating to Shopify. We utilize advanced techniques and meticulously planned strategies to guarantee a smooth transition that has minimal impact on your business.
5. How long does the Woocommerce to Magento 2 migration process take?
The timeline for completing the Magento migration process may differ based on factors such as the intricacy of your existing eCommerce configuration, the size of your product catalog, and any necessary customizations. If you use our Magento migration service, our team of specialists will conduct a comprehensive assessment of your unique requirements to deliver a precise estimation of the project timeline.