
Hi guys,
Today we would like to give you a detailed step-by-step instruction of Magento 2 installation on your webserver.
To begin, let’s take a look at this following diagram for more understanding about what you need to set up.
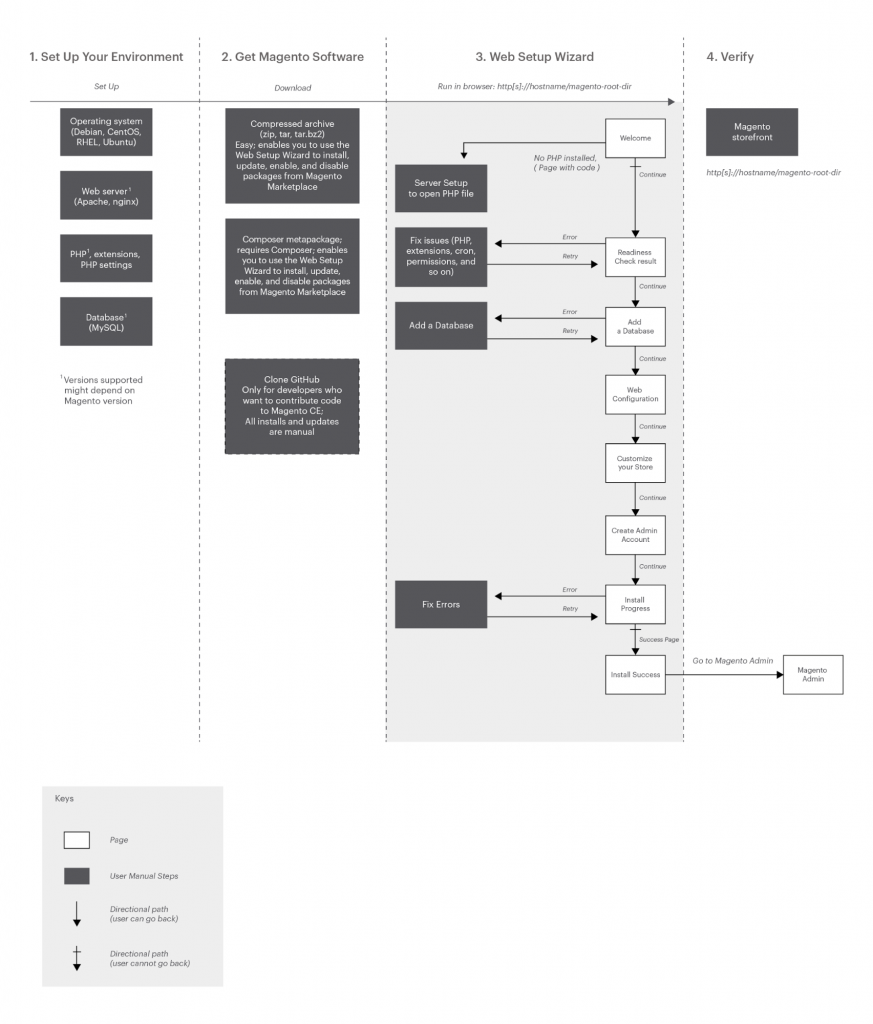
1. Set Up Environment
1.1. Updating repositories
sudo add-apt-repository ppa:ondrej/php
sudo apt-get update
1.2. Install web server and configure it specifically for Magento 2.3
Note: Magento fully supports the Nginx and Apache web servers. So you will need a pre-installed Apache or NGINX setup. Choose one of them to install.
- Install Apache
sudo apt-get install apache2 -y
Open Apache settings file to allow .htaccess file usage
sudo nano /etc/apache2/sites-available/000-default.con
Add the below to the file, then save and exit:
<Directory "/var/www/html">

    AllowOverride All

</Directory>
Open Apache settings file to set the Global ServerName
sudo nano /etc/apache2/apache2.conf
At the end of the file, please insert this line, then save and exit:
ServerName <server_IP>
Check for any errors
sudo apache2ctl configtest
Enable Apache rewrite
sudo a2enmod rewrite
Restart Apache so that changes can take into effect
sudo systemctl restart apache2
Enable Apache through the firewall
sudo ufw allow 'Apache Full'
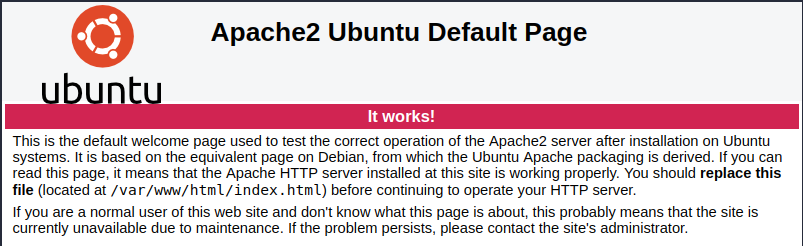
- Test Apache
To test that Apache is working, we can run a super-quick test. Just put the IP address of your server in your browser. You should see a test page similar to this one.
- Install Nginx
apt-get -y install nginx
Install and configure php-fpm
To install Magento, some PHP extensions are required to make Magento function well. Also, in case you are using nginx, you have to install and configure the php-fpm extension.
To install and configure php-fpm, do it as below:
- Install php-fpm and php-cli:
apt-get -y install php7.2-fpm php7.2-cli
- Open the php.ini files in an editor:
vim /etc/php/7.2/fpm/php.ini
vim /etc/php/7.2/cli/php.ini
- Edit both files to match the following lines:
memory_limit = 2G
max_execution_time = 1800
zlib.output_compression = On
- Save and exit the editor.
- Restart the php-fpm service:
systemctl restart php7.2-fpm
1.3. Install PHP and any extensions specifically for Magento 2.3
Let’s start by installing PHP and all of the PHP extensions required in order for Magento 2.3 to run
<I’ve adjusted the below commands to specify 7.2>
sudo apt-get install php7.2 libapache2-mod-php7.2 php7.2-mysql

php7.2-soap php7.2-bcmath php7.2-xml php7.2-mbstring php7.2-gd

php7.2-common php7.2-cli php7.2-curl php7.2-intl php7.2-zip zip unzip -y
It is necessary to tell the web server that PHP files should be preferred.
sudo nano /etc/apache2/mods-enabled/dir.conf
Move “index.php” to the front of the list. Save your changes and exit the text editor.
Set PHP option
Open a php.ini in a text editor. You can use the following command to locate it:
sudo find / -name 'php.ini'
- Locate your server’s time zone in the available time zone settings
- Locate the following setting and uncomment it if necessary:
date.timezone =
- Add the time zone setting you found above.
- Change the value of memory_limit to one of the values at the System 2.3.x requirements post
For example: memory_limit=2G
- Locate opcache.save_comments and uncomment it if necessary.
- Guarantee that its value is set to 1.
- Save your changes and exit the text editor.
Restart apache for changes to take effect:
sudo systemctl restart apache2
1.4. Install MySQL and secure the installation
Install MySQL
sudo apt install -y mysql-server mysql-client
Start MySQL
sudo service mysql start
sudo mysql_secure_installation
Test the installation:
mysql -u root -p
Sample output:
Welcome to the MySQL monitor.  Commands end with ; or \g.
Your MySQL connection id is 45 Server version: 5.6.19-0ubuntu0.14.04.1 (Ubuntu)

Copyright (c) 2000, 2014, Oracle and/or its affiliates. All rights reserved.

Oracle is a registered trademark of Oracle Corporation and/or its affiliates. Other names may be trademarks of their respective owners.

Type 'help;' or '\h' for help. Type '\c' to clear the current input statement.

mysql>
2. Get Magento 2.3
You can download from one of the following resources:
After downloading, extract the pack to /var/www/html/. For example: magento2 in /var/www/html/
Set permission
File system privileges and ownership can be set as below:
- For a dedicated Magento server: set ownership of files and directory as the web server user. You set privileges as 500 (directories) and 400 (files).
- For a hosted Magento server on which the web server runs as the logged-in username: set privileges as 500 (directories) and 400 (files).
Note: In both hosted and dedicated systems, you set the privileges for the media/ and var/ directories at 700/600 because they must be writable. Following is an explanation of the privileges:
- 500 permissions for directories (dr-x——) gives the web server user read and execute privileges to prevent the accidental deletion or modification of files in the directory. Other users have no access to Magento directories.
- 400 permissions for files (-r——–) prevent any user (even the web server user) from overwriting files. This prevents attacks that depend on overwriting existing files with malicious content.
- 700 permissions (drwx——) for the media/ and var/ directories give full control (that is, read/write/execute) to the owner and no permissions to anyone else.
- 600 permissions (-rw——-) for files in the media/ and var/ directories enable the web server user to write to them and to overwrite them.
Note: On a dedicated system, all commands discussed in this article must be entered as a user with root privileges. On a hosted system, commands must be entered as the web server user. To set up ownership and permissions on a dedicated Magento server:
- Dedicated Magento server only. As a user with root privileges, find the web server user:
Apache:
+ Ubuntu: grep User /etc/apache2/apache2.conf
+ CentOS: grep User /etc/httpd/conf/httpd.conf
Note: The preceding paths are samples only. The paths to these .conf files on your system might be different. You can use the command whereis nginx to find the location of the configuration files.
nginx: Open the nginx configuration file, typically /etc/nginx/nginx.conf. The user directive specifies the username. It might run as the Apache user if Apache is installed on the same system.
- Change to the Magento installation directory.
On CentOS, this is typically /var/www/html/magento. On Ubuntu, it is typically /var/www/magento.
cd <magento_root>
- Dedicated Magento server only.
As a user with root privileges, enter the following command to set ownership of the Magento installation directory and all its subdirectories:
chown -R web-server-user-name .
For example, on Ubuntu where Apache usually runs as www-data, enter:
chown -R www-data .
- Enter the following commands to set permissions:
find . -type f -exec chmod 400 {} +

find . -type d -exec chmod 500 {} +

find var/ -type f -exec chmod 600 {} +

find media/ -type f -exec chmod 600 {} +

find var/ -type d -exec chmod 700 {} +

find media/ -type d -exec chmod 700 {} +
3. Install Magento 2.3
3.1. Readiness check
Enter the following URL in the browser’s address or location bar: http://<Magento host or IP>/<path to Magento root>/setup
For example, if the Magento server’s IP address is 127.0.0.1 and you installed Magento 2 in the magento2/ directory relative to the web server’s doc root, enter:
http://127.0.0.1.com/tutorial
You will get this Magento Setup Wizard as the following: 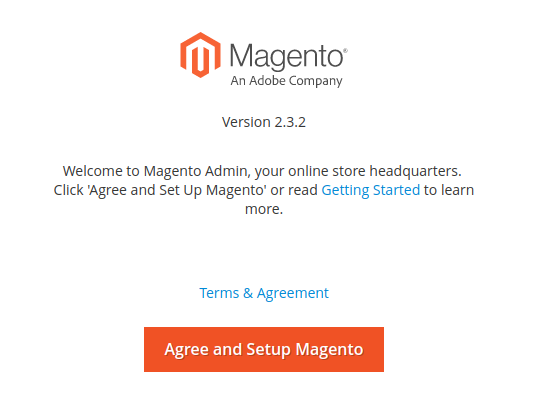 On the initial page, click Agree and Set Up Magento.
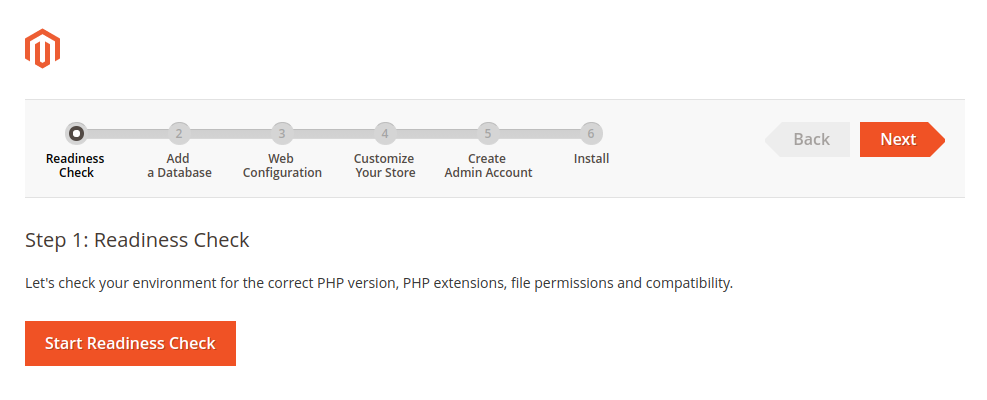
Click Start Readiness Check. If any errors are displayed, you must resolve them before you continue. Click More detail if available to see more information about each check.

If everything is correct, Click Next
3.2. Add a Database
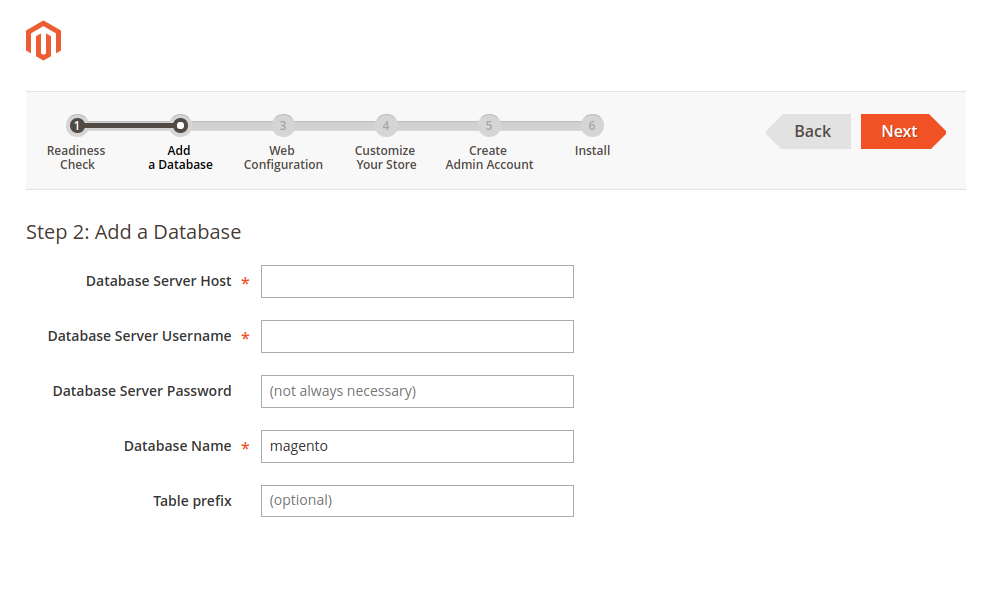
Fill database information then click Next.
3.3. Web Configuration
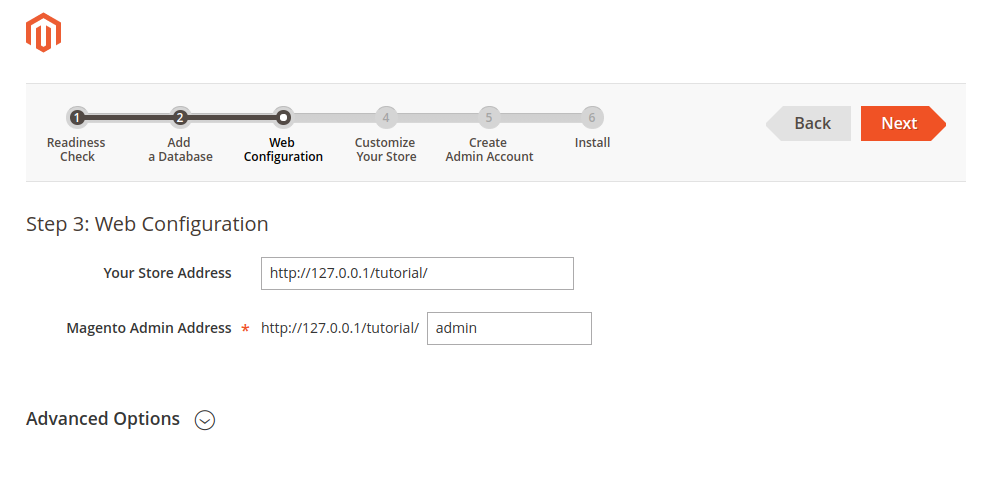
Enter the following information:
- Your Store Address: Enter the URL, including scheme and trailing slash, by which users access your storefront.
- Magento Admin Address: Enter the relative URL by which to access the Magento Admin.
Then click Next
3.4. Customize Your Store
- From the Store Default Time Zone list, click the name of your store’s time zone.
- From the Store Default Currency list, click the default currency to use in your store.
- From the Store Default Language list, click the default language to use in your store.
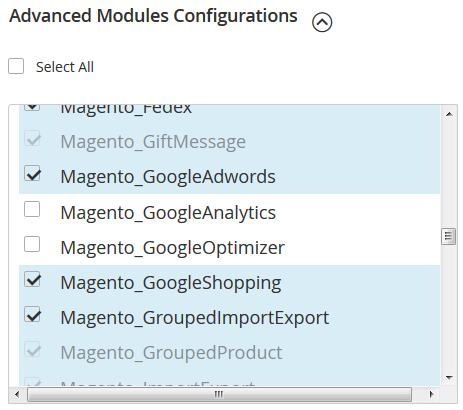
- Expand Advanced Modules Configuration to optionally enable or disable modules before you install the Magento software.
3.5. Create Admin Account
Now enter admin information such as:
- New Username: Enter a username with which to log in to the Magento Admin. This user is an administrator and can create other users, including other administrative users.
- New E-Mail: Enter the Magento administrator’s e-mail address.
- New Password: Enter the administrator’s password.
- Confirm Password: Enter the password again for verification.
Then click Next
3.6. Install
After completing all previous steps in the Setup Wizard, click Install Now. Installation Success The message Success will be displayed to indicate a successful installation. 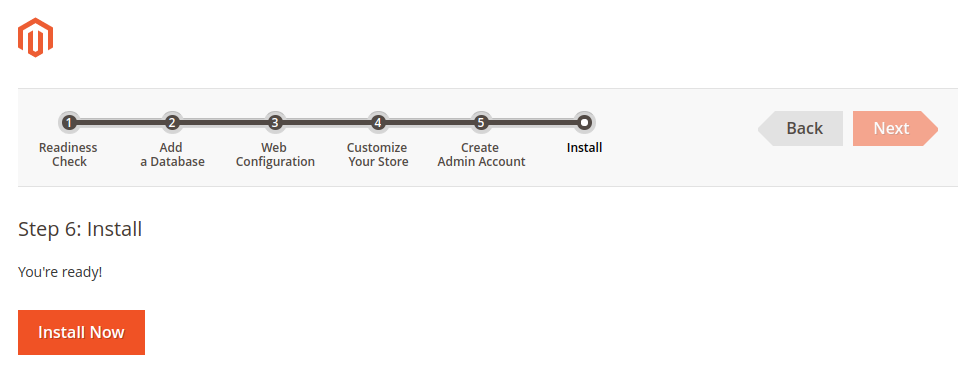
4. Verify the installation
4.1. Storefront (with optional sample data)
Go to the storefront in a web browser. For example, if your Magento installation base URL is http://127.0.0.1/tutorial, enter it in your browser’s address or location bar. The following figure shows a sample storefront page. If it displays as follows, your installation was a success! 
4.2. Magento Admin
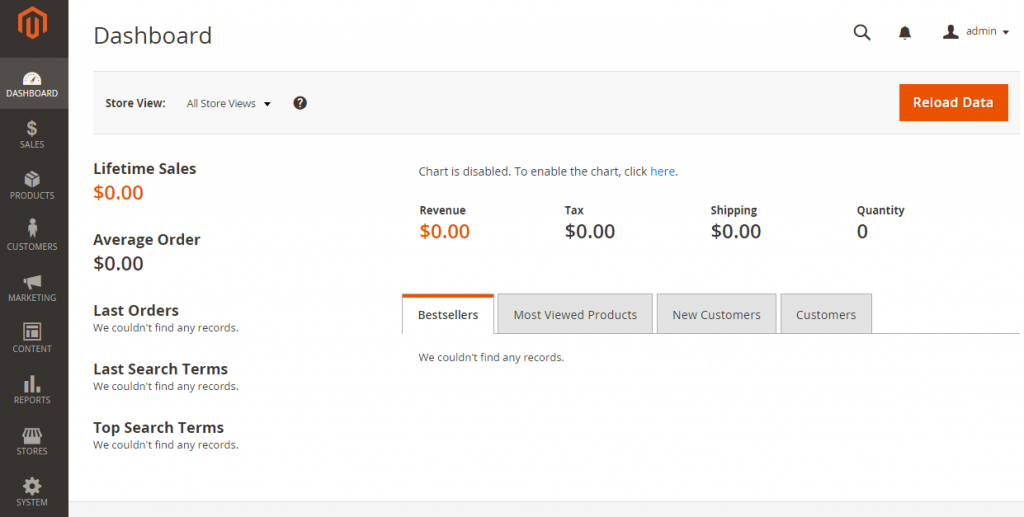
Go to the Magento Admin in a web browser. For example, if your Magento installation base URL is http://127.0.0.1, and the Admin URI is admin, enter http://127.0.0.1/admin in your browser’s address or location bar. (The Admin URI is specified by the value of the backend-frontname installation parameter.) When prompted, log in as a Magento Administrator. The following figure shows a sample Magento
Admin page. If it displays as follows, your installation was a success!