Shopify color swatches are a must-have for any Shopify store selling products with variations, especially when color is a key selling point. They replace clunky dropdown menus with visually appealing clickable options, enhancing customer experience, and making it a breeze for customers to browse. So, how to add color swatches in Shopify stores? In this guide, BSS Commerce Shopify will teach you three ways to add custom color swatches to your Shopify store, from simple theme edits to powerful Shopify apps, helping you to choose the best solution that fits your needs and budget. Let’s proceed!
Contents
Overview of Color Swatches in Shopify
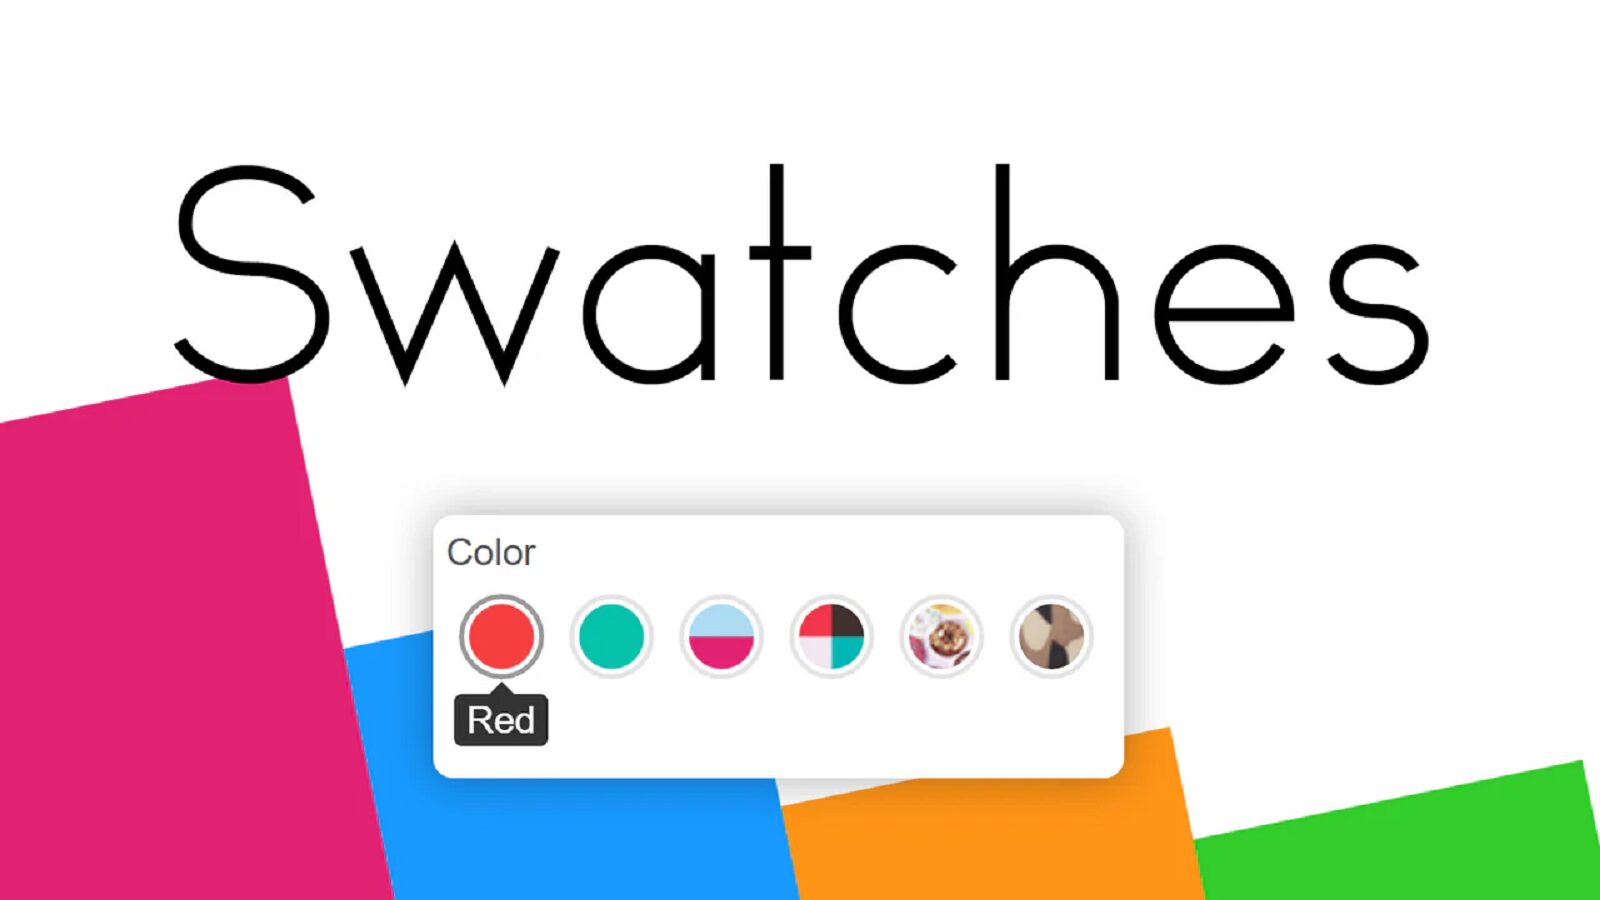
Color swatches in Shopify are a way of visually showing product options through colors on the product page. Instead of displaying a dropdown menu, they allow displaying thumbnails of small clicked images or colored boxes with an image representing each option. When customers choose a swatch, the main product image changes to that variation.
How To Add Color Swatches in Shopify With 3 Methods
Method 1: Adding Color Swatches in the Shopify Theme Editor
Adding color swatches to your Shopify store involves a few steps, and the process depends on your theme. Most of these themes have a built-in feature for color swatches that can be accessed via the theme editor. If your theme does not have this feature (Dawn, Shopify’s default, for example), you would have to pick a theme that offers it. Here’s how:
Step 1: Find a Theme with Color Swatches: Go to the Shopify Theme Store and filter “Color swatches” in the “Features” section. Currently, there are very few free themes with this feature. The paid themes supporting color swatch functionality generally cost anywhere between $100 to $490.

Step 2: Install and Activate the Theme: After you have chosen and purchased a theme, install and activate it in your Shopify admin.
Step 3: Set Up Product Colors:
- Under “Products” select the product you wish to edit.

- In the “Variants” click on “Add options like size or color.”

- Select “Color” as the “Option name,” followed by listing your required colors in the “Option values” field; you can also set the price for the color variants. Do not forget to save your changes.

Step 4: Enable Color Swatches in the Theme Editor:
- Go to “Online Store”, and hit “Customize” right next to the installed theme.

- From the dropdown menu, select the “Default product” template.
- Look for the “Variant picker” block (add it if none is present).
In the settings of “Variant picker”, find the dropdown labeled “Color selector type”, choose “Color swatch” from these options, and save changes.
While this is somewhat of a lengthy process, it is rather straightforward. Keep in mind that with some themes, customization options regarding color swatches can be limited, and thus more involved coding might be necessary for extra customization.

Method 2: Adding Color Swatches Using Shopify Liquid Code
For more advanced color swatch customization in Shopify, you can go into the Liquid code of your theme. This will give you enhanced control over the look and feel of your swatches. Here are the steps.
Step 1: Get Access to Theme Code: Go to Online Store in your Shopify admin, click on the “…” menu next to your theme, then click on Edit Code.

Step 2: From the left sidebar Access the “”Config”” folder, and then open the “”settings_schema.json”” file. You could also search for this file using the search field.

Step 3: Make a line break under Row 9. Paste the following code in the blank space created:
{
“name”: “Color Swatches”,
“settings”: [
{
“type”: “text”,
“id”: “optionName”,
“label”: “Swatch option name”,
“default”: “Color”,
“info”: “Make sure capitalization is same as variant for e.g Color not color “
},
{
“type”: “paragraph”,
“content”: “If your store is in different languages, type in all the different words and separate them with commas. For example: Color, Colour, Couleur”
},
{
“type”: “select”,
“id”: “swatchType”,
“label”: “Swatch type”,
“options”: [
{
“value”: “color”,
“label”: “Color”
},
{
“value”: “variantImage”,
“label”: “Variant image”
}
],
“default”: “color”
},
{
“type”: “textarea”,
“id”: “swatchColors”,
“label”: “Colors”,
“placeholder”: “Red:#ff0000\nGreen:#00ff00\nBlue:#0000ff”,
“default”: “Black:#000000\nWhite:#f5f5f5\nBlue:#005eff\nRed:#c9002c\nPink:#ffd5e6\nBrown:#a2896b\nOlive:#808000\nGreenRed:#008000#c9002c\nGreenRedBlue:#008000#c9002c#005eff”,
“info”: “One rule per line. Example: Blue:#005eff\n2 Color Swatch Example: GreenRed:#008000#c9002c\n3 Color Swatch Example: GreenRedBlue:#008000#c9002c#005eff”
},
{
“type”: “paragraph”,
“content”: “You can also add [image files](/admin/content/files?selectedView=all&media_type=Image) instead of using colors, in lowercase with spaces replaced by hyphens. Example: Green kaki: green-kaki.png”
},
{
“type”: “select”,
“id”: “swatchStyle”,
“label”: “Swatch style”,
“options”: [
{
“value”: “round”,
“label”: “Round”
},
{
“value”: “square”,
“label”: “Square”
},
{
“value”: “square-round-corners”,
“label”: “Square round corners”
},
{
“value”: “portrait”,
“label”: “Portrait”
}
],
“default”: “round”,
“info”: “Portrait mode is only available for the variant image type.”
},
{
“type”: “range”,
“id”: “swatchSize”,
“min”: 20,
“max”: 120,
“step”: 2,
“unit”: “px”,
“label”: “Swatch size”,
“default”: 40
}
]
}
Once the new code has been added, save your changes.
Step 4: The subsequent action involves accessing the “product-variant-picker.liquid” file, located within the “Snippets” folder.

Step 5: Modify the code beginning at Row 51 as follows:
<fieldset class=”js product-form__input product-form__input–pill”>
<legend class=”form__label”>{{ option.name }}</legend>
{% render ‘product-variant-options’,
product: product,
option: option,
block: block,
picker_type: picker_type
%}
</fieldset>
With this code:
<fieldset class=”js product-form__input product-form__input–pill”>
{%- liquid
assign optionNames = settings.optionName | split:”,”
assign useColor = false
for optionColor in optionNames
if optionColor == option.name
assign useColor = true
break
endif
endfor
-%}
{%- if useColor -%}
<legend class=”form__label “>{{ option.name }}:<span id=”selected-{{ option.name }}”> {{ option.selected_value }}</span></legend>
{% render ‘color-option’, product: product, option: option, block: block %}
{%- else -%}
<legend class=”form__label”>{{ option.name }}</legend>
{% render ‘product-variant-options’, product: product, option: option, block: block, picker_type: picker_type %}
{%- endif -%}
</fieldset>
Then, save your changes
Step 6. Access the “Snippets” directory and choose the option to “Add a new snippet.”
Step 7. Designate the new snippet with the name “color-option.liquid,” and then click on “Done.”
Step 8. Insert the following code:
{% comment %}
Renders product variant options
Accepts:
– product: {Object} product object.
– option: {Object} current product_option object.
– block: {Object} block object.
Usage:
{% render ‘product-variant-options’,
product: product,
option: option,
block: block
}%
{% endcomment %}
{%- liquid
assign variants_available_arr = product.variants | map: ‘available’
assign variants_option1_arr = product.variants | map: ‘option1’
assign variants_option2_arr = product.variants | map: ‘option2’
assign variants_option3_arr = product.variants | map: ‘option3’
assign product_form_id = ‘product-form-‘ | append: section.id
assign swatchType = settings.swatchType
assign swatchStyle = settings.swatchStyle
assign swatchSize = settings.swatchSize
assign swatchColors = settings.swatchColors | newline_to_br | split: ‘<br />’
-%}
<style>
.product-form__input input[type=’radio’] + label.color-swatch,
.product-form__input input[type=’radio’] + label.color-swatch:after,
.product-form__input input[type=’radio’] + label.color-swatch:before{
border-radius: 0;
}
.product-form__input input[type=’radio’] + label.color-swatch.round,
.product-form__input input[type=’radio’] + label.color-swatch.round:after,
.product-form__input input[type=’radio’] + label.color-swatch.round:before{
border-radius: 100%;
}
.product-form__input input[type=’radio’] + label.color-swatch.round-corners,
.product-form__input input[type=’radio’] + label.color-swatch.round-corners:after,
.product-form__input input[type=’radio’] + label.color-swatch.round-corners:before{
border-radius: 5px;
}
.product-form__input input[type=’radio’] + label.color-swatch{
border:1px rgb(214,214,214) solid;
width: {{swatchSize}}px;
height: {{swatchSize}}px;
background-repeat: no-repeat;
background-position: center;
background-size: cover;
margin-right: 9px;
}
.product-form__input input[type=’radio’] + label.color-swatch:before{
content: “”;
position: absolute;
top: -1px;
left: -1px;
width: calc(100% + 2px);
height: calc(100% + 2px);
border: 1px rgb(214,214,214) solid;
z-index: 0;
}
.product-form__input input[type=’radio’] + label.color-swatch:after{
content: “”;
position: absolute;
top: 0;
left: 0;
width: 100%;
height: 100%;
z-index: 1;
{%- if settings.dark or swatchType == “variantImage” -%}
border: none;
{%- else -%}
border: 3px rgb(255 255 255) solid;
{%- endif -%}
}
.product-form__input input[type=’radio’] + label.color-swatch:hover:before{
border: 1px rgb(125 124 124) solid;
}
.product-form__input input[type=’radio’]:checked + label.color-swatch:before{
{%- if settings.dark -%}
box-shadow: 0 0 0 2px rgb(var(–color-foreground));
{%- else -%}
box-shadow: 0 0 0 1px rgb(var(–color-foreground));
{%- endif -%}
border-color:rgb(var(–color-foreground));
}
.product-form__input input[type=’radio’] + label.color-swatch.variant-swatch{
background-color:white;
{%- if swatchStyle == “portrait” -%}
height: calc({{swatchSize}}px/ 0.66);
{%- endif -%}
}
</style>
{%- for value in option.values -%}
{%- liquid
assign option_disabled = true
for option1_name in variants_option1_arr
case option.position
when 1
if variants_option1_arr[forloop.index0] == value and variants_available_arr[forloop.index0]
assign option_disabled = false
endif
when 2
if option1_name == product.selected_or_first_available_variant.option1 and variants_option2_arr[forloop.index0] == value and variants_available_arr[forloop.index0]
assign option_disabled = false
endif
when 3
if option1_name == product.selected_or_first_available_variant.option1 and variants_option2_arr[forloop.index0] == product.selected_or_first_available_variant.option2 and variants_option3_arr[forloop.index0] == value and variants_available_arr[forloop.index0]
assign option_disabled = false
endif
endcase
endfor
-%}
{%- if block.settings.picker_type == ”button” -%}
<input
type=”radio”
id=”{{ section.id }}-{{ option.position }}-{{ forloop.index0 }}”
name=”{{ option.name }}”
value=”{{ value | escape }}”
form=”{{ product_form_id }}”
{% if option.selected_value == value %}
checked
{% endif %}
{% if option_disabled %}
class=”disabled”
{% endif %}
>
{%- if swatchType == “”variantImage”” -%}
<label
data-{{ option.name }}=”{{value}}”
style=”background-image:url(
{%- liquid
assign optionIndex = option.position | minus: 1
for variant in product.variants
if variant.options[optionIndex] == value
assign swatchSizePortrait = swatchSize | times: 2
echo variant.image | image_url: width: swatchSizePortrait
break
endif
endfor
-%}
);”
class=”color-swatch variant-swatch {% case swatchStyle %}{% when “’round'” %}round{% when “‘square-round-corners'” %}round-corners{% endcase %}”
for=”{{ section.id }}-{{ option.position }}-{{ forloop.index0 }}”>
<span class=”visually-hidden””>{{ ‘products.product.variant_sold_out_or_unavailable’ | t }}</span>
</label>
{%- else -%}
{%- liquid
for colorData in swatchColors
assign colorDataArr = colorData | split:”:”
assign ruleName = colorDataArr[0] | strip
if value == ruleName
assign colorCodes = colorDataArr[1] | strip |
Then, save your changes
Step 9. Click on the “…” dropdown menu located in the top-left corner of the page and select “Customize theme.”

Step 10: Navigate to the “Default product” template and select the “Variant picker” option in the left sidebar.
Step 11. In the “Style” section, pick “Pills.”
Step 12. You may have noticed that only the name of the color is set to display native swatches. If the inputted color name has been enabled from the system, depending on the theme, in this case, black color is showing properly, but green is yet to be added, so it displays as white. Repeat this process to additional colors which exist in the Variants.
Click on “Theme Settings,” denoted by a gear icon to the left of the page.
Step 13. Choose “Color Swatches.”
Step 14. In the “Colors” section, input all the colors you require with their respective hex codes written in a color with a colon and with no spaces. When you hit enter, the color will appear on the swatch automatically, provided it is activated in the product settings.
There are other customizing options, for instance, for an option to use different shapes given for the swatches—round, square, square with rounded corners, or portrait. Alternatively, you can change the swatch size, which is the width of the circles and thickness of the line.
To explore further customizing options, you would have to use your own modifications on the code provided. There is a world of possibilities for customization when you write your own code, but without the know-how in web development, it is just as likely that reaching your desired results will be a major trial-and-error exercise.
Method 3: Using the BSS: Product Variants Options App
The BSS: Product Variants Options App is a beneficial app that facilitates the customization of adding and personalizing color swatches for your product pages on Shopify without requiring any coding sort of involvement. This app allows unlimited options for products, variants, variant options, color swatches, and even file upload. Then the user can use a system of 14 different types such as text boxes, swatches, dropdowns, buttons, and many more to define their product options. Below are its key features.
- 14 option types are available: image swatches, text boxes, dropdown menus, buttons, file uploads, and much more.
- Price Add-On: If you want to monetize the extra product options offered to customers, charge an additional fee for the customization.
- Conditional Logic: Show or hide product options based on the previous selections.
- Change Options on Cart Page; adding a price add-on will add to the product price.
- 100% compatible with all Shopify discounts, integrated fully into your products.
Why Should Choose BSS: Product Variants Options App?
- Pricing: Free 100%
- Built for Shopify
- Rating: 5.0/5.0
FAQs – How To Add Custom Color Swatches in Shopify
1. Do I require prior coding experience to add customized color swatches?
Whether or not you’ll need coding really depends upon the method that you choose for adding color swatches. Some Shopify themes already come with the color swatch functionality, which does not require any coding at all. Alternatively, you may choose from a myriad of Shopify apps which have an easy-to-use interface for creating and customizing swatches. If you would like an advanced level of customization, you will require a little bit of knowledge of coding (HTML, CSS, Liquid) though.
2. Are there any options for adding color swatches without being charged?
There are a number of free options available through Shopify themes that provide basic color swatch options. There might be free apps in the Shopify App Store that may have limited features, but at least they are free.
3. Can I modify the looks of my color swatches?
Most of the methods will allow making all kinds of changes to the appearance of your color swatches, including controlling the sizes, shapes, and even colors for your swatches, whereas other apps provide very advanced options for customization.
4. How can I make sure that color swatches will be displayed in any device?
Usually color swatches are responsive and show the right way on every device if you use this theme or a trustworthy app. However, it is still good practice to check whether they were shown correctly on various devices.
5. Can I use color swatches for other product variations other than color?
Yes, color swatches can be used for other product variations such as size, material, or pattern. If this is the case, you may use image swatches instead of color swatches to present the different choices.
The Bottom Line
So, this article is about three ways of how to add color swatches in Shopify Store using three methods: Theme Editor method, coding using Liquid, and BSS: Product Variants Options app. The simplest method is the Theme Editor where your theme supports it. Liquid coding gives you the most flexibility, but it requires coding knowledge. The BSS app offers a middle ground with straightforward customizations that otherwise would require heavy coding. However, the best method will depend on your technical skills, budget, and desire for control. Whichever option you choose should allow you to create the optimum product representation selection experience for your customers. Thank you for reading!