As we all know that product images are extremely important, especially when you’re selling the products online because they not only show features and color but also help to boost up sale for your online store.
In Magento, when you create a product in the backend, it is necessary for you to upload images to help customers to have a real visual about your products. However, if you are owning a store with thousands of products and you have to upload images one by one for this huge number of items, it is really a big problem for your business. You will take more time, cost more money and also invest more human resources to complete this manual task. Therefore, let’s us introduce you a smart solution for this issue by allowing you easily import multiple product images at one time.
1. Import Images from Local Server
On the Magento server, upload all image directories to the default folder for importing product images:
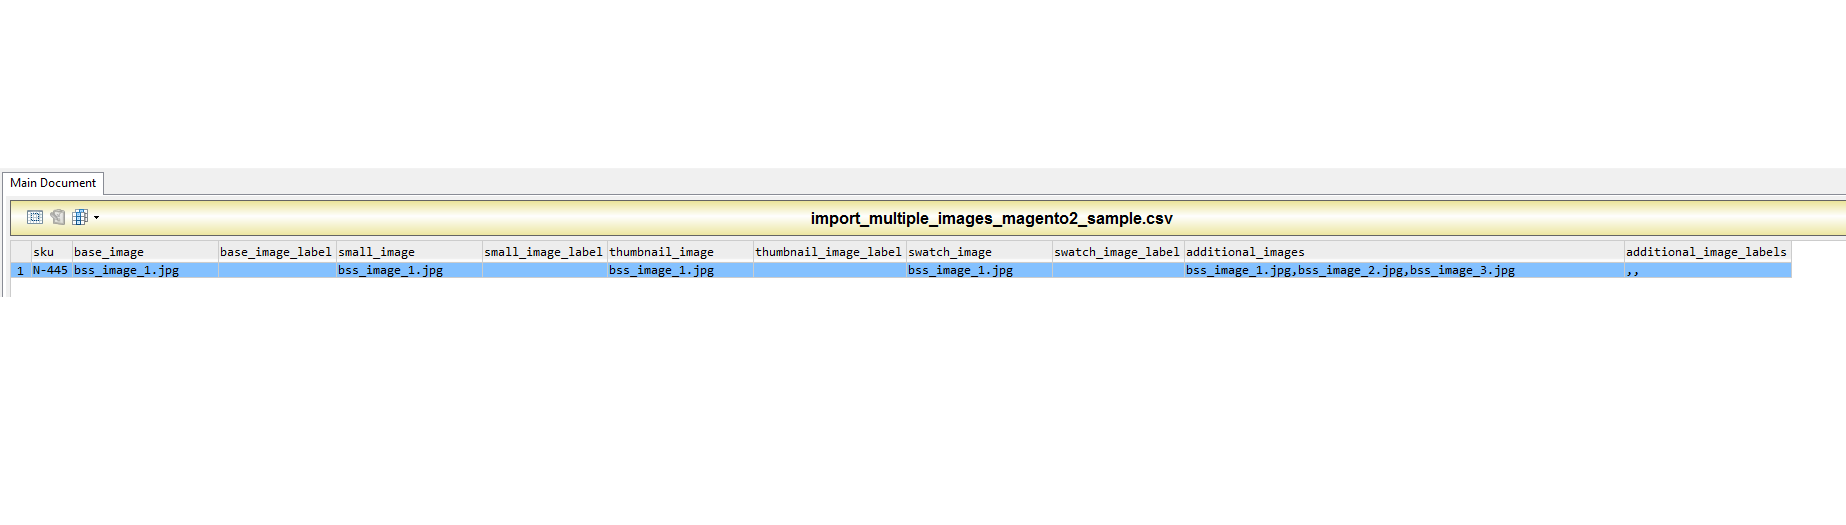
{Magento_root_path}/pub/media/import/You need to prepare a CSV file including data about imported product images.
In the CSV file, enter the name of each image file to be imported on the correct row, by sku, and in the correct column according to image type (base_image, small_image, thumbnail_image, or additional_images). Make sure to modify name of each picture in this CSV file to match with the name of the previously uploaded image (corresponding to each image of product). In the CSV file:
- Modify fields “base_image, small_image, thumbnail_image and swatch_image” with a representative image showing the product.
- In the “additional_images” field, if you have many images, separate them by comma.
In which:
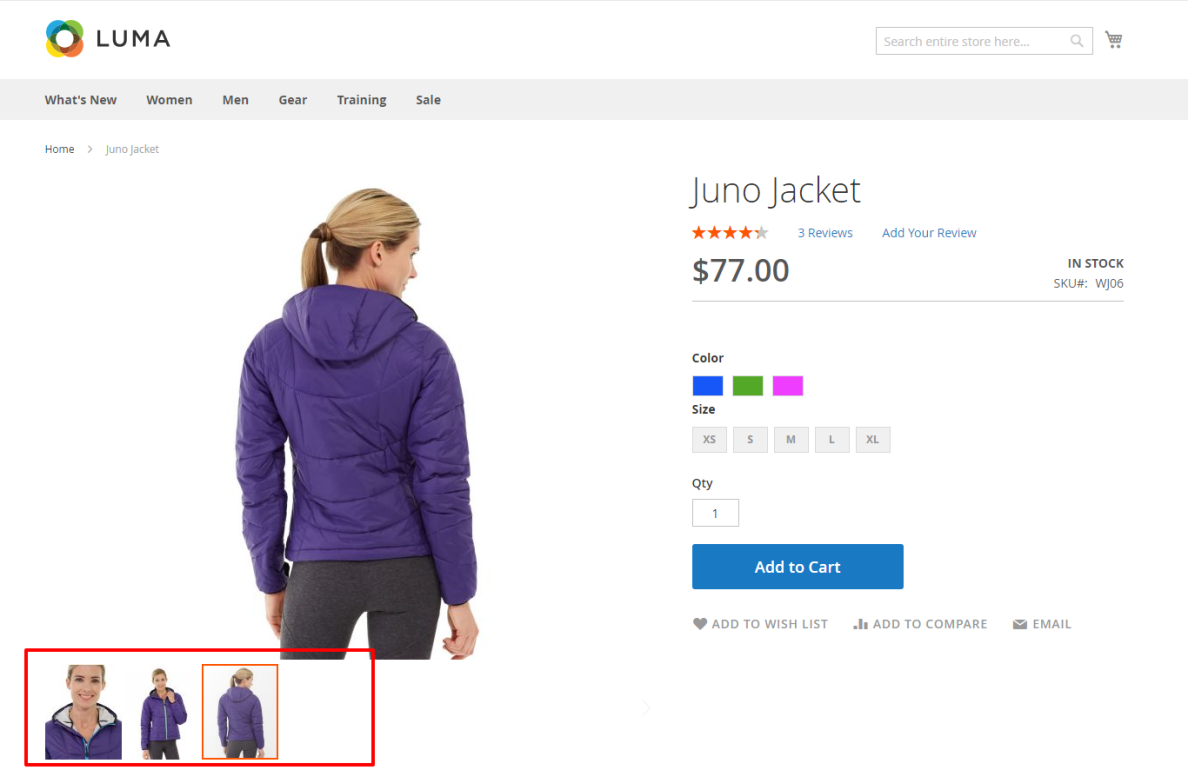
- Base image is displayed in the product page.
- Small image is displayed in the category listings, in up sells section, related product section and page result search.
- Thumbnail image is displayed in the cross sell section, thumbnail gallery and in the cart.
- Swatch image is used to visualize product specifics like color, material and design.
To import image, navigate to Admin -> System -> Import

In which:
- Entity type: select “Products”.
- Import Behavior: select “Add/Update”.
- The other fields set same as default Magento.
Then you click button “Check data” to validate input data. If it is free of errors, “Import” button will appear for you to click. In which:
- Select File to import: select the CSV file which you configured above.
- Images File Directory: enter the path to image folder uploaded at pub/media/import.
2. Imported images from external URLs
In case all images are from URLs, you need to edit the fields in the CSV file to import. The fields base_image, small_image, thumbnail_image, swatch_image, additional_images are edited as below.
 To import product images from URL, you should adhere to the above steps at “Import Image from Local Server”.

In which:
- Select File to import: select the CSV file which you configured above.
- Images File Directory: leave blank.
Finally, all the images have been added to the product through import tool.
Good luck!