
Before making a decision to buy any Magento 2 extensions, make sure you already check all default functionalities. There are many cases that Magento 2 already supports what you need by nature.
Take Magento 2 Marketing Menu (*) for example.
It provides access tools to manage Promotions, SEO, Communications, and User-generated Content at hand.
(*) This tutorial is based on Magento 2.3 Open Source.
An Overview of Magento 2 Marketing Menu
Table of Contents
Please login to Admin Panel and navigate to Marketing.
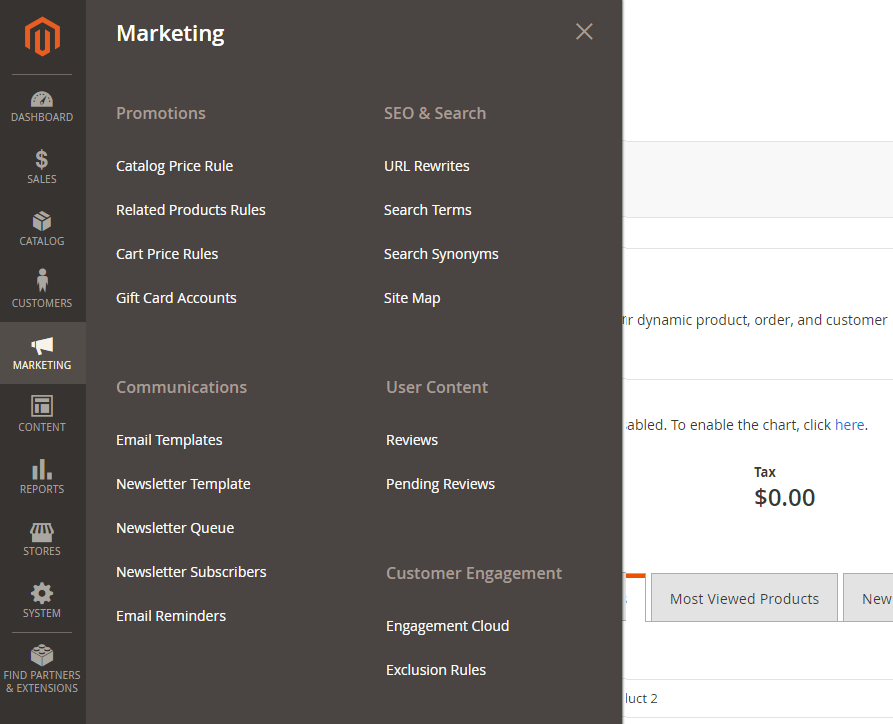
There are 5 main sections.
➡️ Promotions: As the name suggests, you can set up promotions here by defining a collection of conditions to auto-apply discounts to multiple products and order amounts. Catalog Price Rule, Cart Price Rules, Related Products Rules, and Gift Card are available.
➡️ Communications: Keep in touch with customers via transitional emails, newsletters, RSS, and more! In this section, you will learn how to create emails that are user-friendly and reflect your brand with pre-defined variables and markup tags.
➡️ SEO & Search: If you fail to do SEO, your website fails to get significant sales. There Magento suggests you with SEO best practices. Moreover, you can get insight into customer search terms and plan to make your products easier to find.
➡️ User Content: All customer reviews are recorded in the User Content. You can preview, approve/disapprove, and showcase them on product pages. Reviews are proven to build a sense of social proof. Moreover, some search engines like Google appreciate sites with product reviews than those without.
➡️ Customer Engagement: For those who might not know, this section used to be Marketing Automation. Its critical purpose stays unchanged – getting engaged with customers via customized email communications such as abandoned carts or automation campaigns.
Promotions
❔ How to reward your best valuable customers with a discount on a certain product?
❔ How to offer free shipping or a specific order value?
❔ How to schedule a promotion campaign for a period of time?
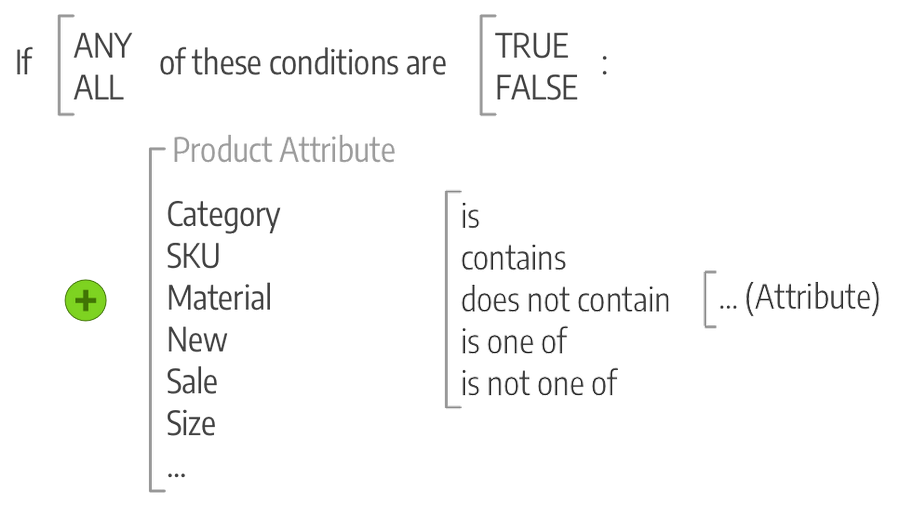
Then, you must define a price rule with one or multiple conditions based on existing attribute values. The detailed conditions are up to your promotional purposes.
Here is an example of conditions.
Catalog Price Rules
In Magento 2, you can set a special price per product. However, when it comes to a sales season or promotion campaign, going to product pages individually is time-consuming. Instead, you can create a catalog price rule.
The catalog price rule discounts will go into effect before the product is added into the shopping cart.
Go to Marketing ⇒ Promotions ⇒ Catalog Price Rules ⇒ Add New Rule:
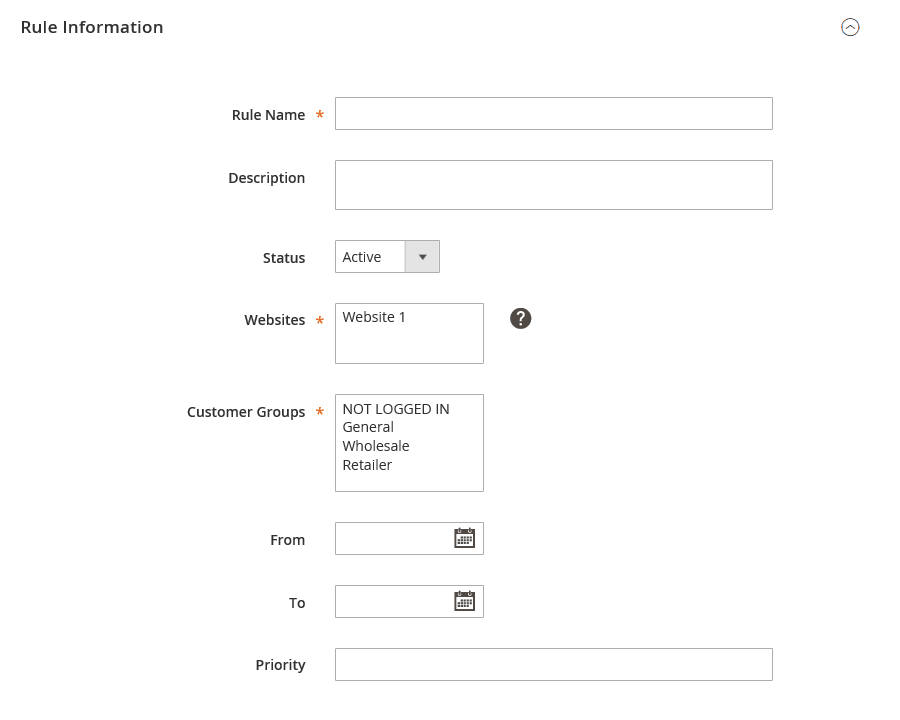
- Step 1: Enter Rule Information
- Step 2: Set up a set of conditions
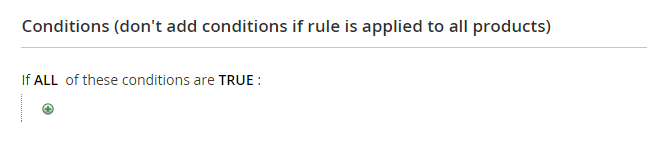
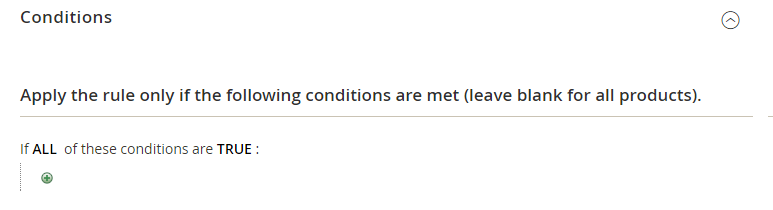
Scroll down to the Conditions and set rules for specific products based on the existing attribute values. Leave the conditions blank to apply the catalog price rule for all products.
- Step 3: Define the actions

Pick the method to apply the rule:
✔️ Apply as a percentage of original.
✔️ Apply as a fixed amount.
✔️ Adjust final price to this percentage.
✔️ Adjust final price to discount value.
Enter the Discount Amount. Please consider the apply rule (percentage or fix amount) carefully.
To avoid applying multiple discounts to one product, set Discard subsequent rules to Yes.
- Step 4: Save and Apply the rule
Remember to test the rules carefully in advance.
How to Create Catalog Price Rules in Magento 2 (with a detailed example.)
Cart Price Rule
As its name suggests, the cart price is applied to the subtotal of products in the shopping cart when the order meets a set of defined conditions or when customers enter a valid coupon code.
The configurations are similar to those of Catalog Price Rules.
Go to Marketing ⇒ Promotions ⇒ Cart Price Rules ⇒ Add New Rule:
- Step 1: Enter Rule Information
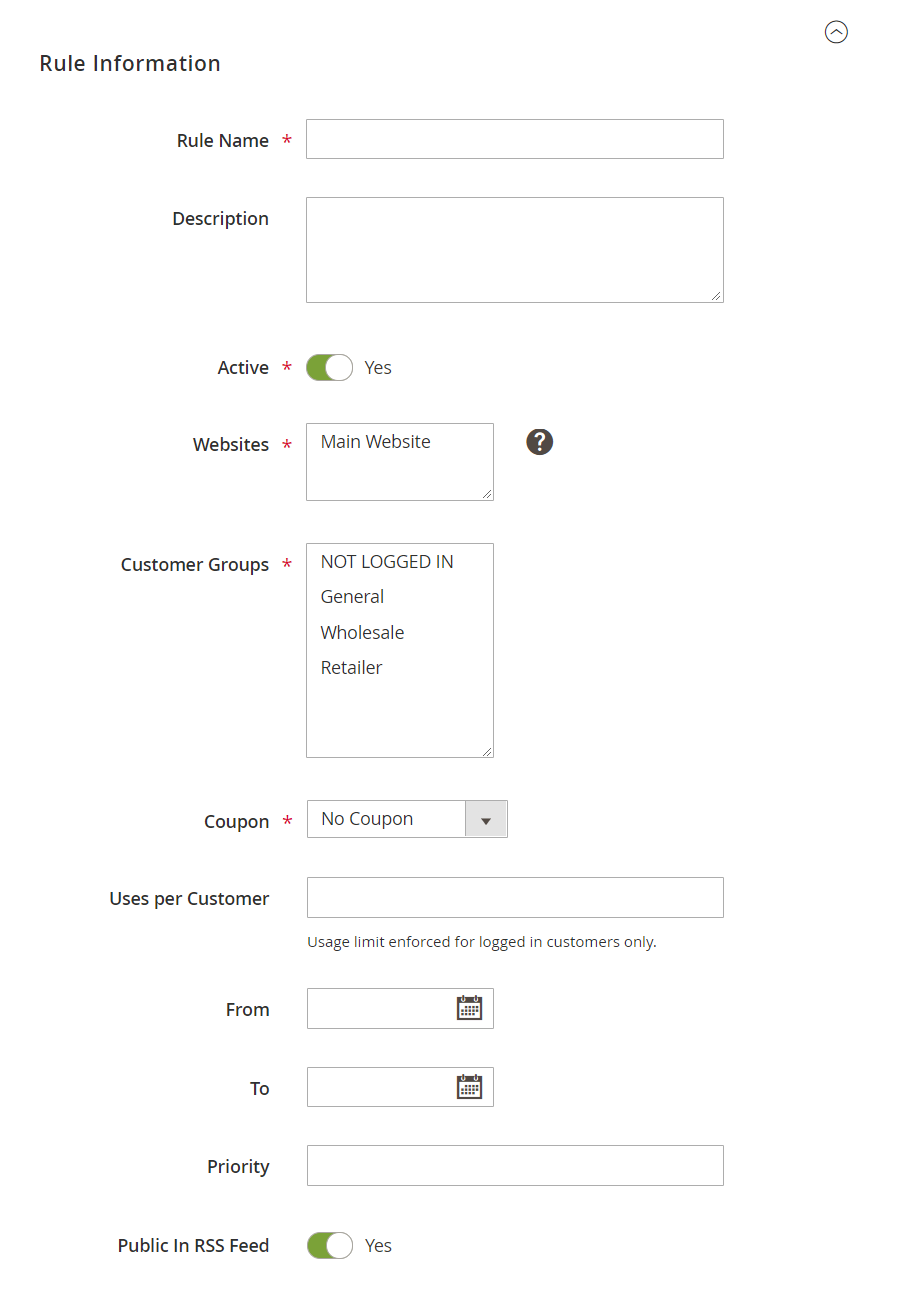
- Step 2: Describe the conditions
We recommend applying Discount with Minimum Amount to protect your profit margin. Read more >>>.
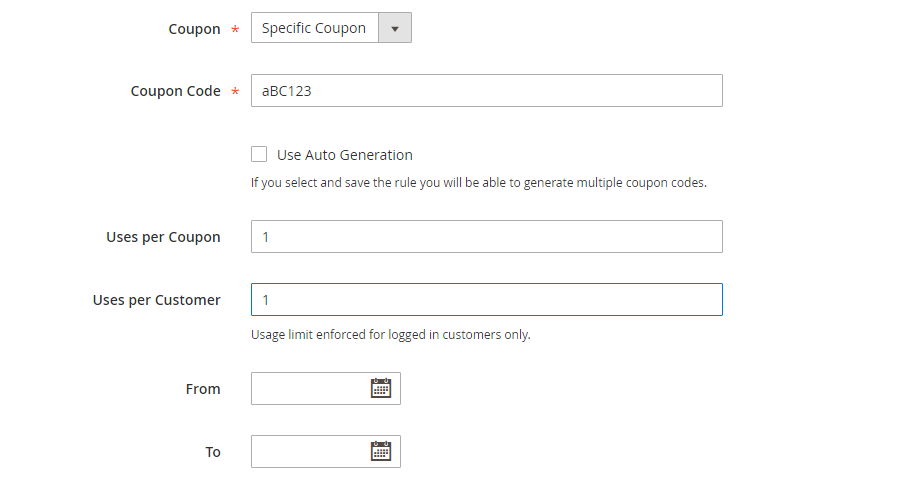
- Step 3: Define the coupon (Optional)
Set Coupon to Specific Coupon and define the conditions of the coupon. Otherwise, set it to No Coupon.
- Step 4: Define the actions
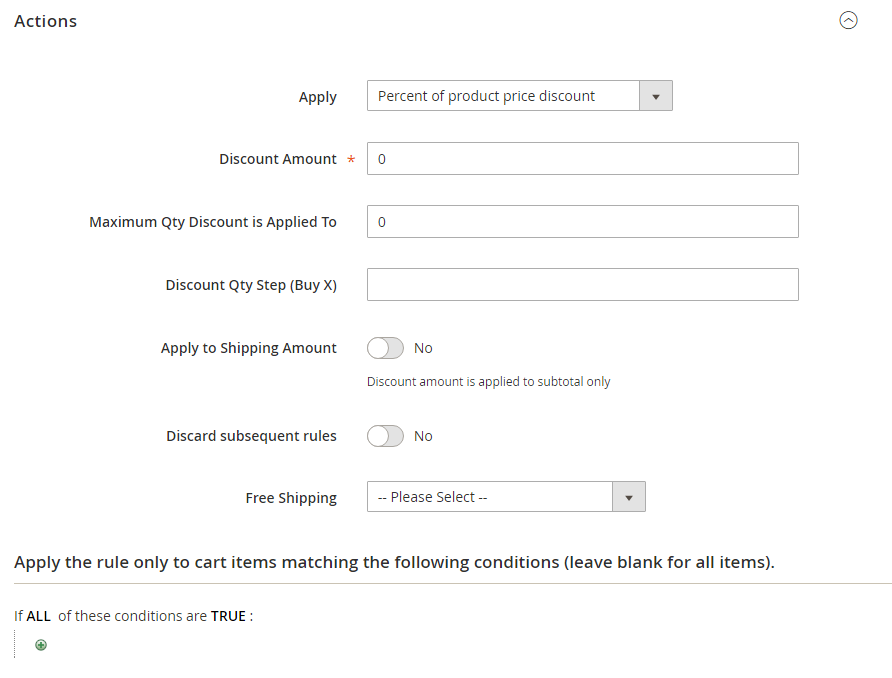
There are 4 ways to apply the shopping cart price rule:
✔️ Percent of product price discount.
✔️ Fixed amount discount.
✔️ Fixed amount discount for the whole cart.
✔️ Buy X get Y free.
Enter the Discount Amount.
Optional options:
✔️ For a “Buy X get Y Free” discount, define the Discount Qty Step (Buy X) by which customers can get the discount.
✔️ Enter a number to set Maximum Qty Discount is Applied To in a purchase.
✔️ Set Apply to Shipping Amount to Yes to apply the discount to the subtotal and the shipping amounts separately. Otherwise, set it to No.
✔️ You can also offer Free Shipping for items that meet the conditions or for orders including the items that meet the conditions.
- Step 5: Tailor the label for the Cart Price Rule
Specify the discount with some explanation so that both you can the customer know why they are discounted.
For example, create a BACKTOCART coupon code with a label: “Welcome back to your cart!”.
This label is added after the word “Discount” in the order summary.
- Step 6: Save and Apply the rule.
Remember to test the rules carefully in advance.
How To Create Shopping Cart Price Rule in Magento 2 (with a detailed example.)
Communications
That self-serviced ecommerce has become more and more common doesn’t mean merchants can ignore communications with the customers. In contrast, you must keep in frequent touch with customers, especially after-sales, to turn them into repeat customers.
Magento 2 provides basic marketing features to complete this task.
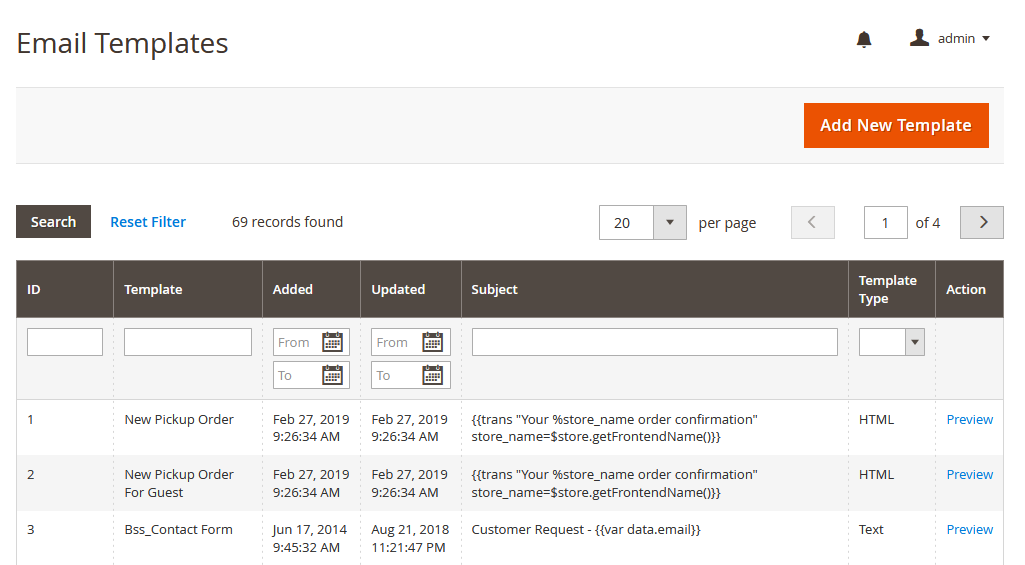
Email Templates
Email templates are so-called transactional emails because they are sent upon a specific transaction or event.
By default, Magento 2 has already built a set of responsive email templates related to on-site triggering activities (order confirmation, invoice, shipment, account confirmation, etc.) and admin notifications (product alerts, system messages, or admin log actions.)
These emails include the layout, content, as well as automated messages. You can customize them according to your brand and marketing purposes.
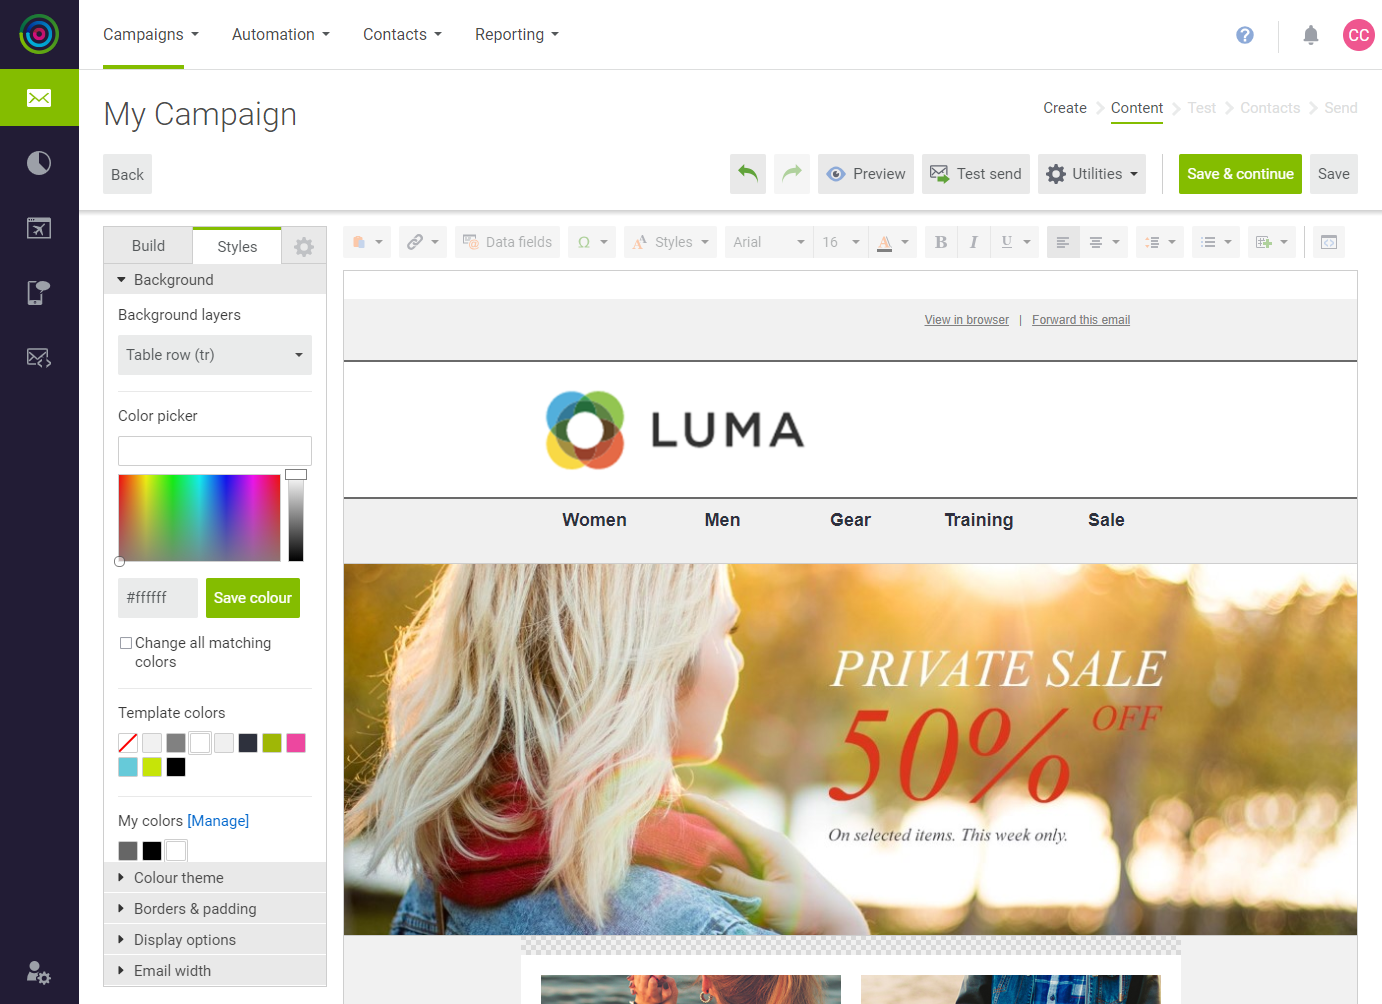
Please navigate to Marketing ⇒ Communications ⇒ Email Templates ⇒ Add New Template:
We have published a series of Magento 2 email templates for your references:
Magento 2 Email Templates: From A to Z
How to Change Magento 2 Email Logo
Customize Email Header in Magento 2
Customize Magento 2 Email Footer Template
5 Min to Be Master in Creating Magento 2 Sales Emails
Slick and Simple Guidelines to Configure Payment Failed Emails in Magento 2
Newsletter
Know what?
The newsletter is a powerful marketing tactic to deliver valuable information to customers, appealing to come back to your ecommerce websites.
Hence, you must pay more attention.
Magento 2 provides tools to build & manage subscribers, produce the newsletter content, set up to send the emails, and keep track of customers’ engagement.
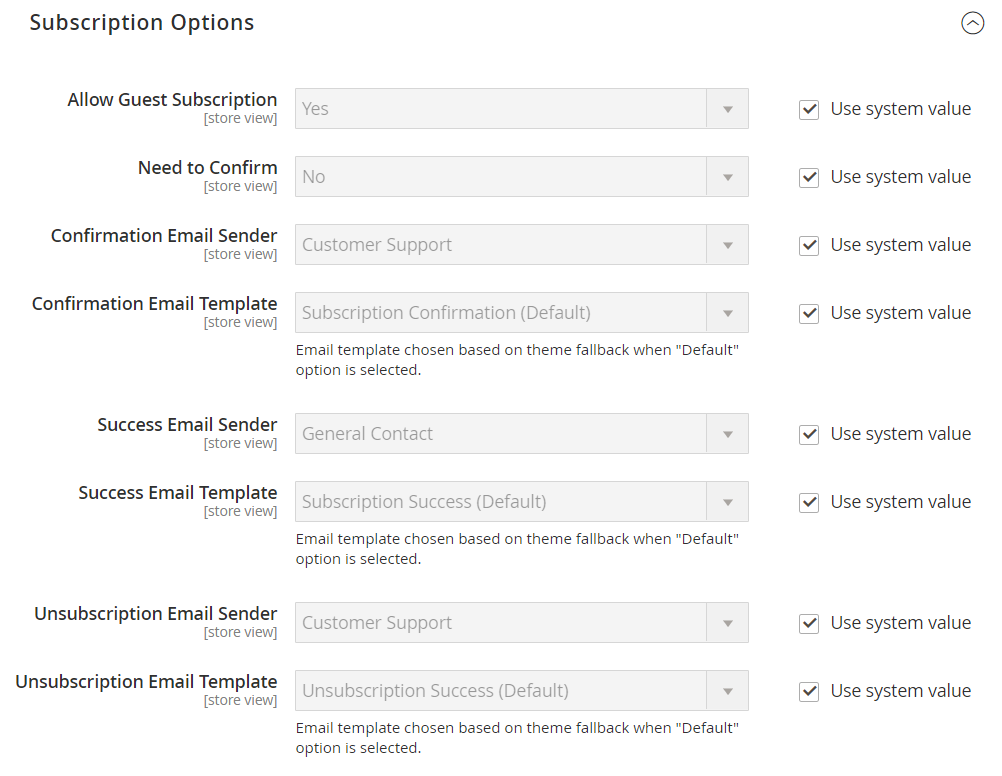
1. Configure Newsletter
Go to Stores ⇒ Settings ⇒ Configuration ⇒ Customers ⇒ Newsletter.
Check newsletter configurations under Subscription Options.
2. Create Newsletter Templates
Open Marketing ⇒ Communications ⇒ Email Templates and Add New Template.
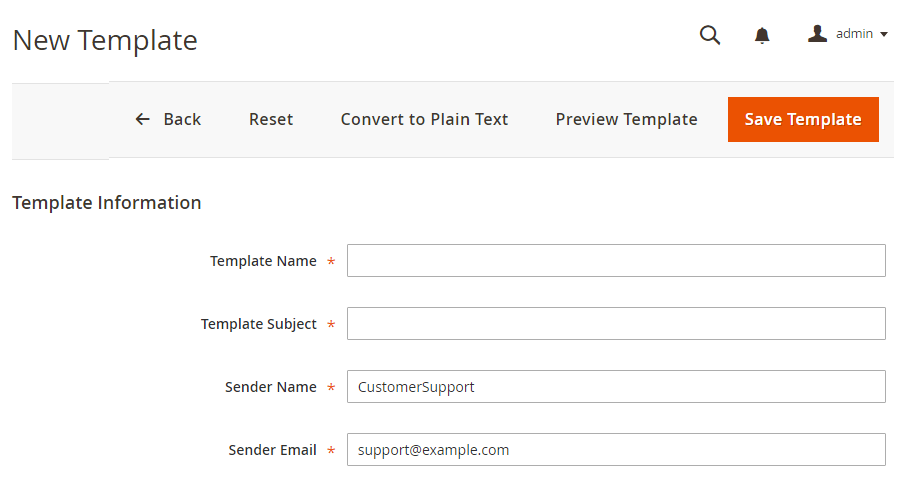
Enter Template Information.
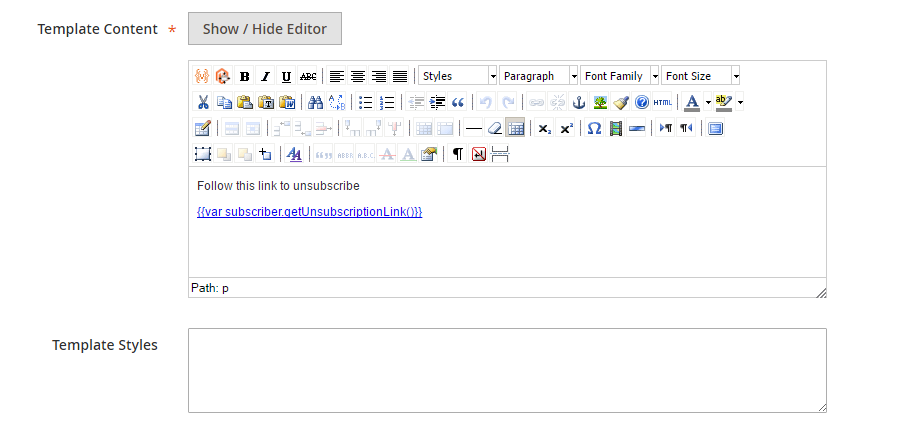
Tailor email content with WYSIWYG editor.
Preview and Save the template.
3. Send The Newsletter
Under the Action column in the grid, set it to Queue Newsletter.
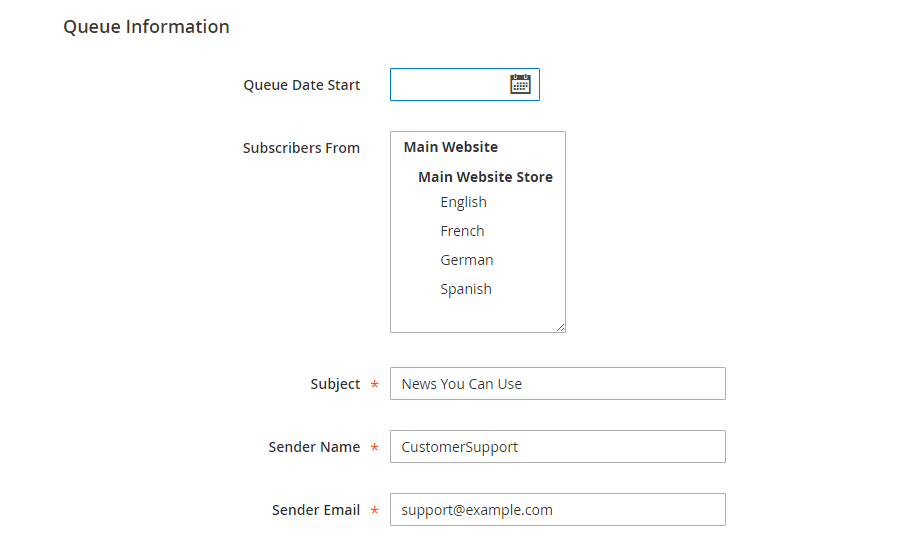
✔️ Select the Date in the Queue Date Start field.
✔️ Pick a store view in the Subscribers From list.
✔️ Enter Subject line, Sender Name, and Sender Email.
If applicable, enter a message in the Message box to instruct how to unsubscribe. This is required by law in many jurisdictions.
✔️ On completing, Save and Resume the sending.
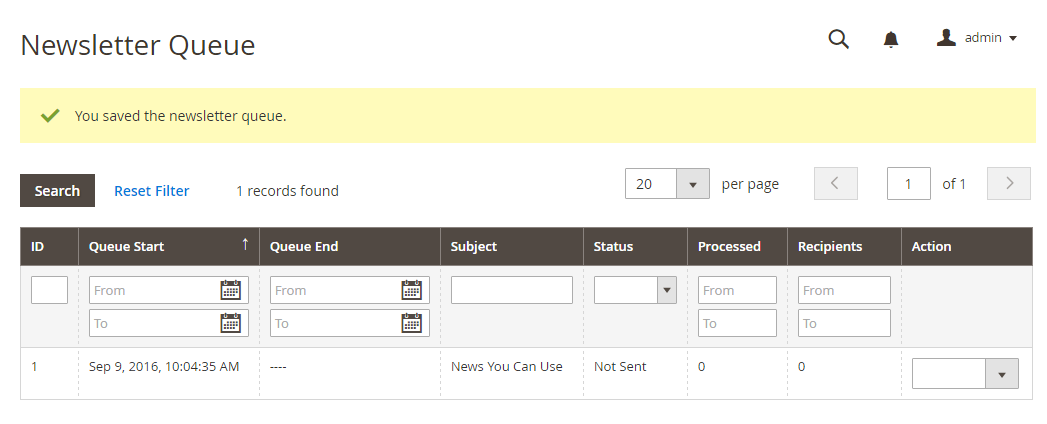
4. Check Newsletter Queue
Go to Marketing ⇒ Communications ⇒ Newsletter Queue to track all newsletter which is waiting to be processed.
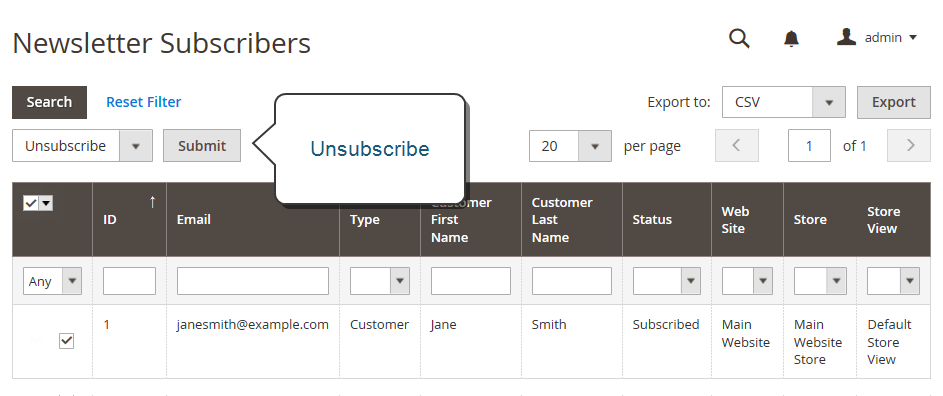
5. Manage Newsletter Subscribers
Both subscribers and unsubscribers are recorded under the Newsletter Subscribers grid (Marketing ⇒ Communications ⇒ Newsletter Subscribers.)
You can unsubscribe any contact as wished. Moreover, the Export button is available to export all contacts in 1 click.
Besides Newsletter, you can get in touch with potential customers via RSS Feeds. This is an XML-based data format to deliver information such as promotions, new products, new blogs online.
Learn how to turn RSS Feeds on!
4 Best Email Marketing Platforms for Magento 2
SEO & Search
Simply, doing SEO is to learn customer search terms and make your website easier to find on search engines – better on the first pages.
Magento 2 helps you to do so with the best techniques and practices.
Catalog Navigation
Do you know how customers browse throughout your store?
If not, then let get insight into this Catalog Navigation tutorial. Once you know their preferred shopping journey, you can drive a potential shopper into a real customer.
Then, what you should learn?
1. Top Navigation
The top navigation is so-called the main menu where all categories of products are presented in levels. The position and the look of this top navigation vary by theme. However, it works essentially in the same way.
To your surprise, the category structure not only makes it easy for shoppers to get around Magento 2 website, but it also influences the index of search engines.
The max number of levels are determined by the configurations and store theme. Naturally, one to three levels of categories is the most effective.
✔️ The first level is the root category, which is not visible in the frontend menu.
✔️ The next levels are the relevant sub-categories.
1 minute to set up the Top Navigation in Magento 2.
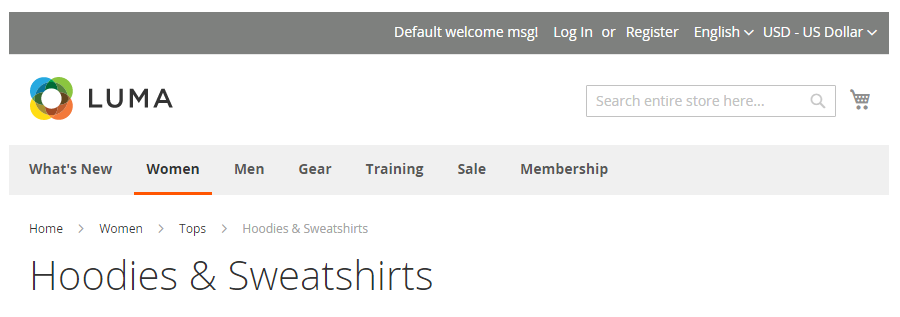
2. Breadcrumb Trails
You see breadcrumb almost every day on the Internet. Usually located at the top of the webpage, a breadcrumb trail is a small text path of clickable links, like this one:
From the SEO & Search perspective, breadcrumbs can demonstrate three advantages:
✔️ Offer customers a way to track their path back.
✔️ Search engines, especially Google, love breadcrumbs.
✔️ Magento 2 breadcrumbs look good on content pages.
How to add breadcrumbs in Magento 2?
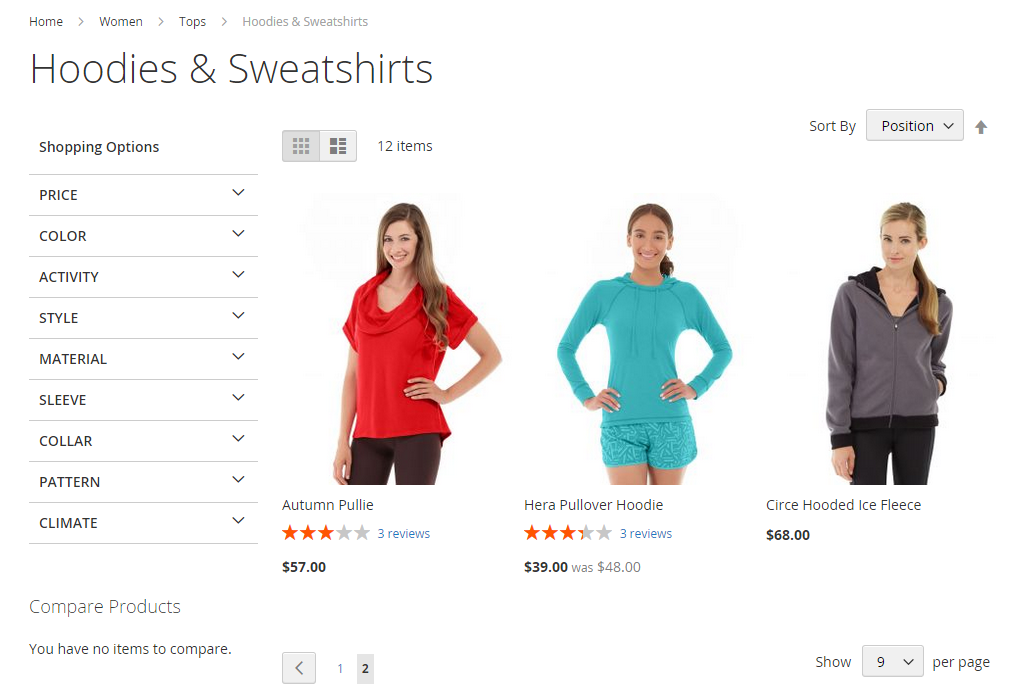
3. Product Listings
By default, products are listed either in a list or a grid so that shoppers can get general information about the product, such as price, name, images, rate, etc. at a glance.
In the admin, you can determine which attributes are used to sort or how many products are displayed per page.
Go to Stores ⇒ Settings ⇒ Configuration ⇒ Catalog ⇒ Catalog.
Expand the Storefront tab and set the configurations according to your needs.
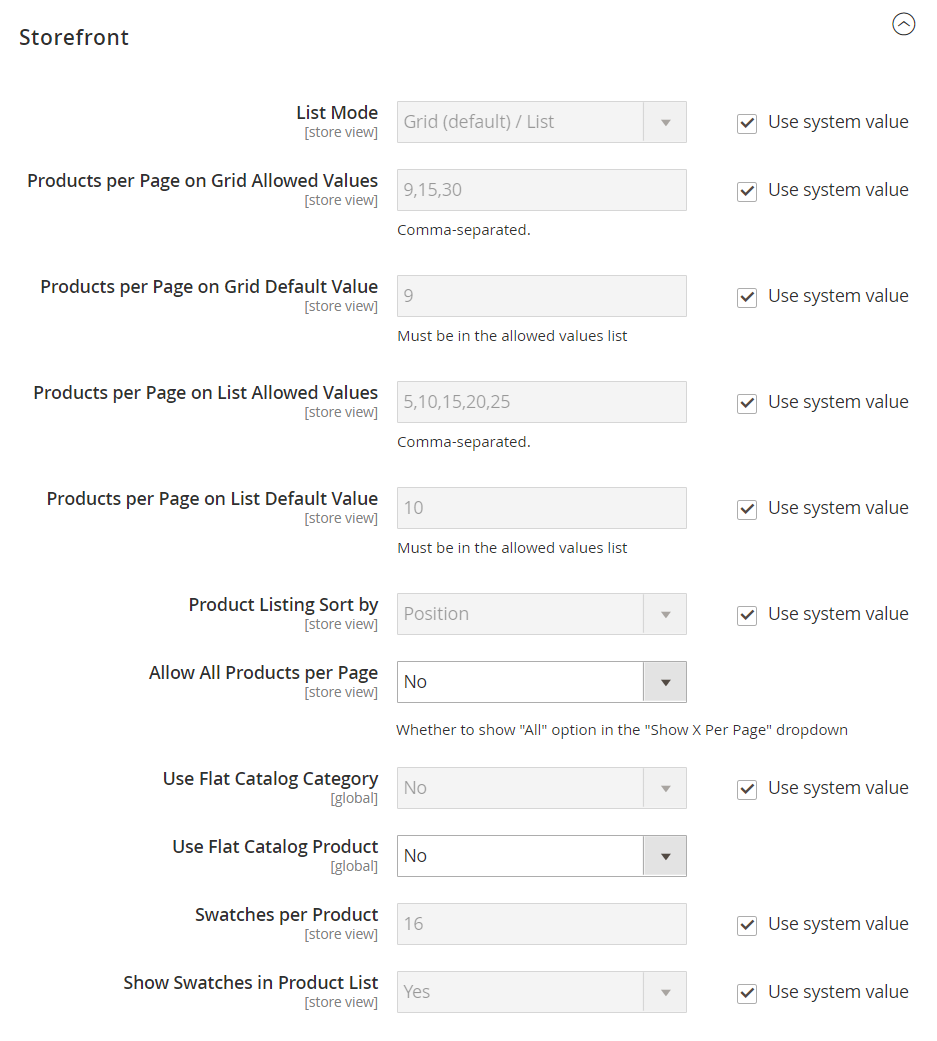
Save the configuration.
4. Pagination Controls

Pagination settings appear at four corners on the top and bottom of the list. By choosing between the options within the pagination settings, you can change the format of the pagination links for product listings, set the number of links that appear in the control, and also can configure the Next and Previous links.
How to Configure Magento 2 Pagination Control Step-by-Step?
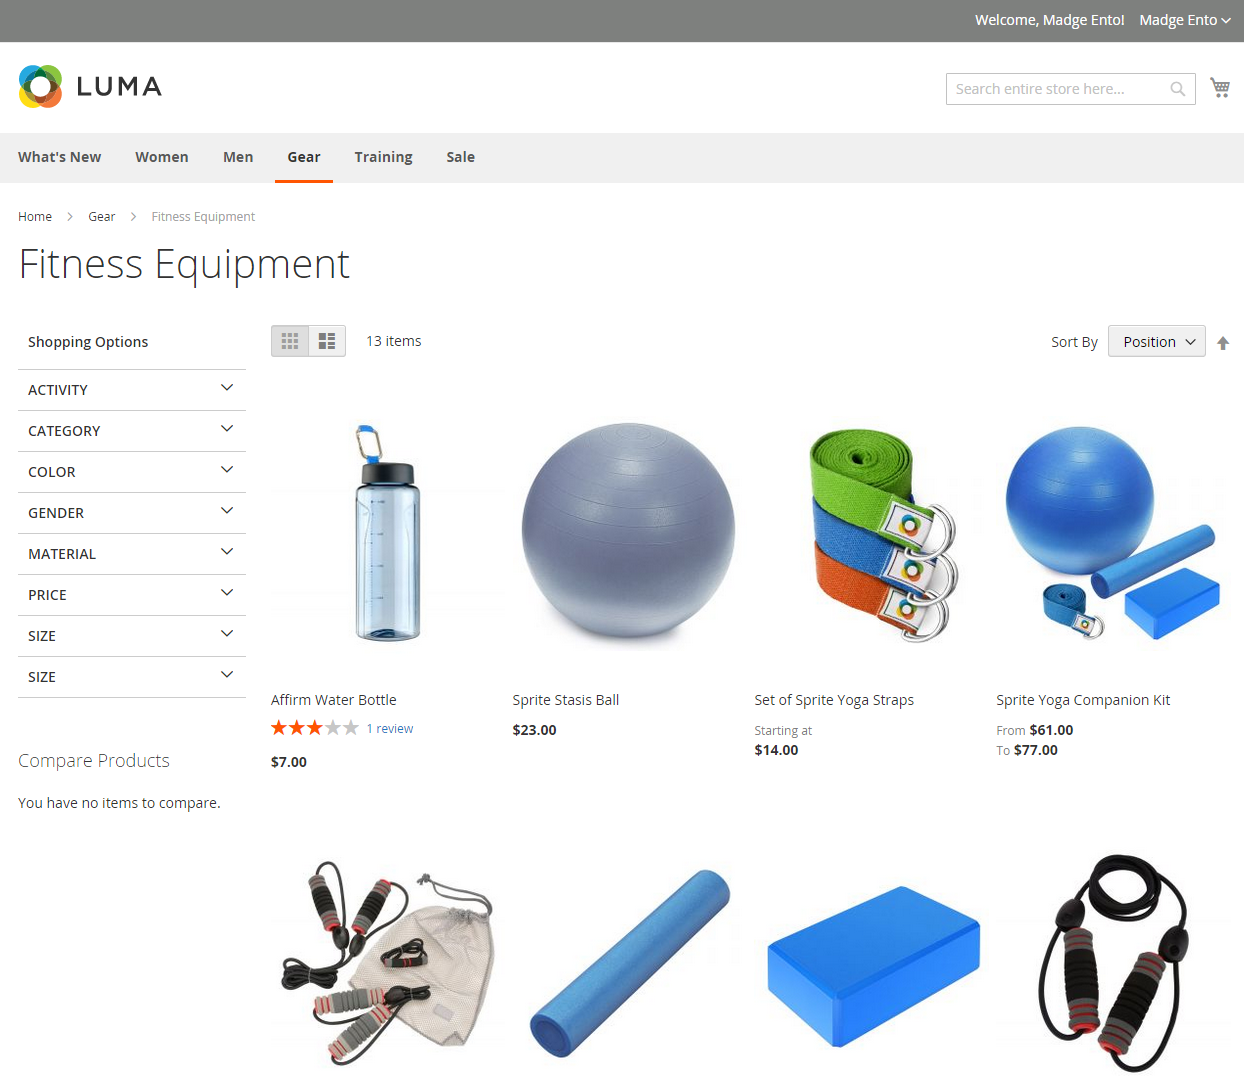
5. Layered Navigation
Why is Layered Navigation is important?
The more quickly customers find their preferred items, the more likely they drive into the purchase decision. Beside the search box, layered navigation which usually displayed on the left of the search result pages or category pages also works.
On the one hand, shoppers find it easy to sort product by filterable attributes, category, or price range. On the other side, this Magento 2 product filter plays as a flexible recommendation system that shows customers items in their taste and budget.
Show Magento 2 Layered Navigation Filterable Attributes Right!
Catalog Search
In the catalog, customers can search for products in various ways.
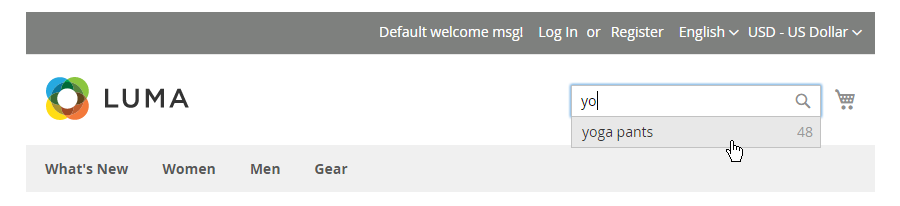
1. Quick Search
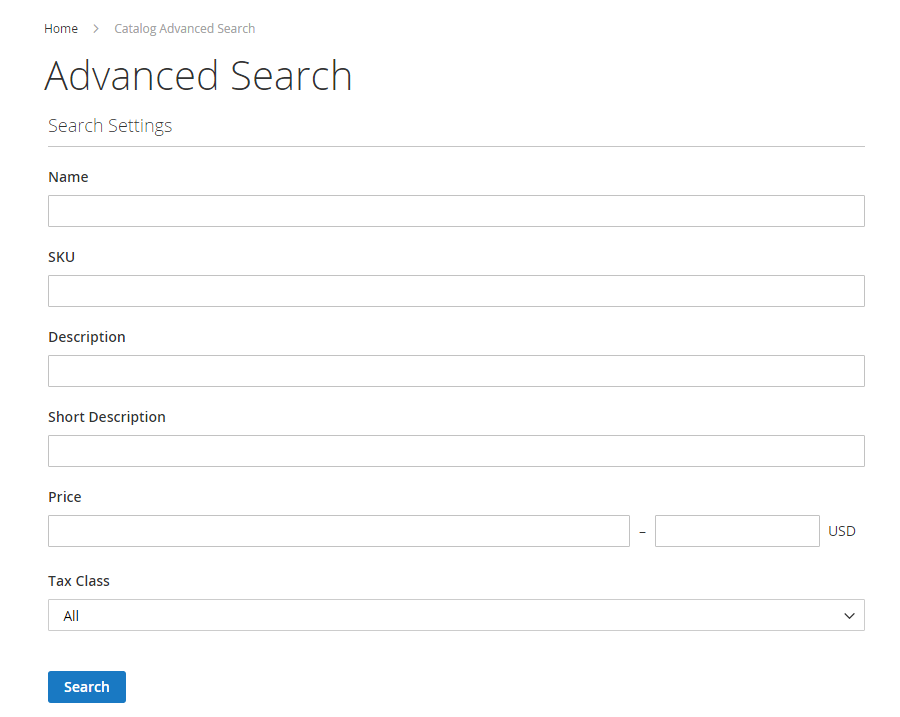
2. Advanced Search
Search products in more detail.
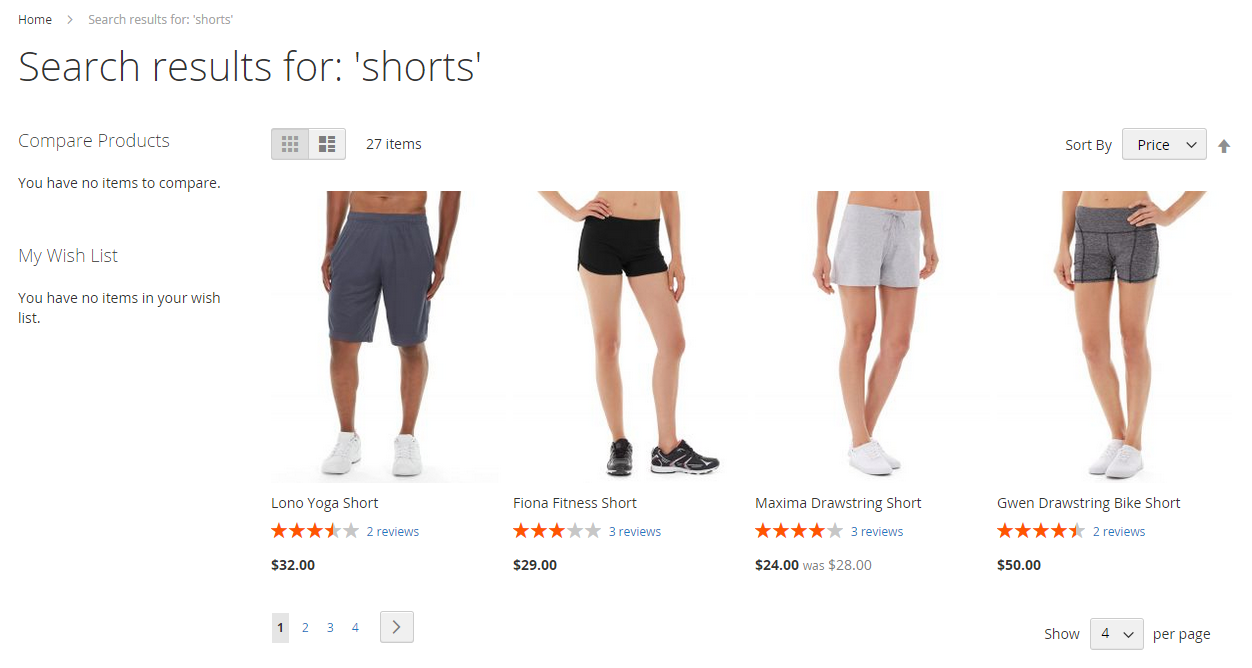
3. Search Results
This page shows all products that match the quick search or advanced search. This is a kind of product listing.
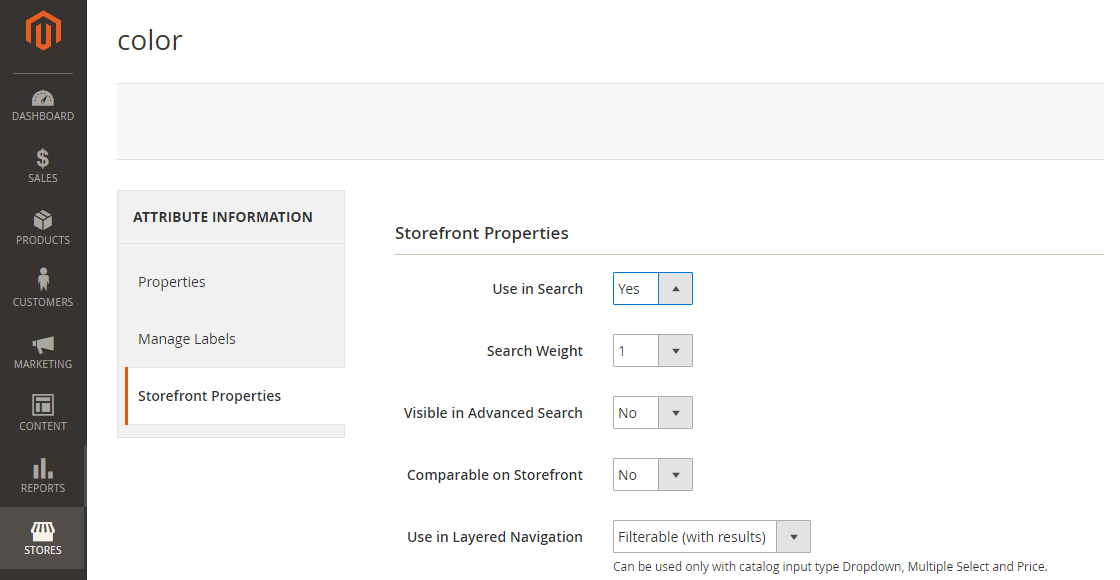
4. Weighted Search
This weighted search is configured to search attributes in the system.
For your information, attributes with a greater weight are listed before those with a lower weight.
Check the weight of attributes by going to Stores ⇒ Attribute Set ⇒ Attribute
5. Catalog Search Configurations
By default, Magento 2 uses the MySQL search engine with the EAV Indexer enabled in advance. You can determine the search behaviors, the size of the valid query text, as well as the search recommendation display.
Go to Stores ⇒ Settings ⇒ Configuration ⇒ Catalog ⇒ Catalog ⇒ Catalog Search.
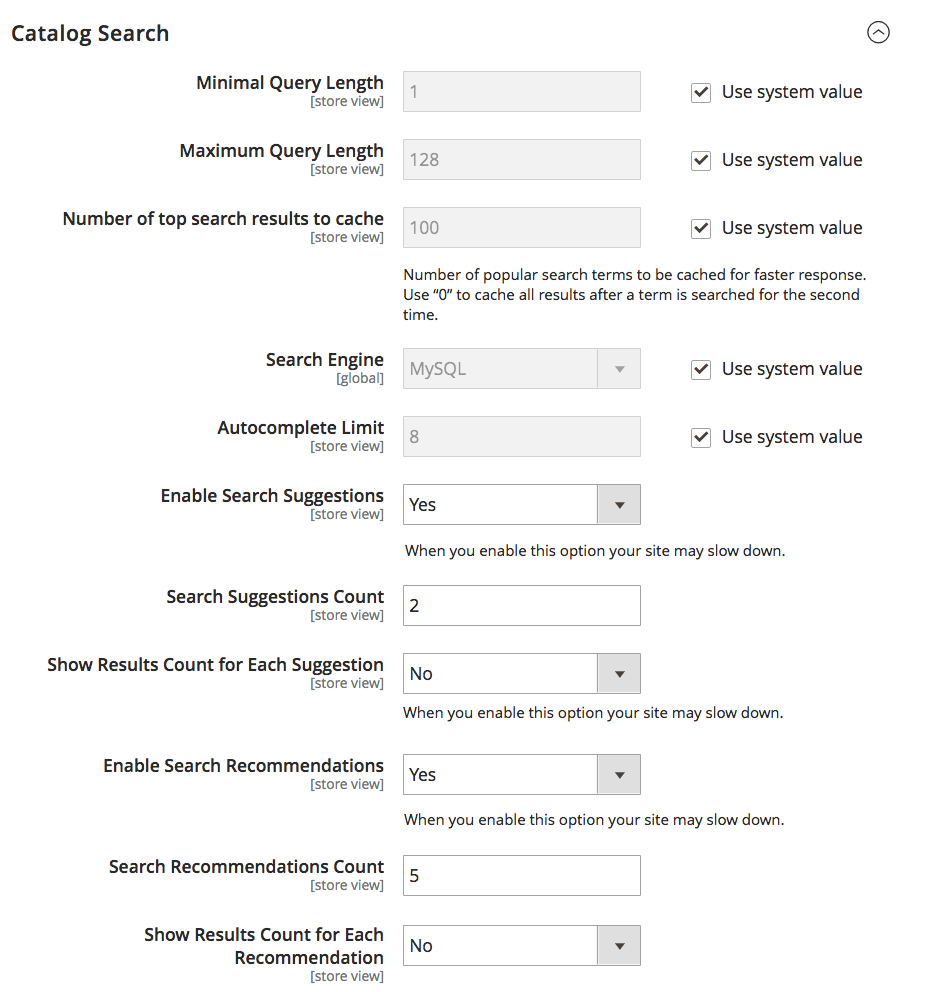
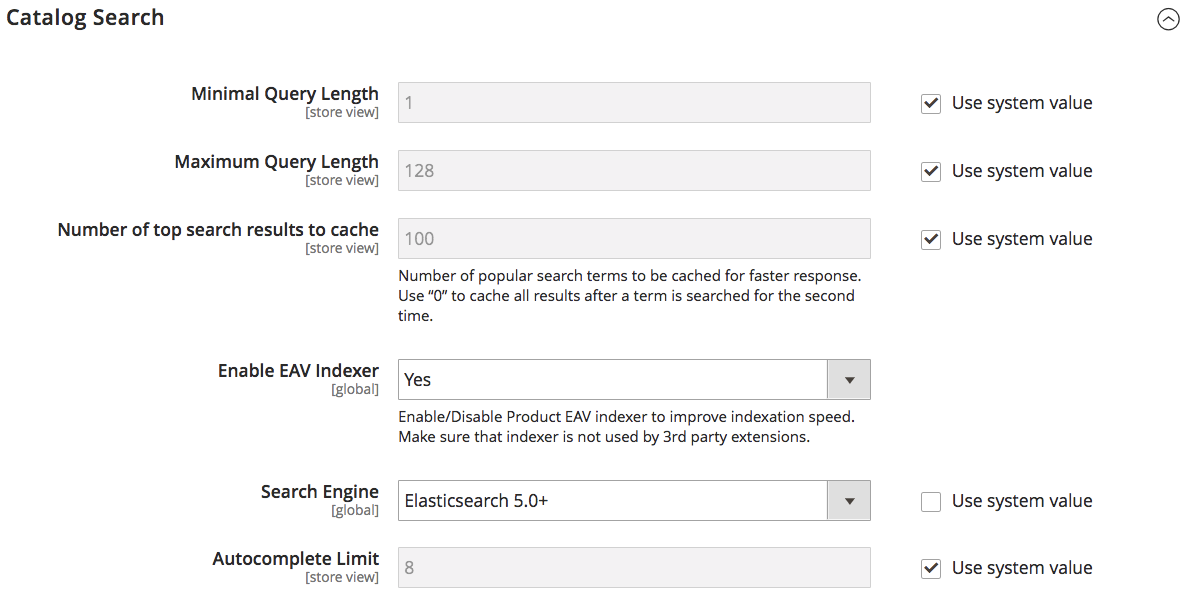
In Search Engine, you can change the search engine to Elasticsearch. This is a powerful tool that includes search suggestions and recommendations.
But first, you need to install Elasticsearch Service.
Go to Stores ⇒ Settings ⇒ Configuration ⇒ Catalog ⇒ Catalog ⇒ Catalog Search.
The search options are similar to those of MySQL.
Then, set up the Elasticsearch Connection.
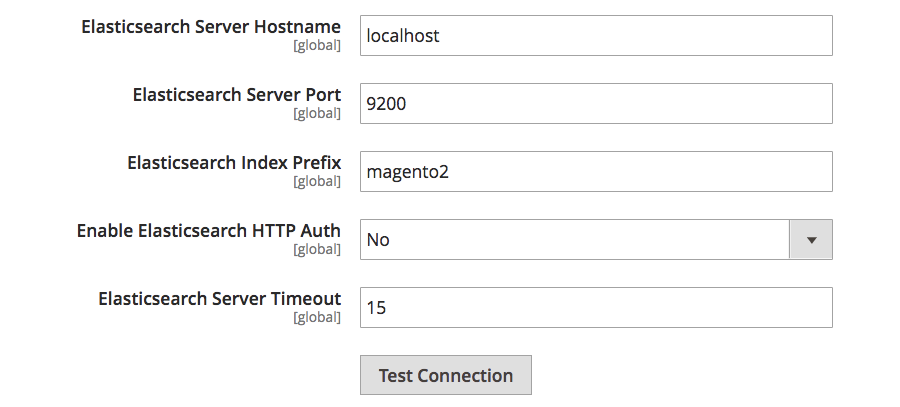
Click Test Connection to verify the configurations.
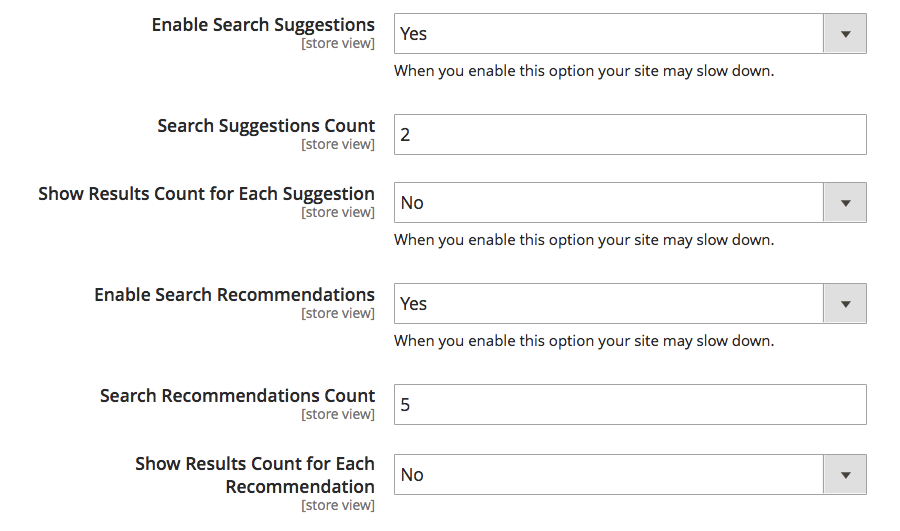
Next, determine the search suggestions and recommendations.
In the end, Save Config.
Search Terms
As mentioned, SEO & Search efforts are to make your products easier to search. Hence, it is important to learn about customer search terms in advance.
What to consider?
✔️ Landing page: to which customers are directed after they search something on your website. It can be a CMS page, product listing, product detail page, or even a page of another website.
✔️ Synonyms: Customers can use different terms to describe the same product. For example, your category is listed as a “sofa.” However, customers search for “couch.” Should they be directed to the “Sofa” product listing or a blank page?
Then, you must include all potential terms related to your products so that customers can land in the right place.
✔️ Misspelled Words: Your search engine must be effective enough to capture common misspellings and redirect shoppers to an appropriate page.
1. Popular Search Terms
The page of popular search terms is generated automatically in a “tag cloud” format. Customers can access the page through the link in the footer or the URL mystore.com/search/term/popular/
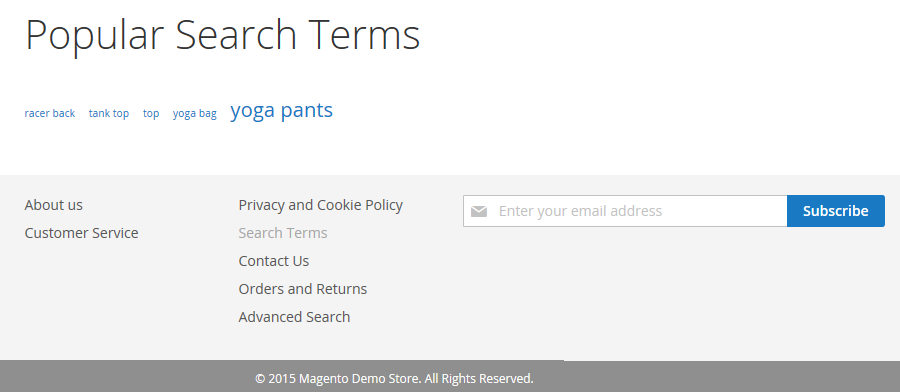
Since this page is also reindexed by search engines, it helps to improve your SEO juice.
To configure the popular search terms, please navigate to Stores ⇒ Settings ⇒ Configuration ⇒ Catalog ⇒ Catalog ⇒ Search Engine Optimization.

2. Adding Search Terms
All search terms are recorded in the Search Terms grid (Marketing ⇒ SEO & Search ⇒ Search Terms.)
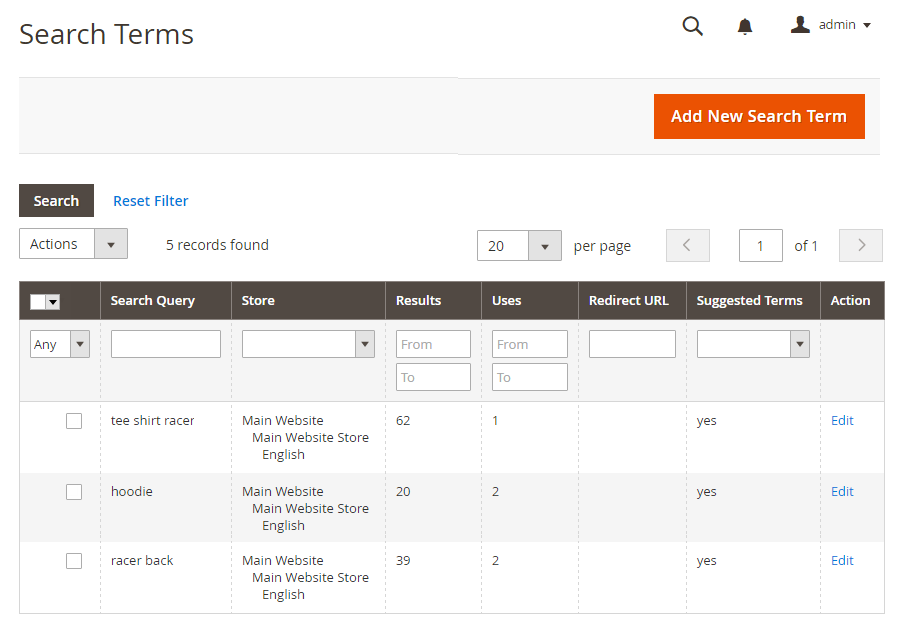
You can Add New Search Term, Edit, or Delete the search terms as wished.
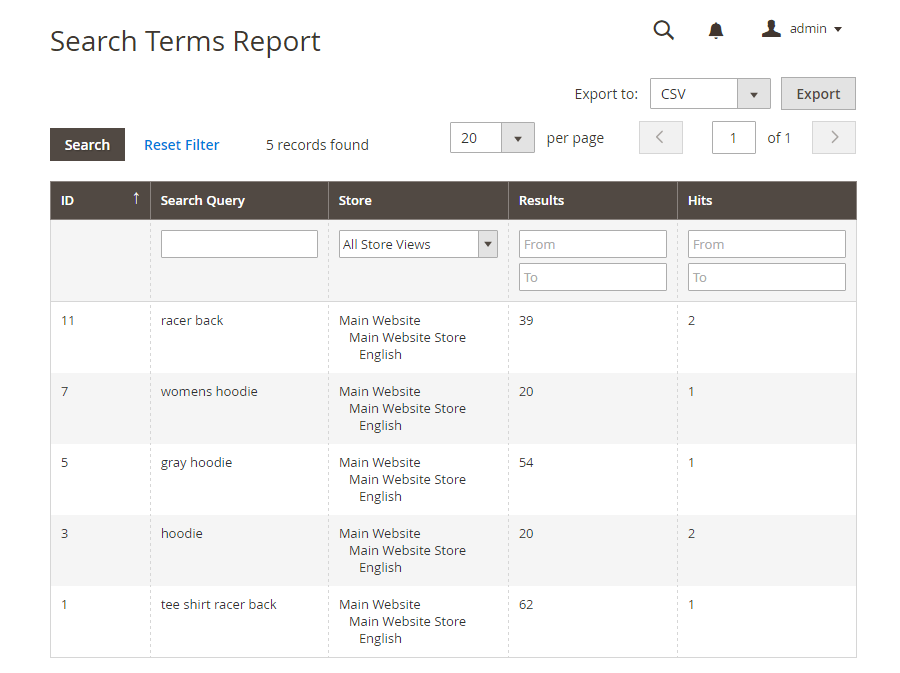
3. Search Terms Report
Go to Reports ⇒ Marketing ⇒ Search Terms to access the Search Terms Report.
SEO Practices
Magento 2 includes a lot of features to support on-going SEO efforts.
We already discussed Magento 2 SEO practices in detail. Check below!
What are The Biggest Magento 2 SEO Improvements?
All Default SEO Features of Magento 2
Overall Explanation of Sitemap in Magento 2
Magento 2 URL Rewrite Full Tutorial You Should Not Miss
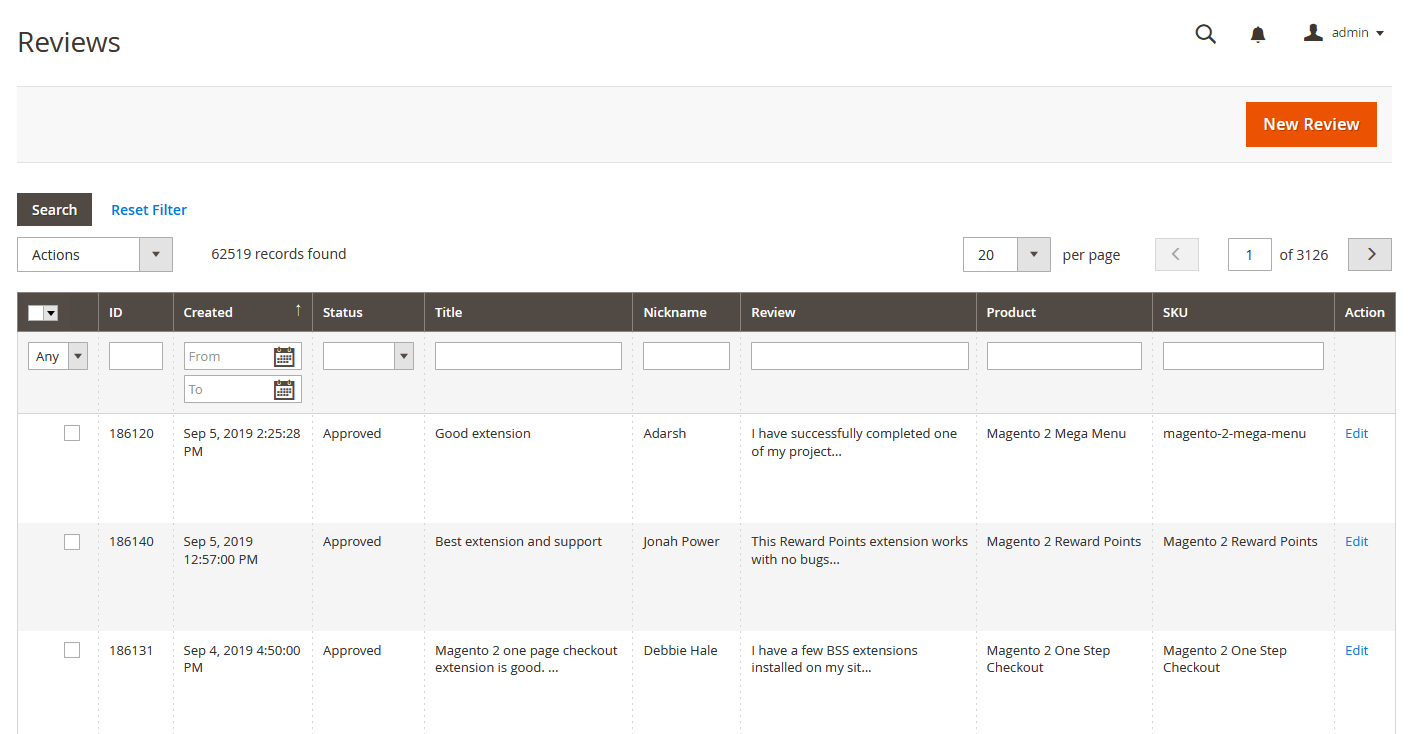
User Content: Product Reviews
Go to Marketing ⇒ User Content ⇒ Reviews to check all approved reviews and take action accordingly (search, sort, approve, delete, add new reviews.)
Customer Engagement
Engagement Cloud by dotdigital will affect the delivery of transactional emails.
✔️ Customizing email communications.
✔️ Buiding rules to add logic.
✔️ Importing contacts.
✔️ Scheduling and automating campaigns.
✔️ Generating reports.
✔️ Update on the latest release.
First, sign up for a Dotdigital account.
Go to Marketing ⇒ Customer Engagement ⇒ Engagement Clouds.
Enter the API Username and API Password.
Login to Dotdigital to Set up Engagement Cloud, Create Campaigns, and define Exclusion Rules.
Above are all you need to know about Magento 2 Marketing Menu. Make the full of Magento 2 default marketing features to save costs and leverage the overall performances.
Besides, you should still consider advanced extensions to fill up the shortages of the default and get bigger sales!